


Warning: Array to string conversion in /var/www/vhosts/chlrbuzf.host205.checkdomain.de/spt.solar/wp-includes/formatting.php on line 1096

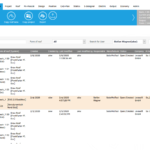
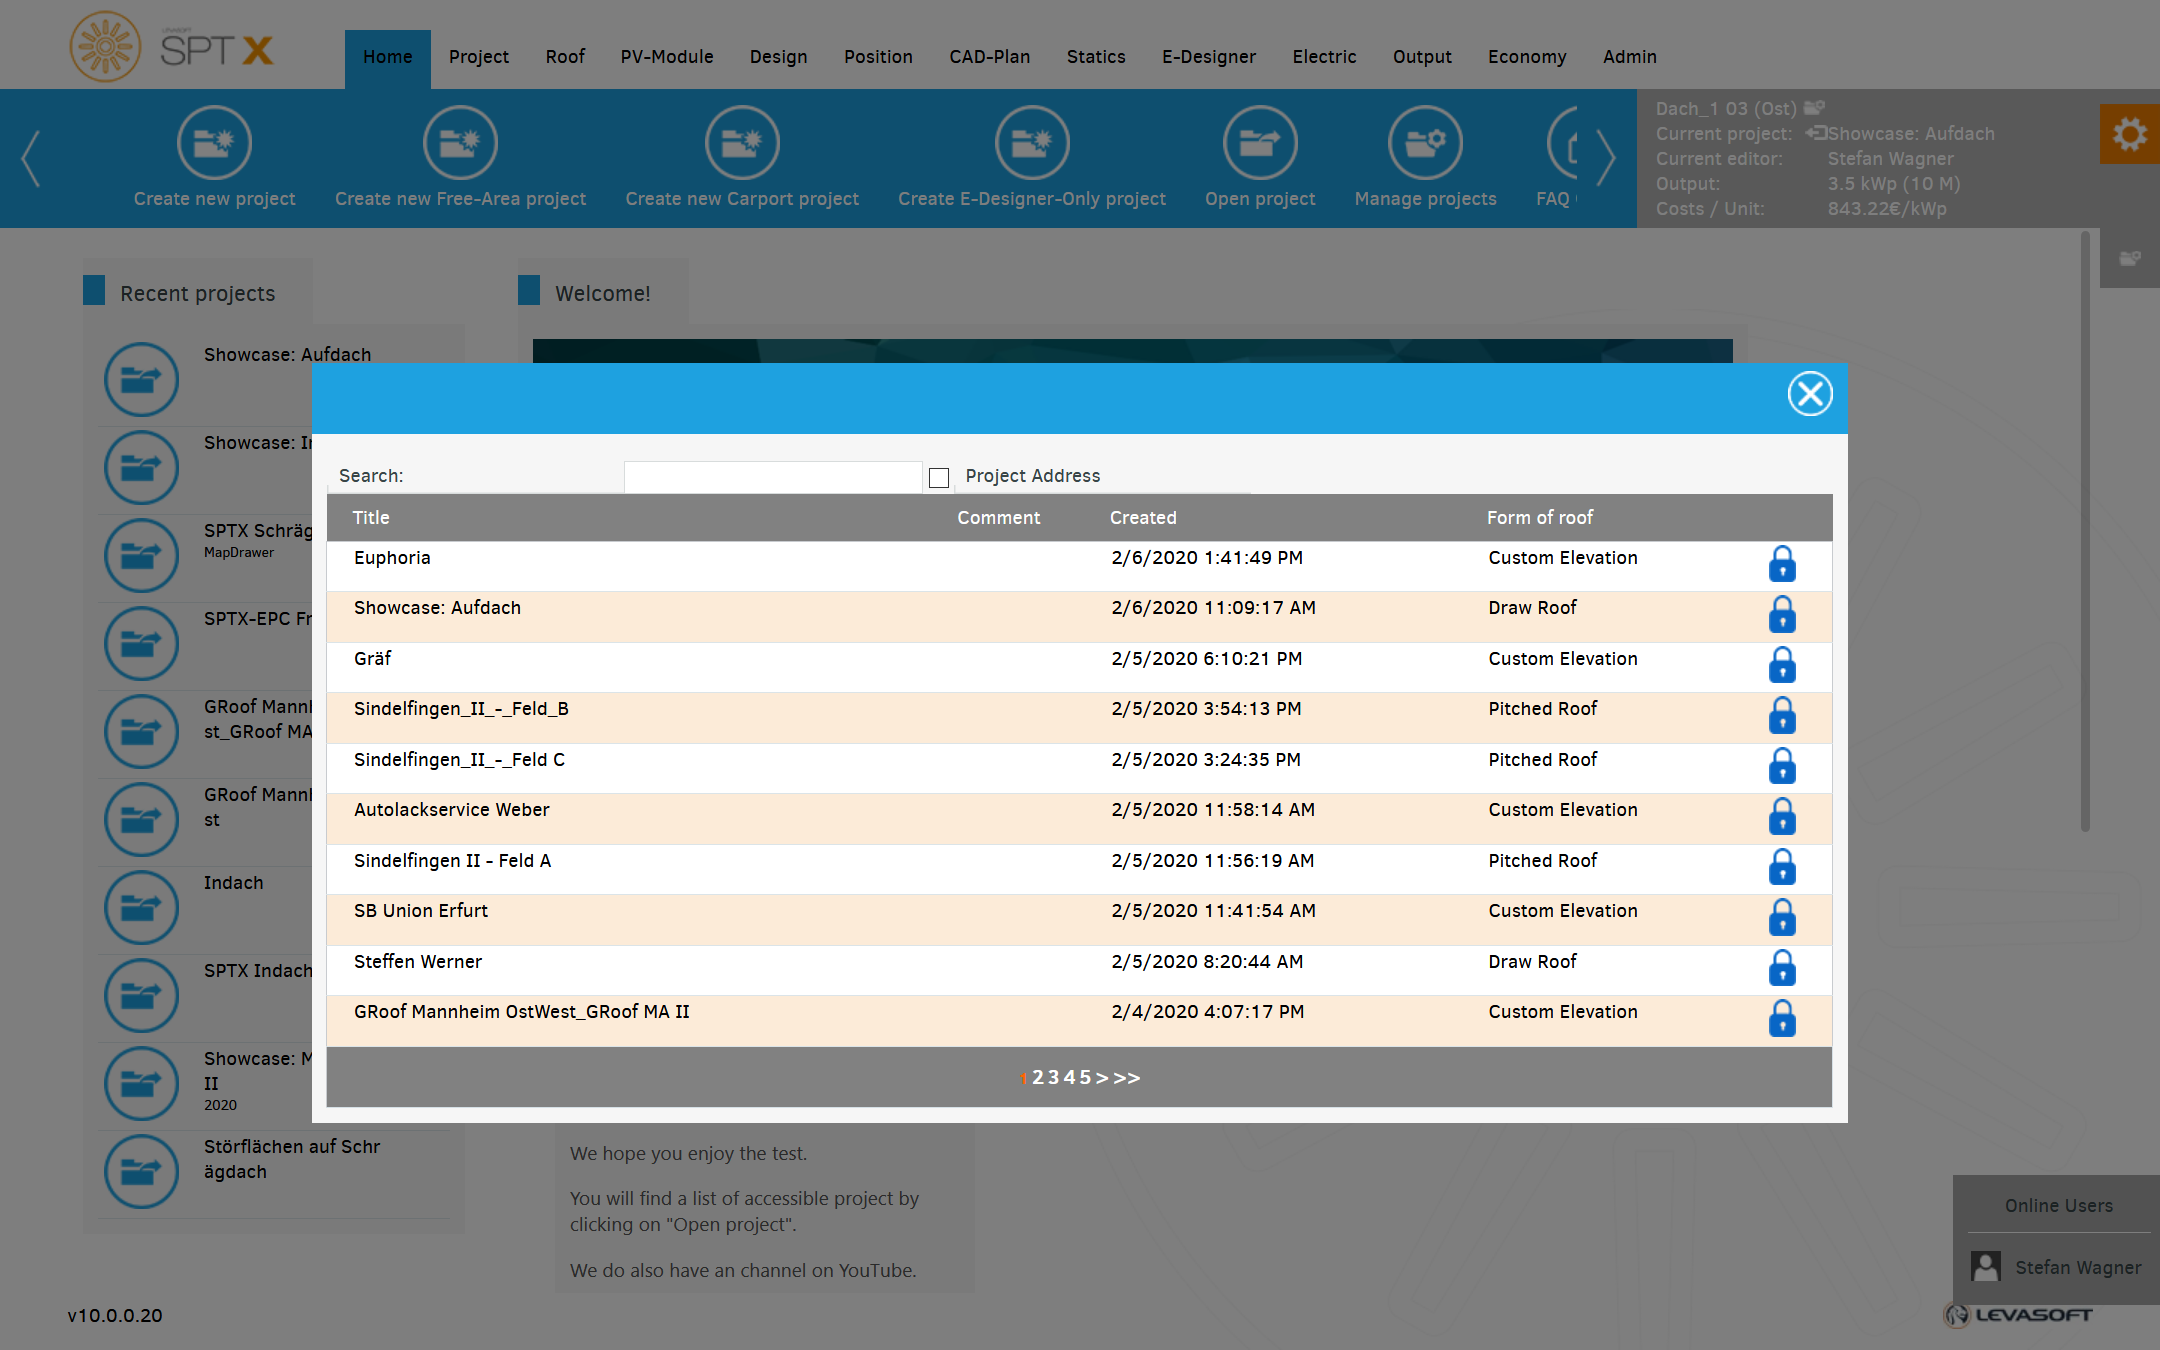
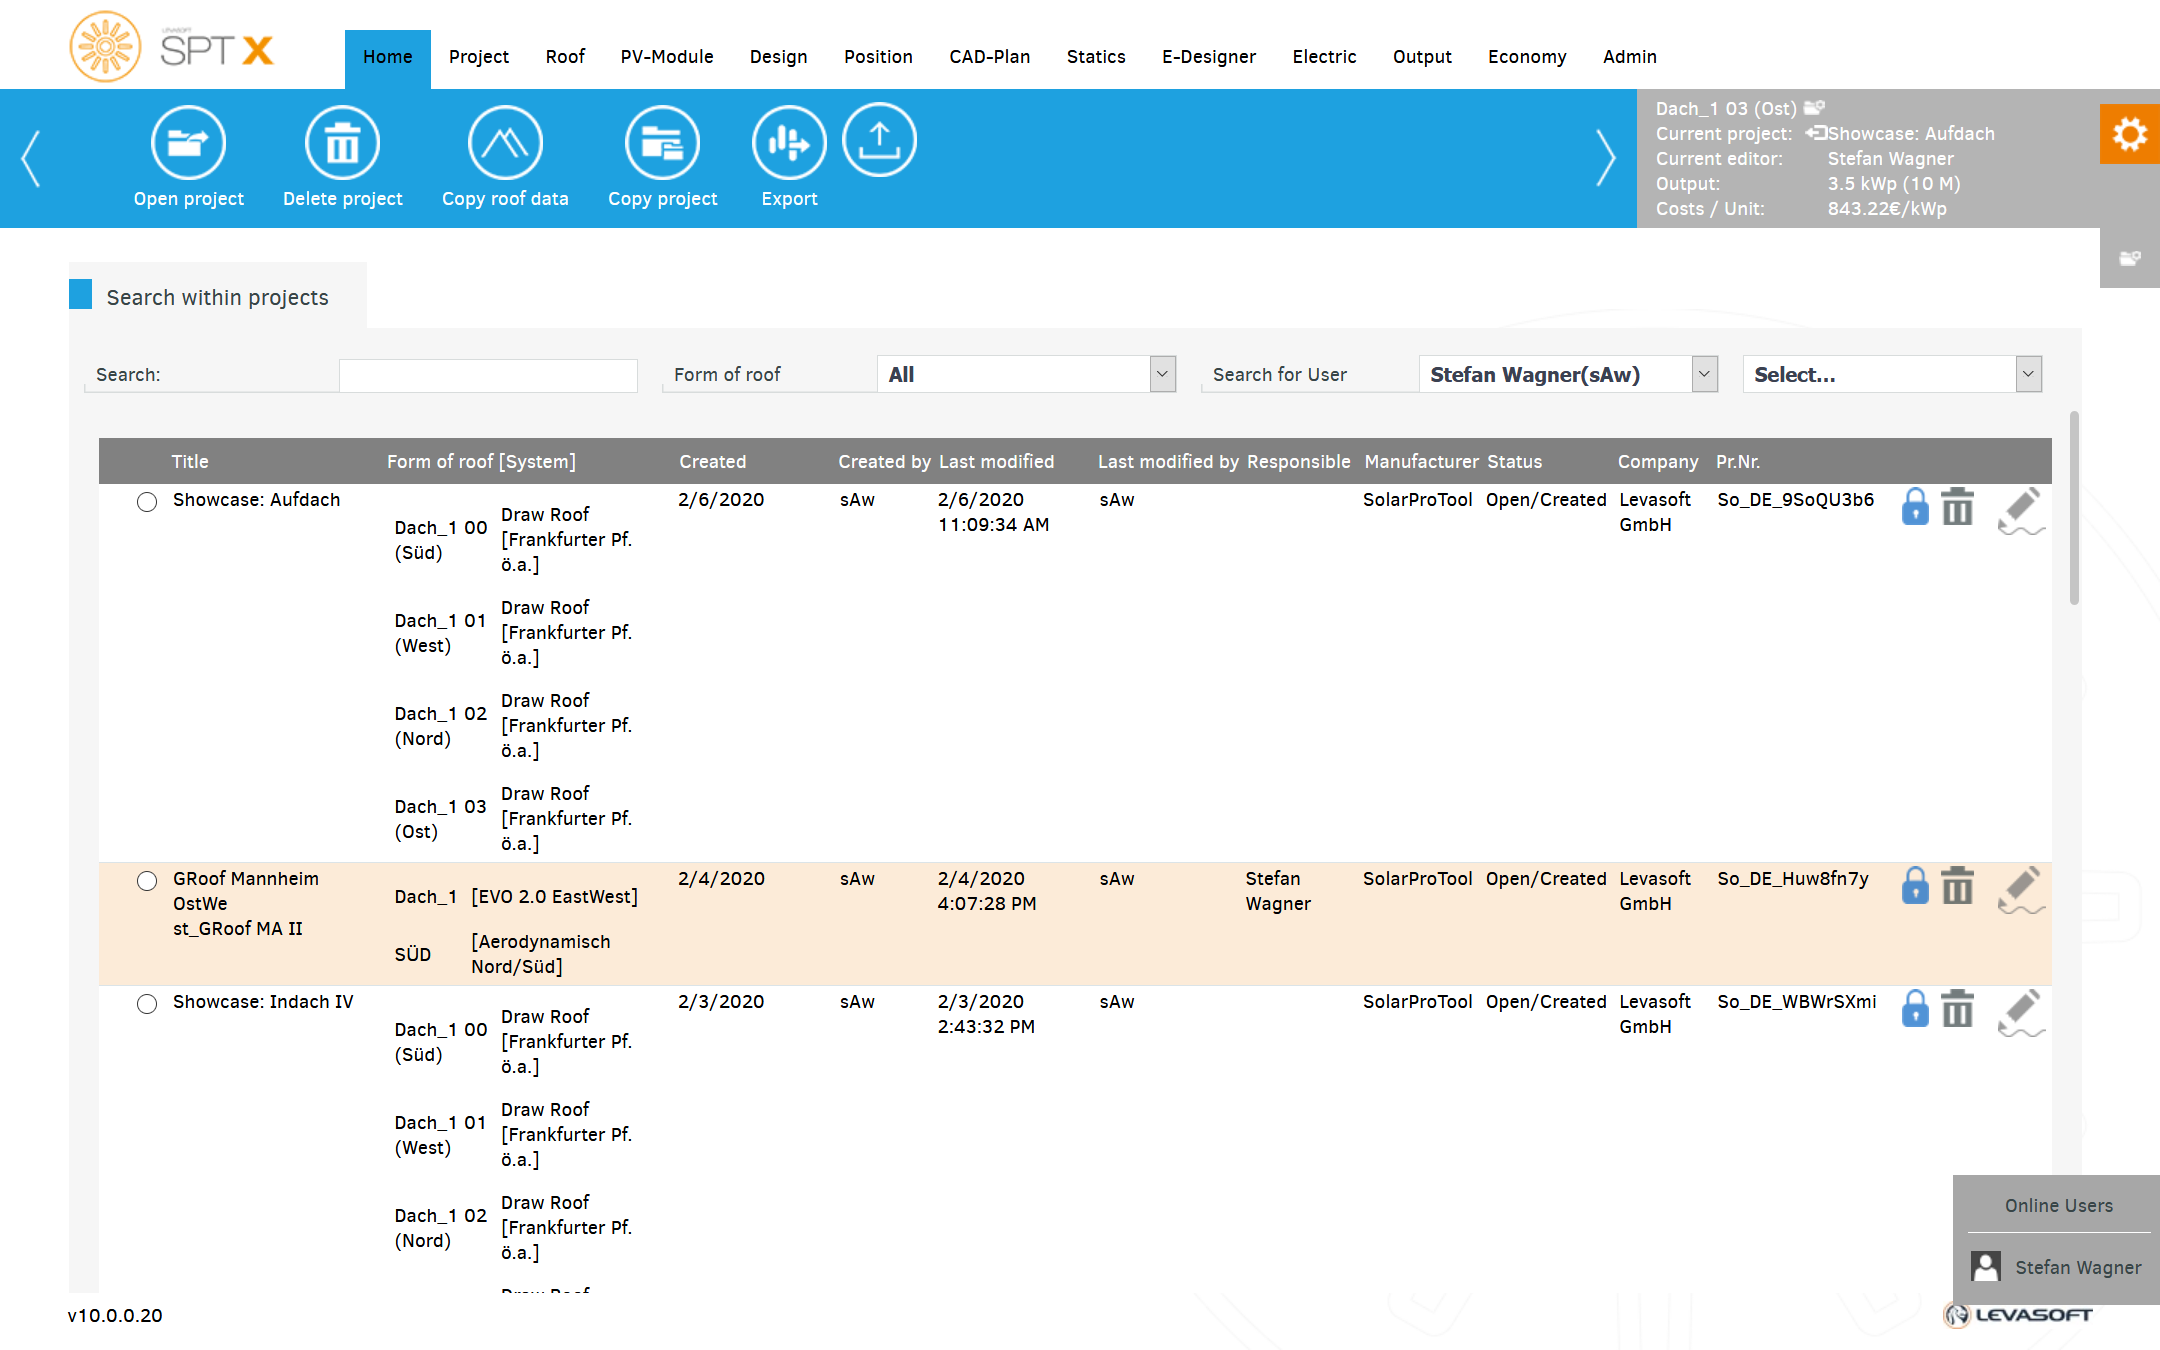
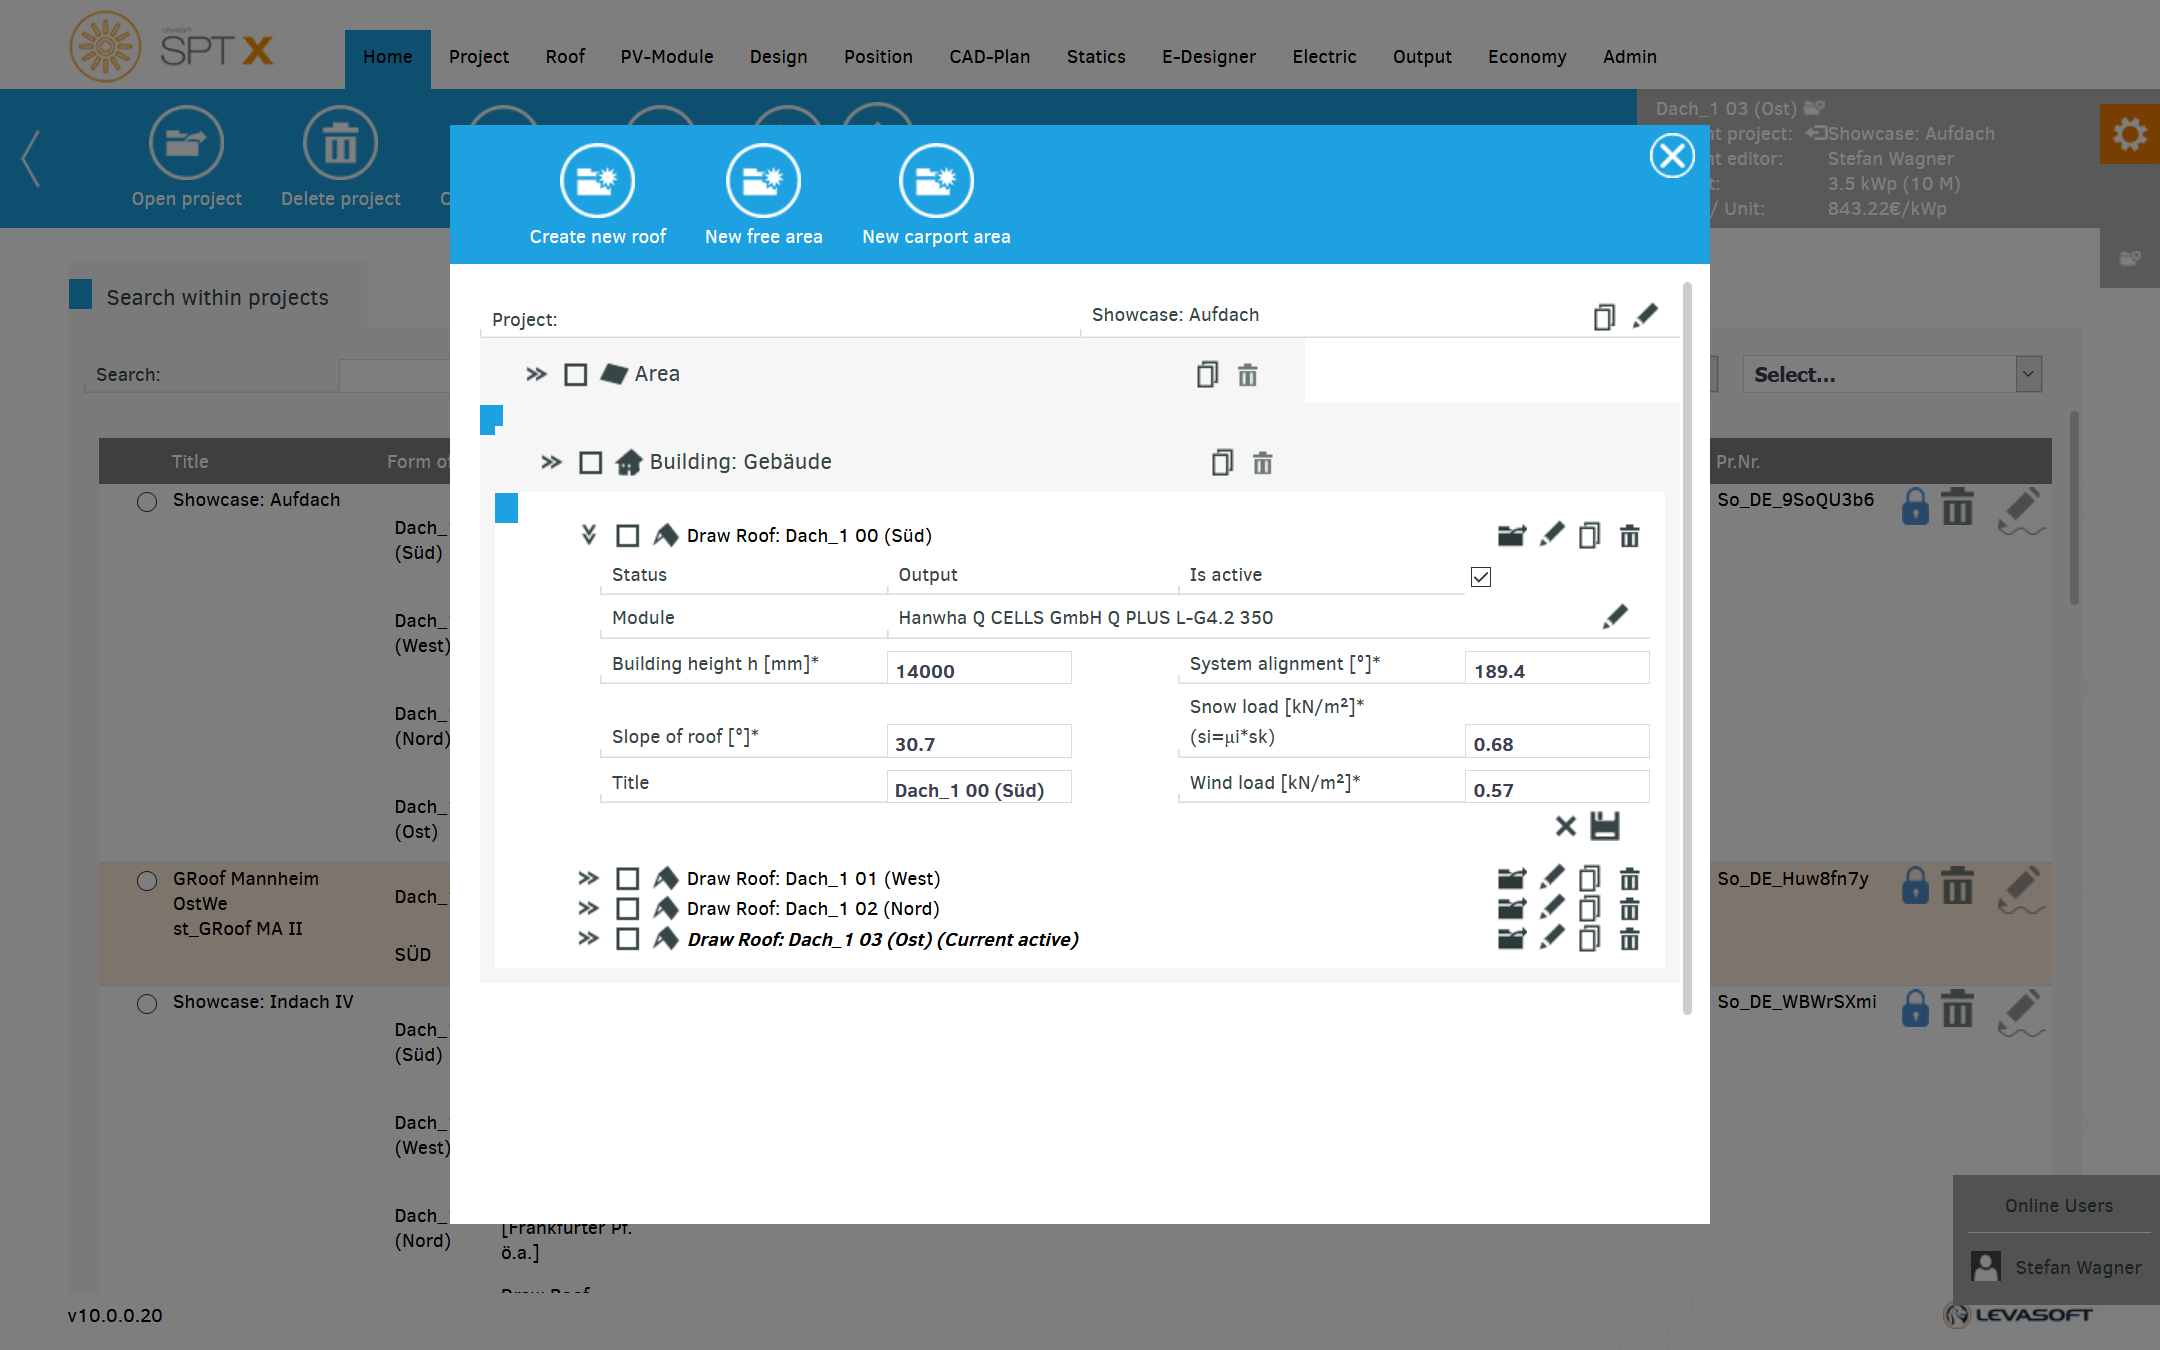
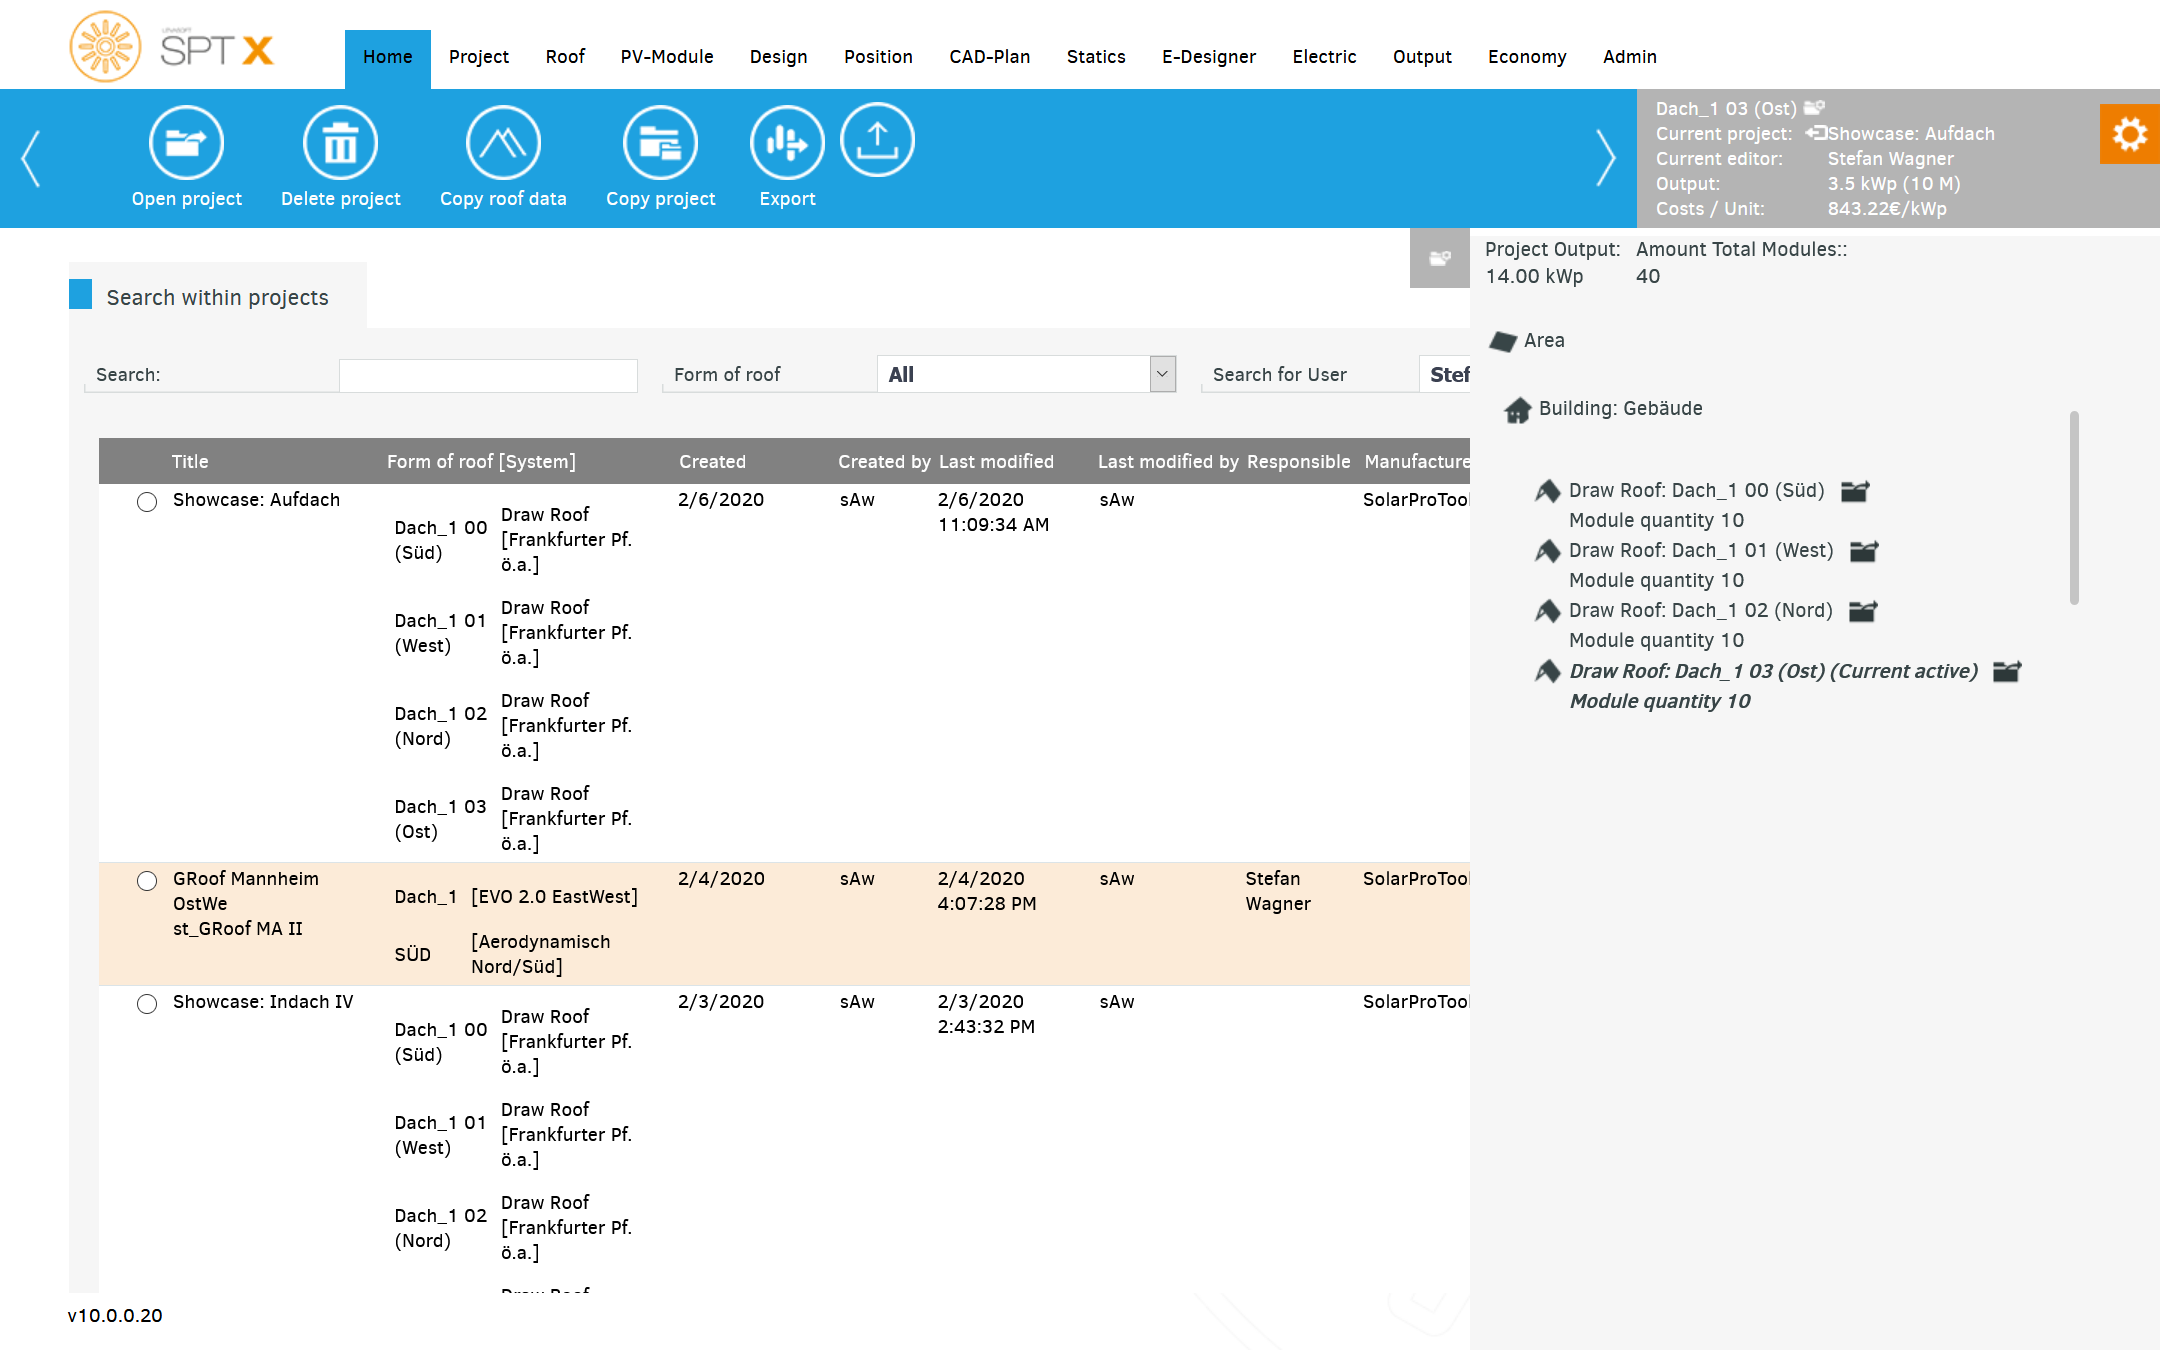
Here you have all the functions to open, manage, or create a new project.
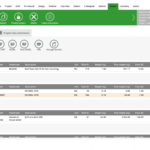
In addition, as an administrator, you have the option of populating three columns of content for your users.
Possible content could be images or links to technical documents, but also news about your products.
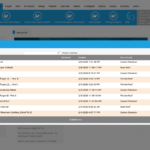
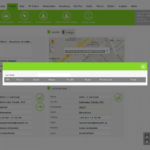
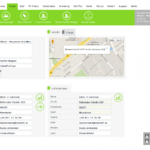
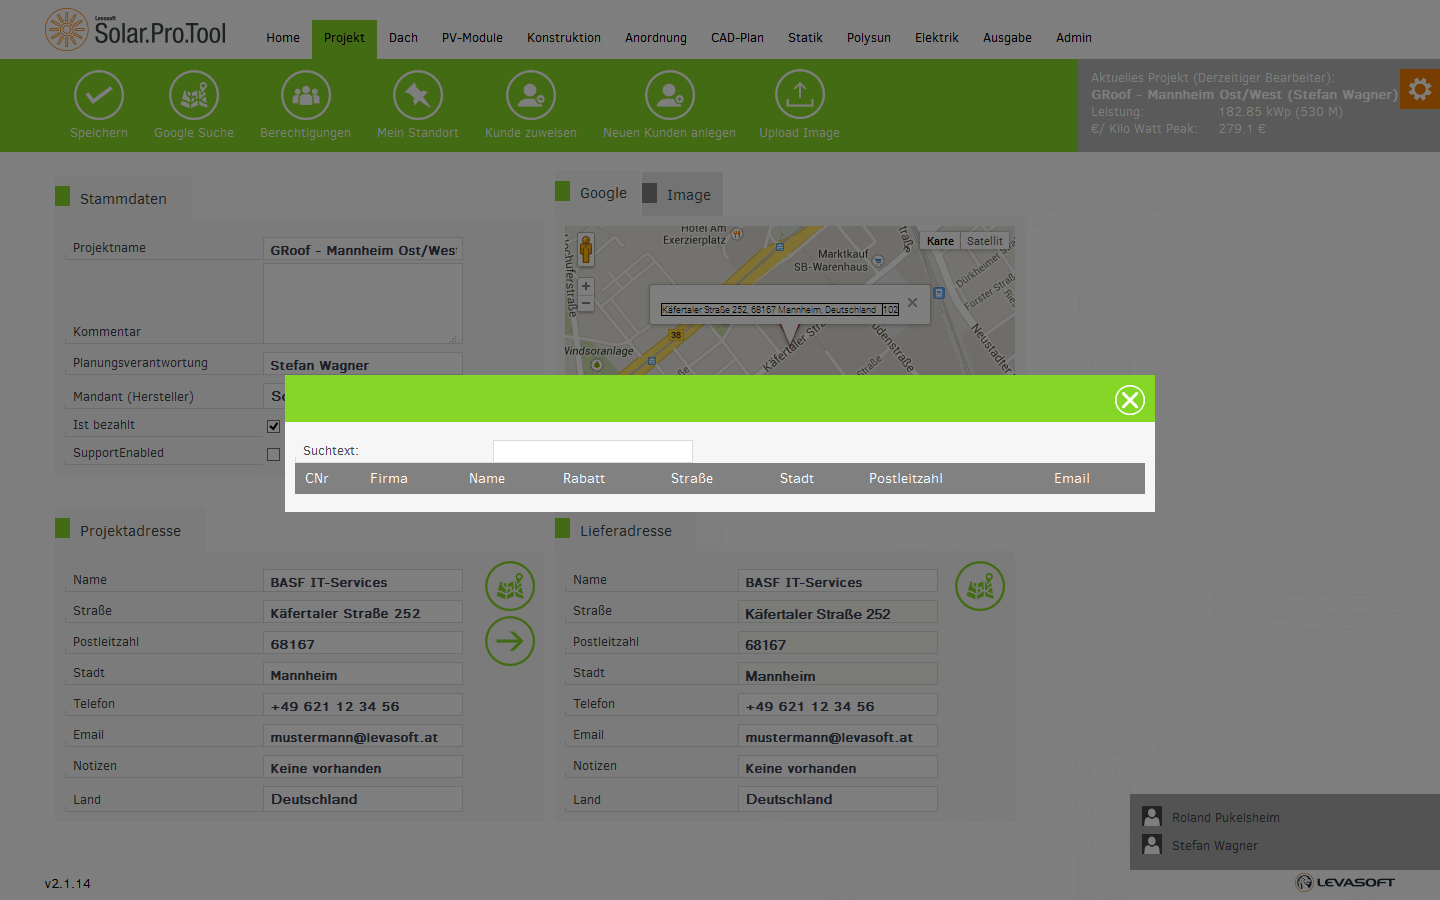
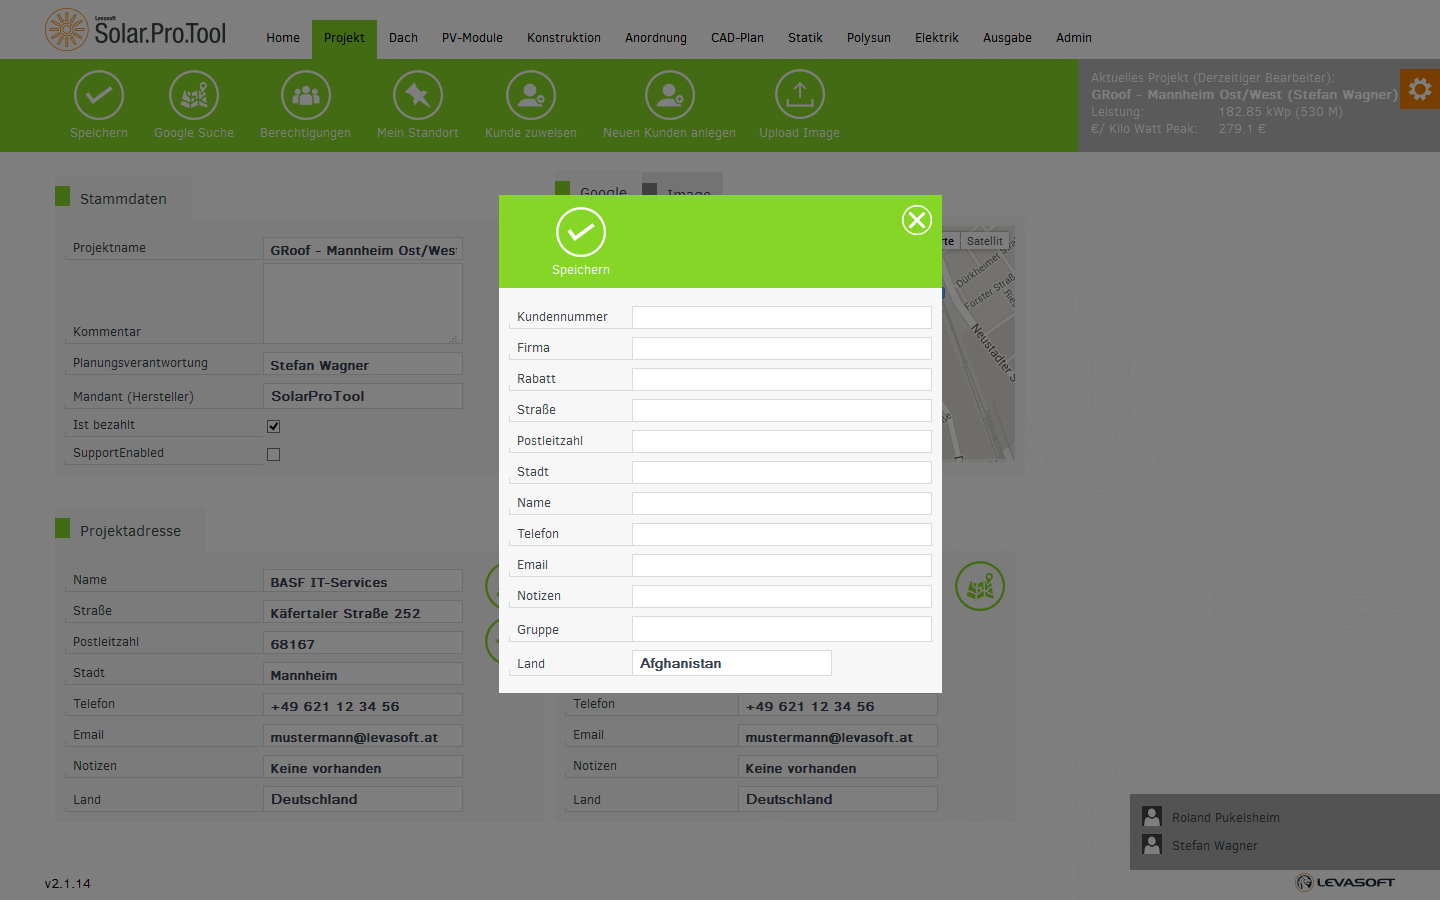
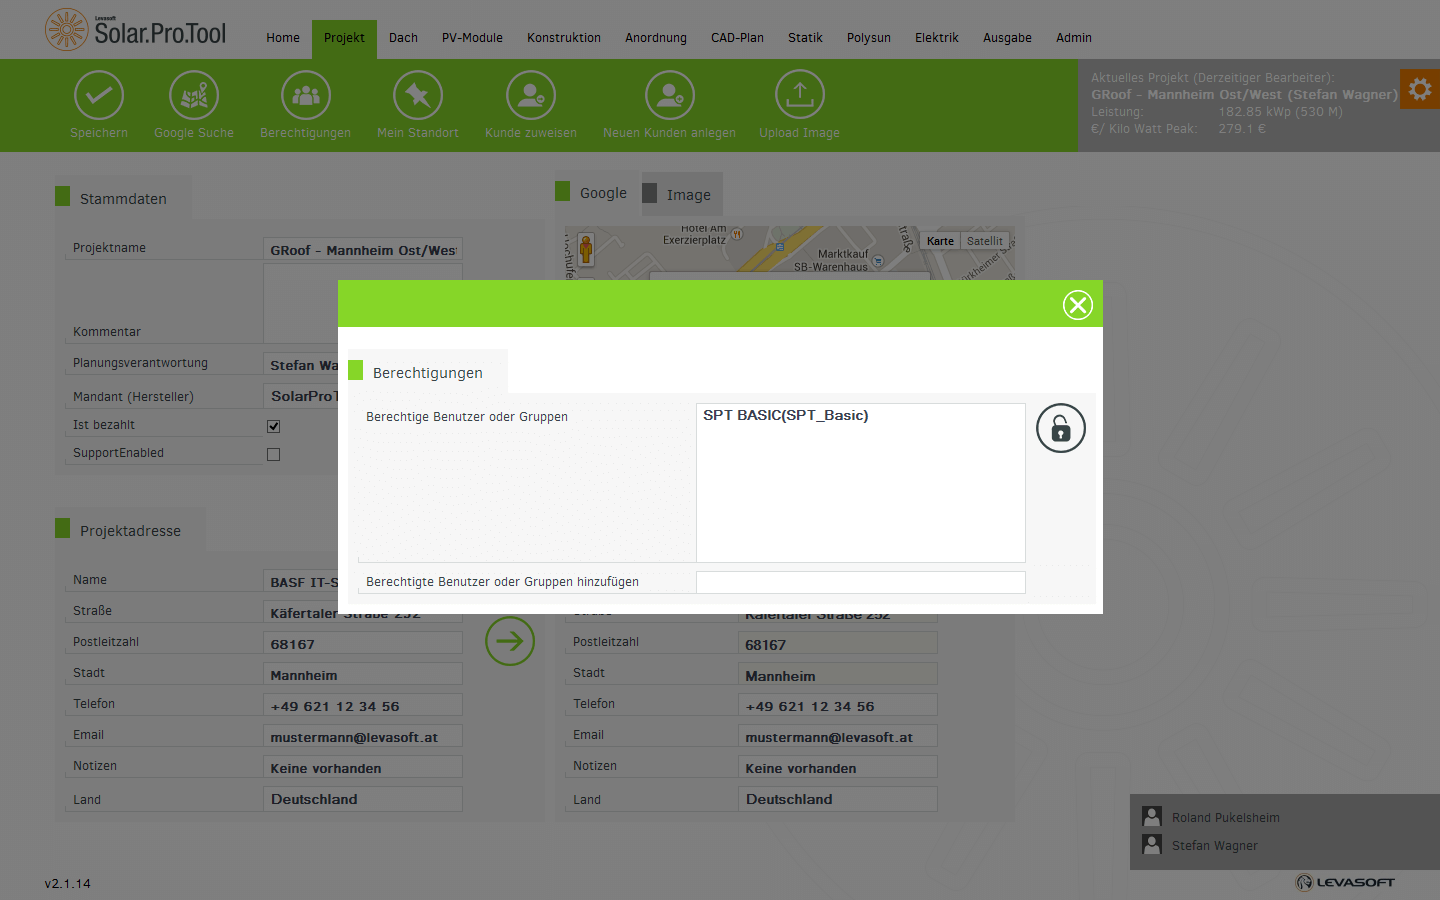
In Master Data, you store all the data that is useful for identifying the project.
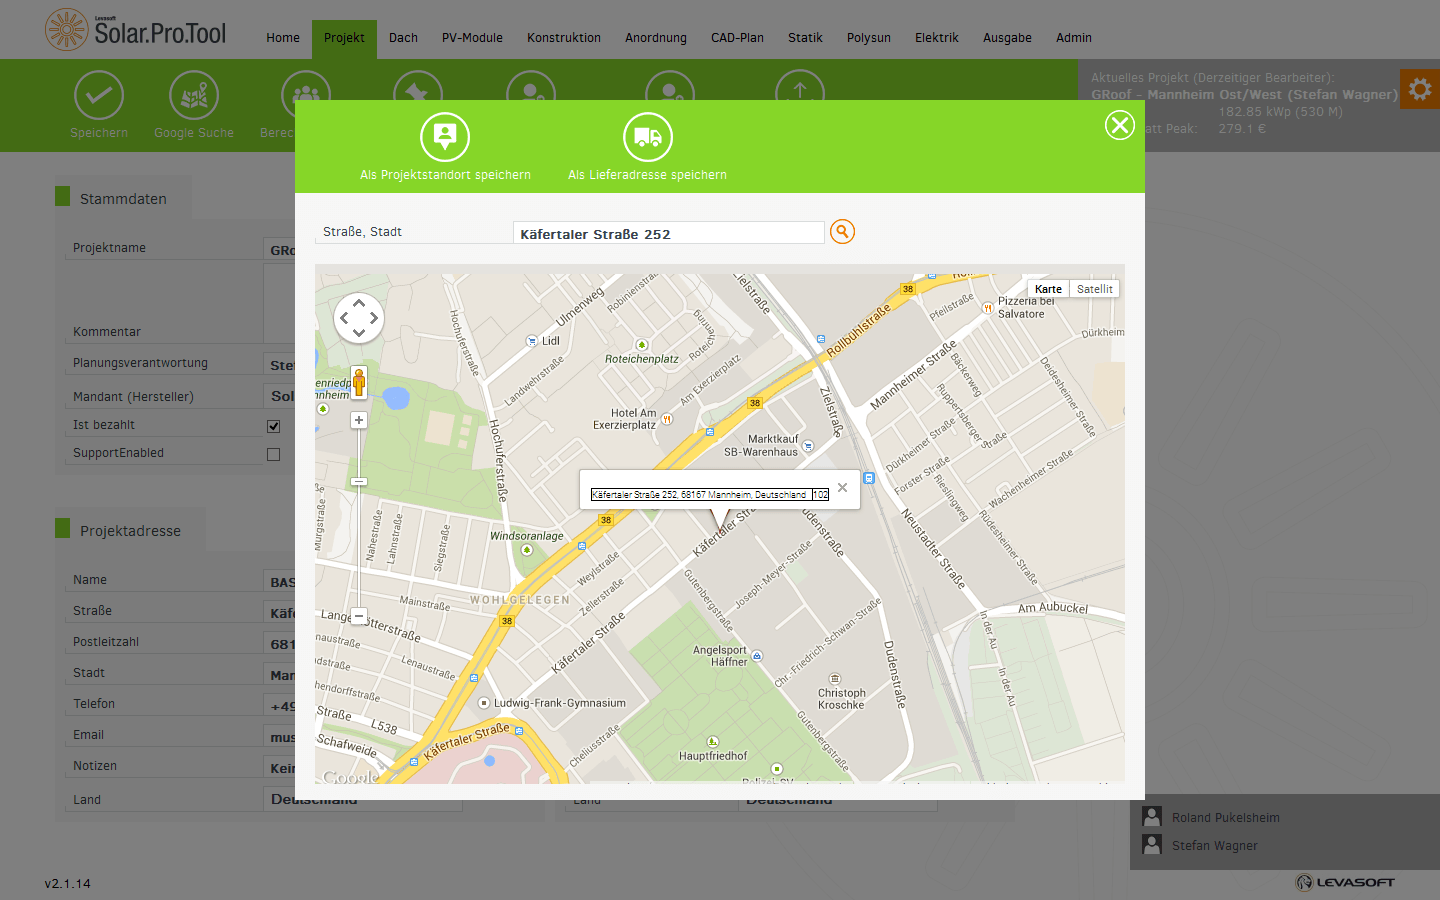
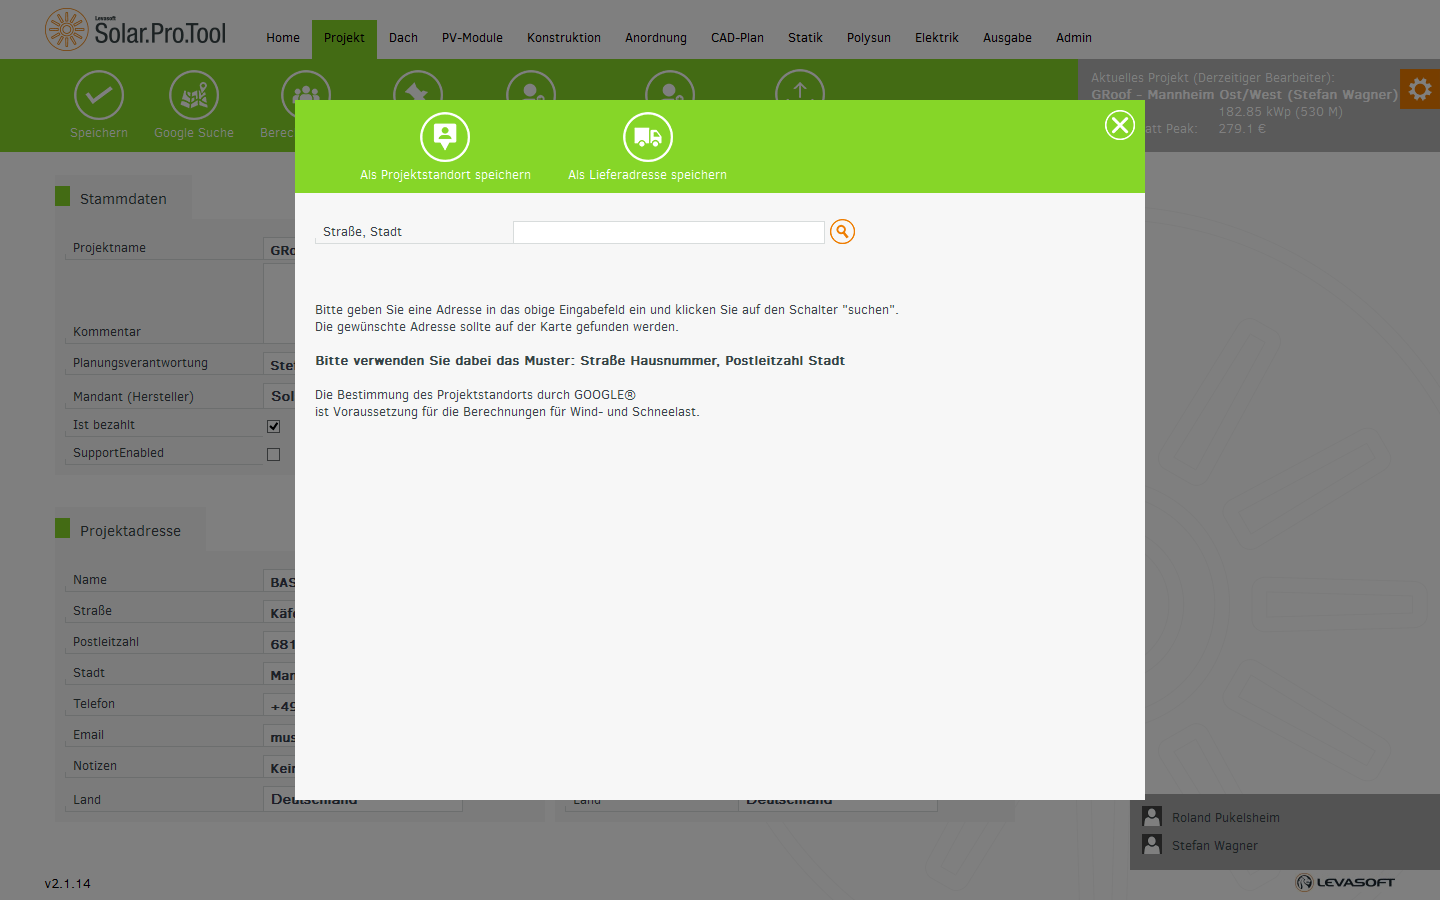
The best way to determine the project address is to use Google. This ensures that we know the exact location later when determining snow and wind load and can thus automatically determine the altitude in the background, for example.
You can either use Google to determine the delivery address, take it from the project address, or simply leave it blank.
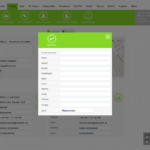
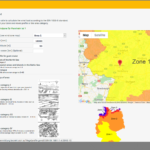
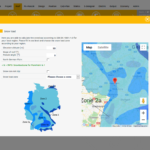
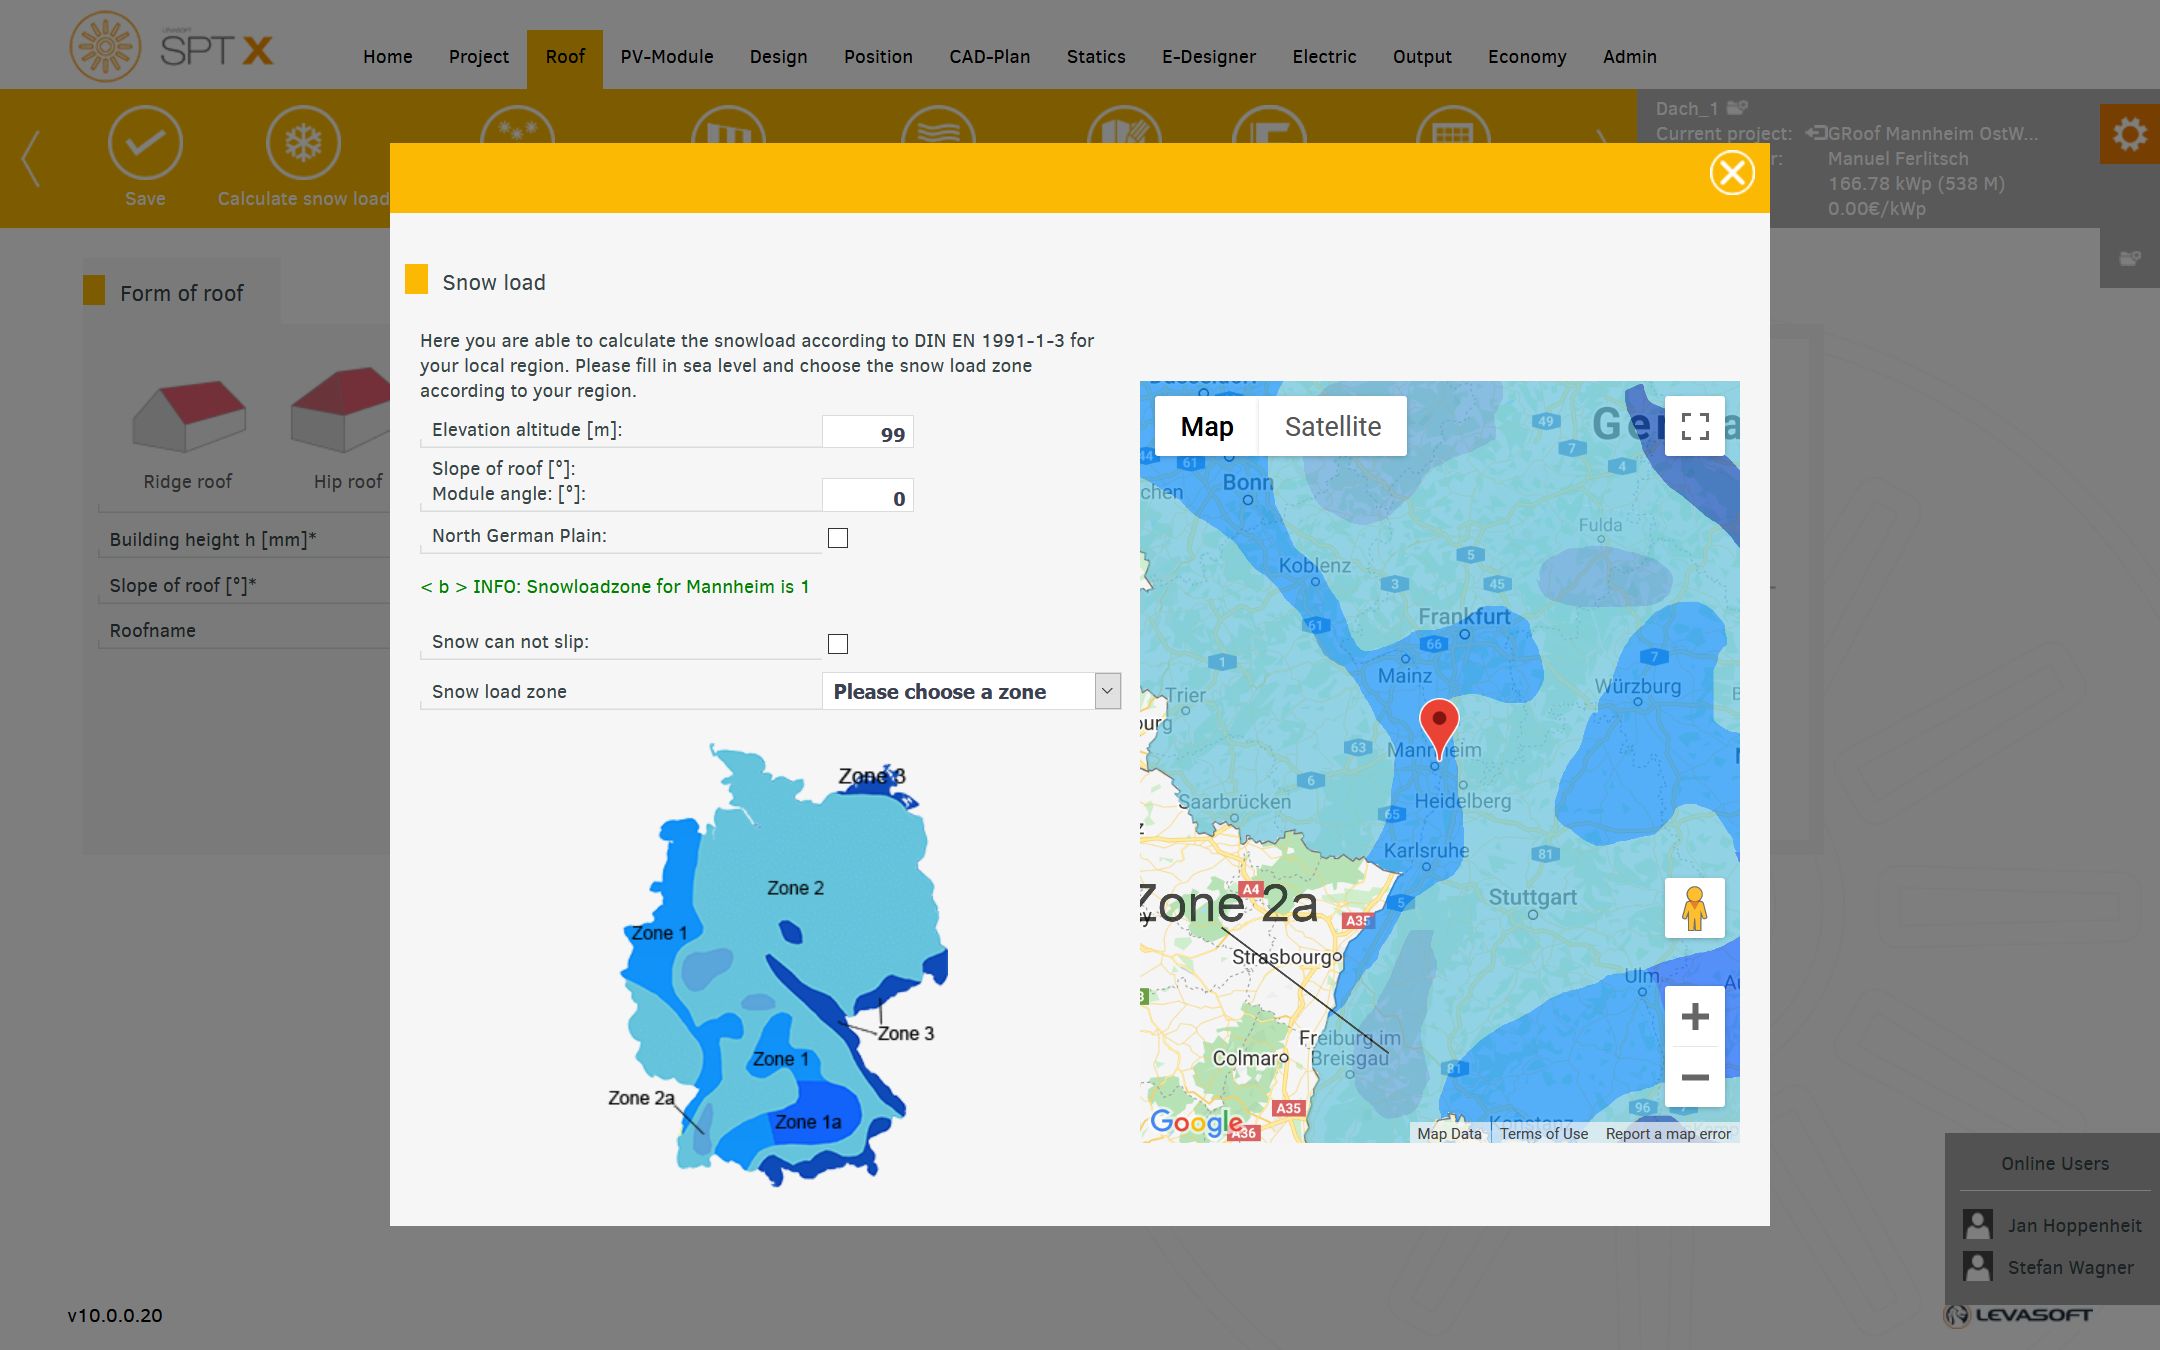
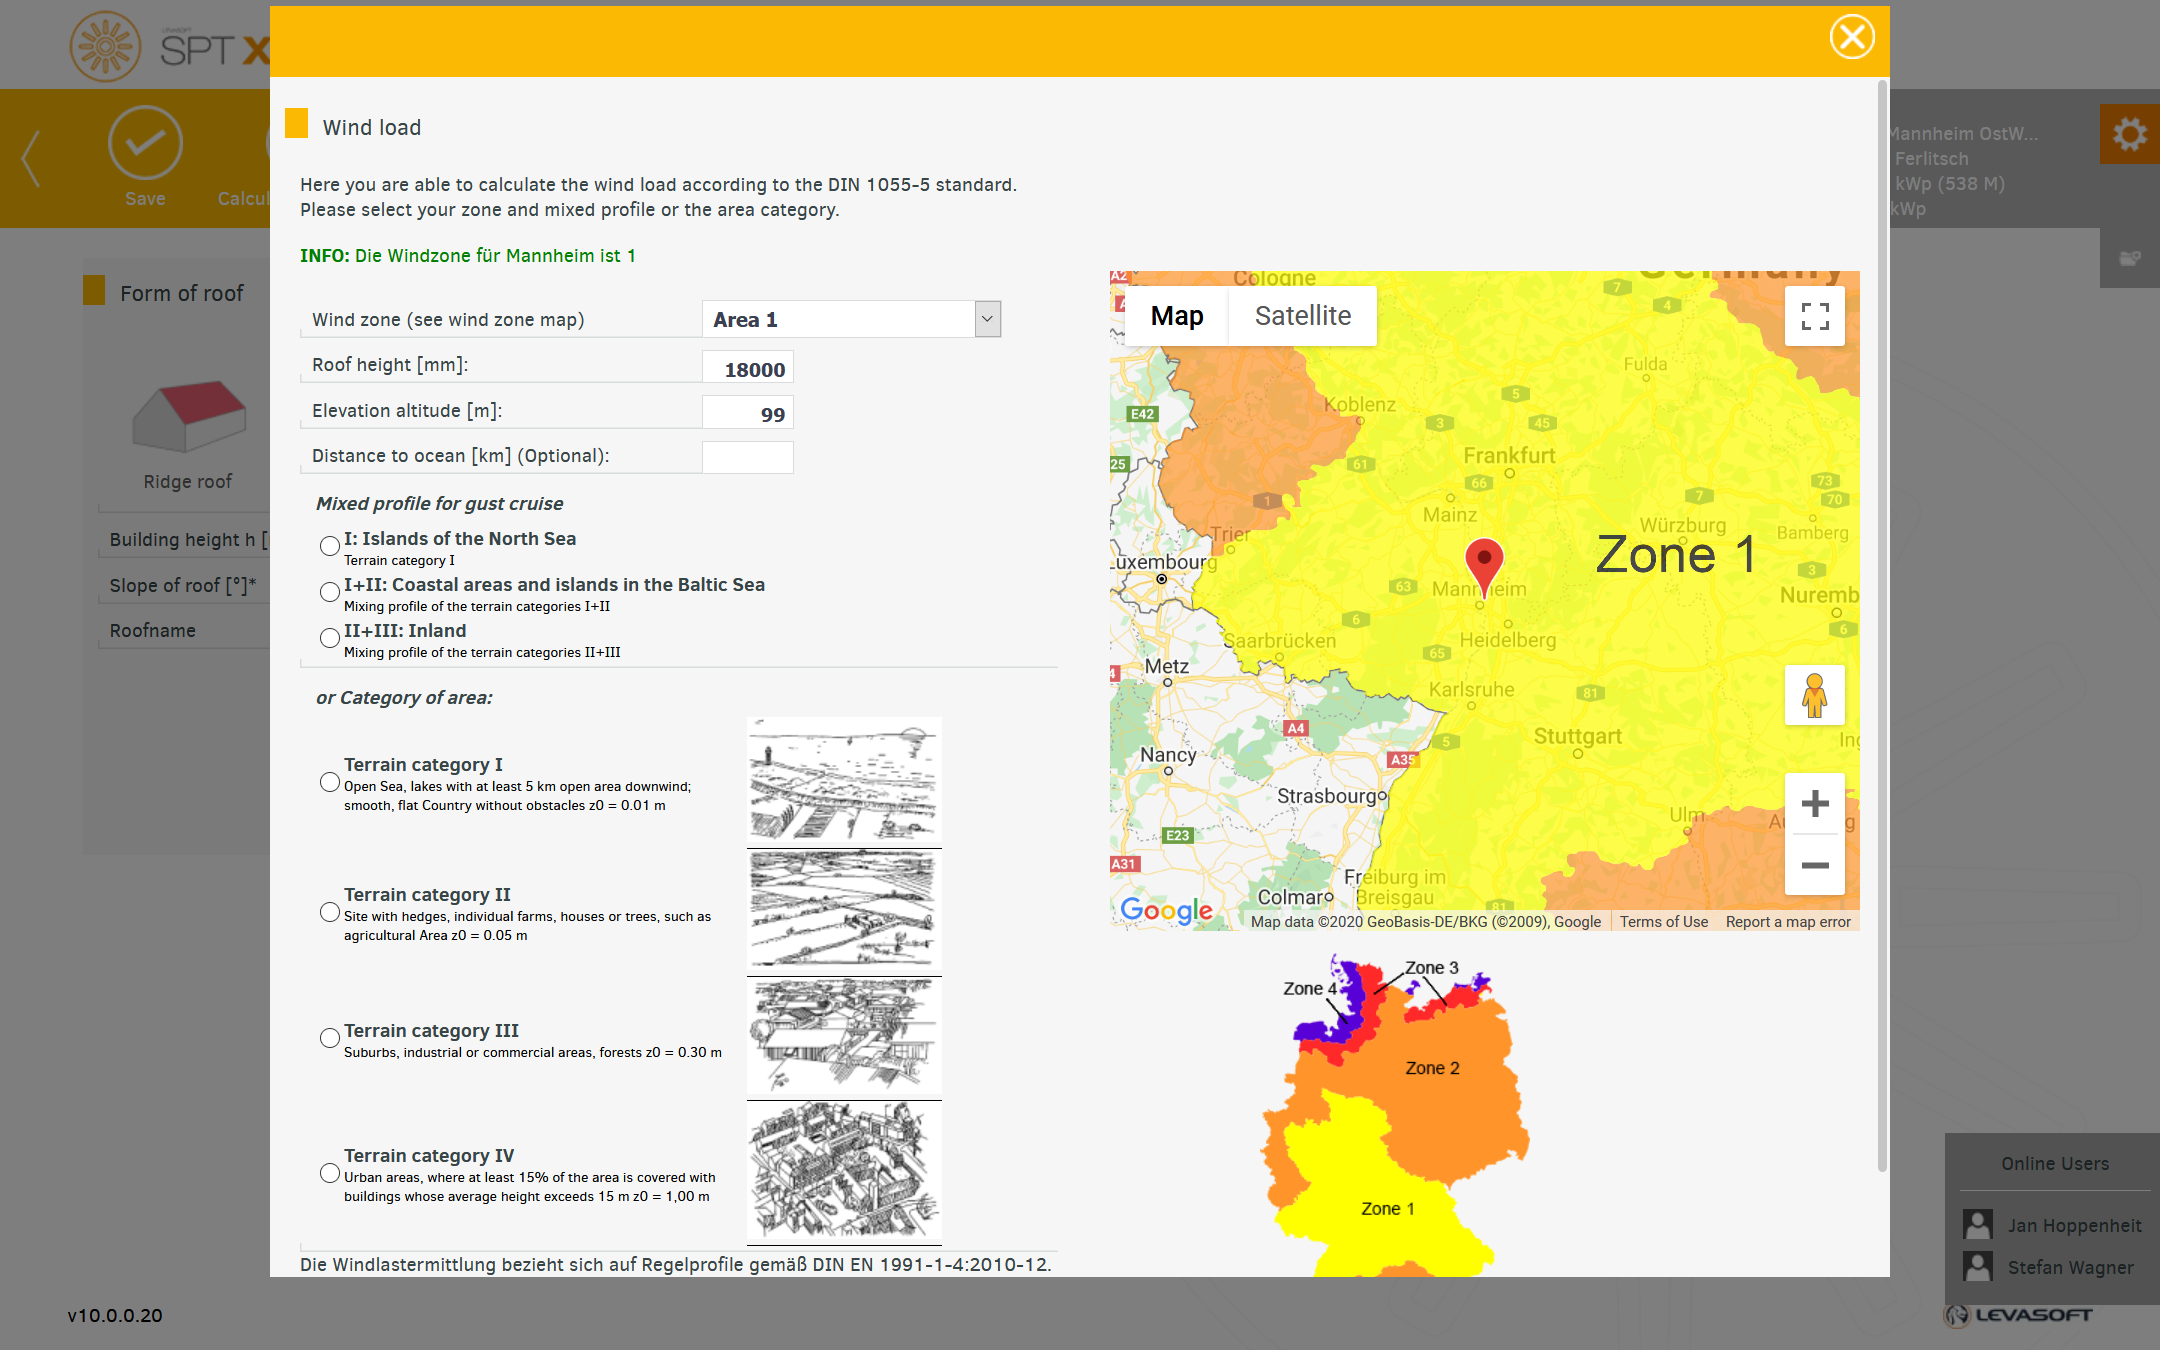
The snow and wind load are recorded in the decoded dialogs.
In the Subconstruction pane, either keep the default values or enter your values.
Depending on the coverage, the input fields in this area change.
The roof structure area is not relevant for the calculation of the roof, but serves, for example, to determine the appropriate screws with which roof hooks are mounted on the rafter.
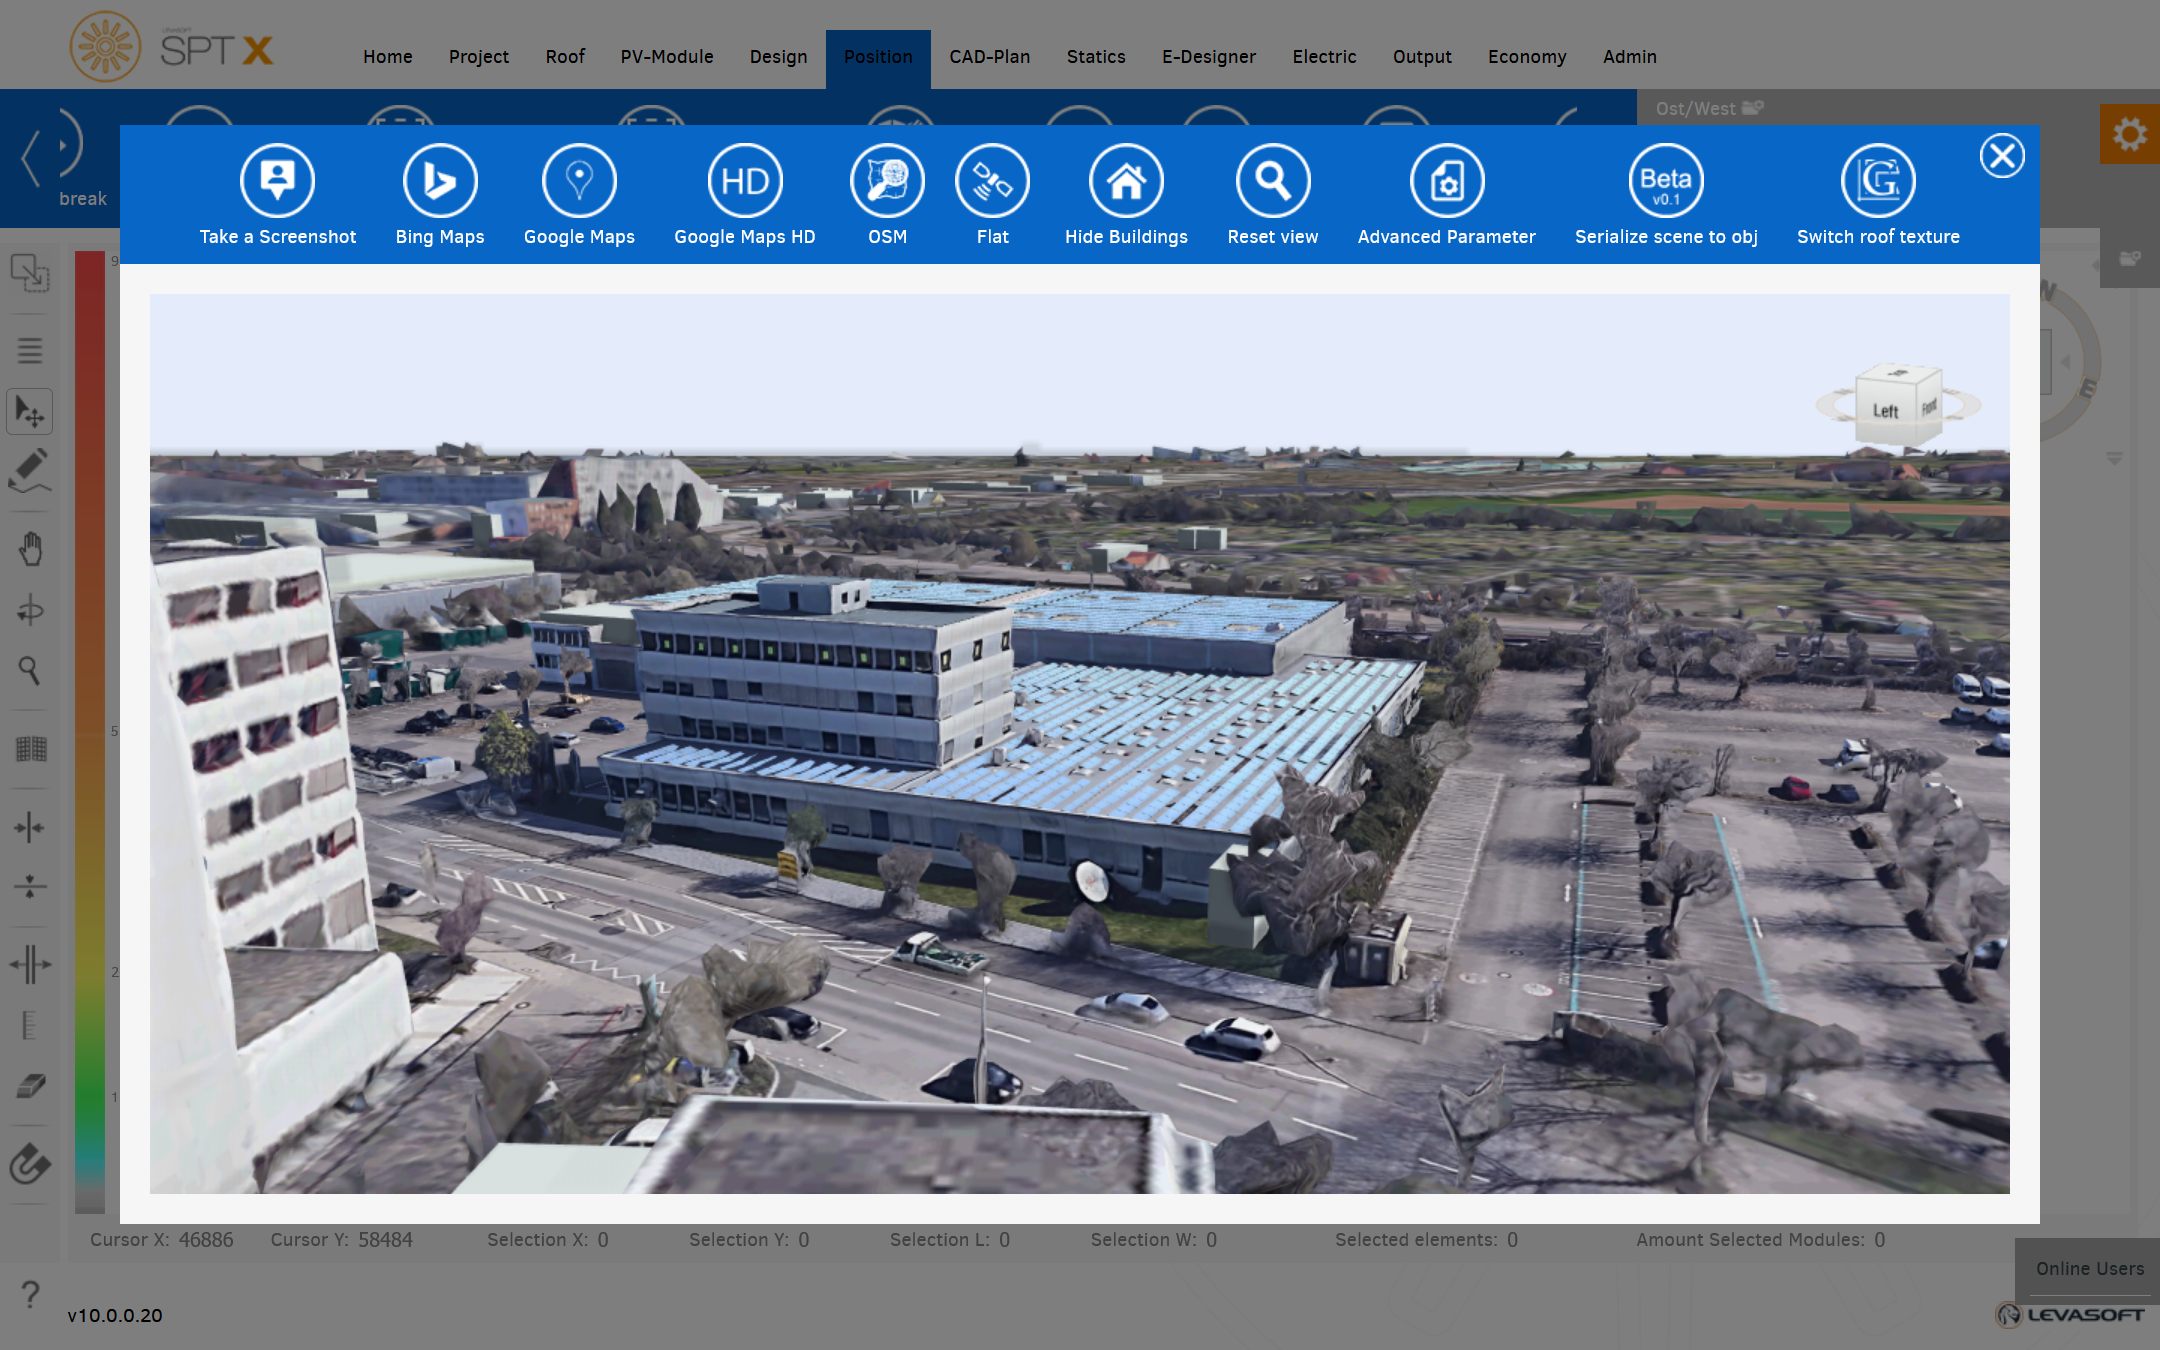
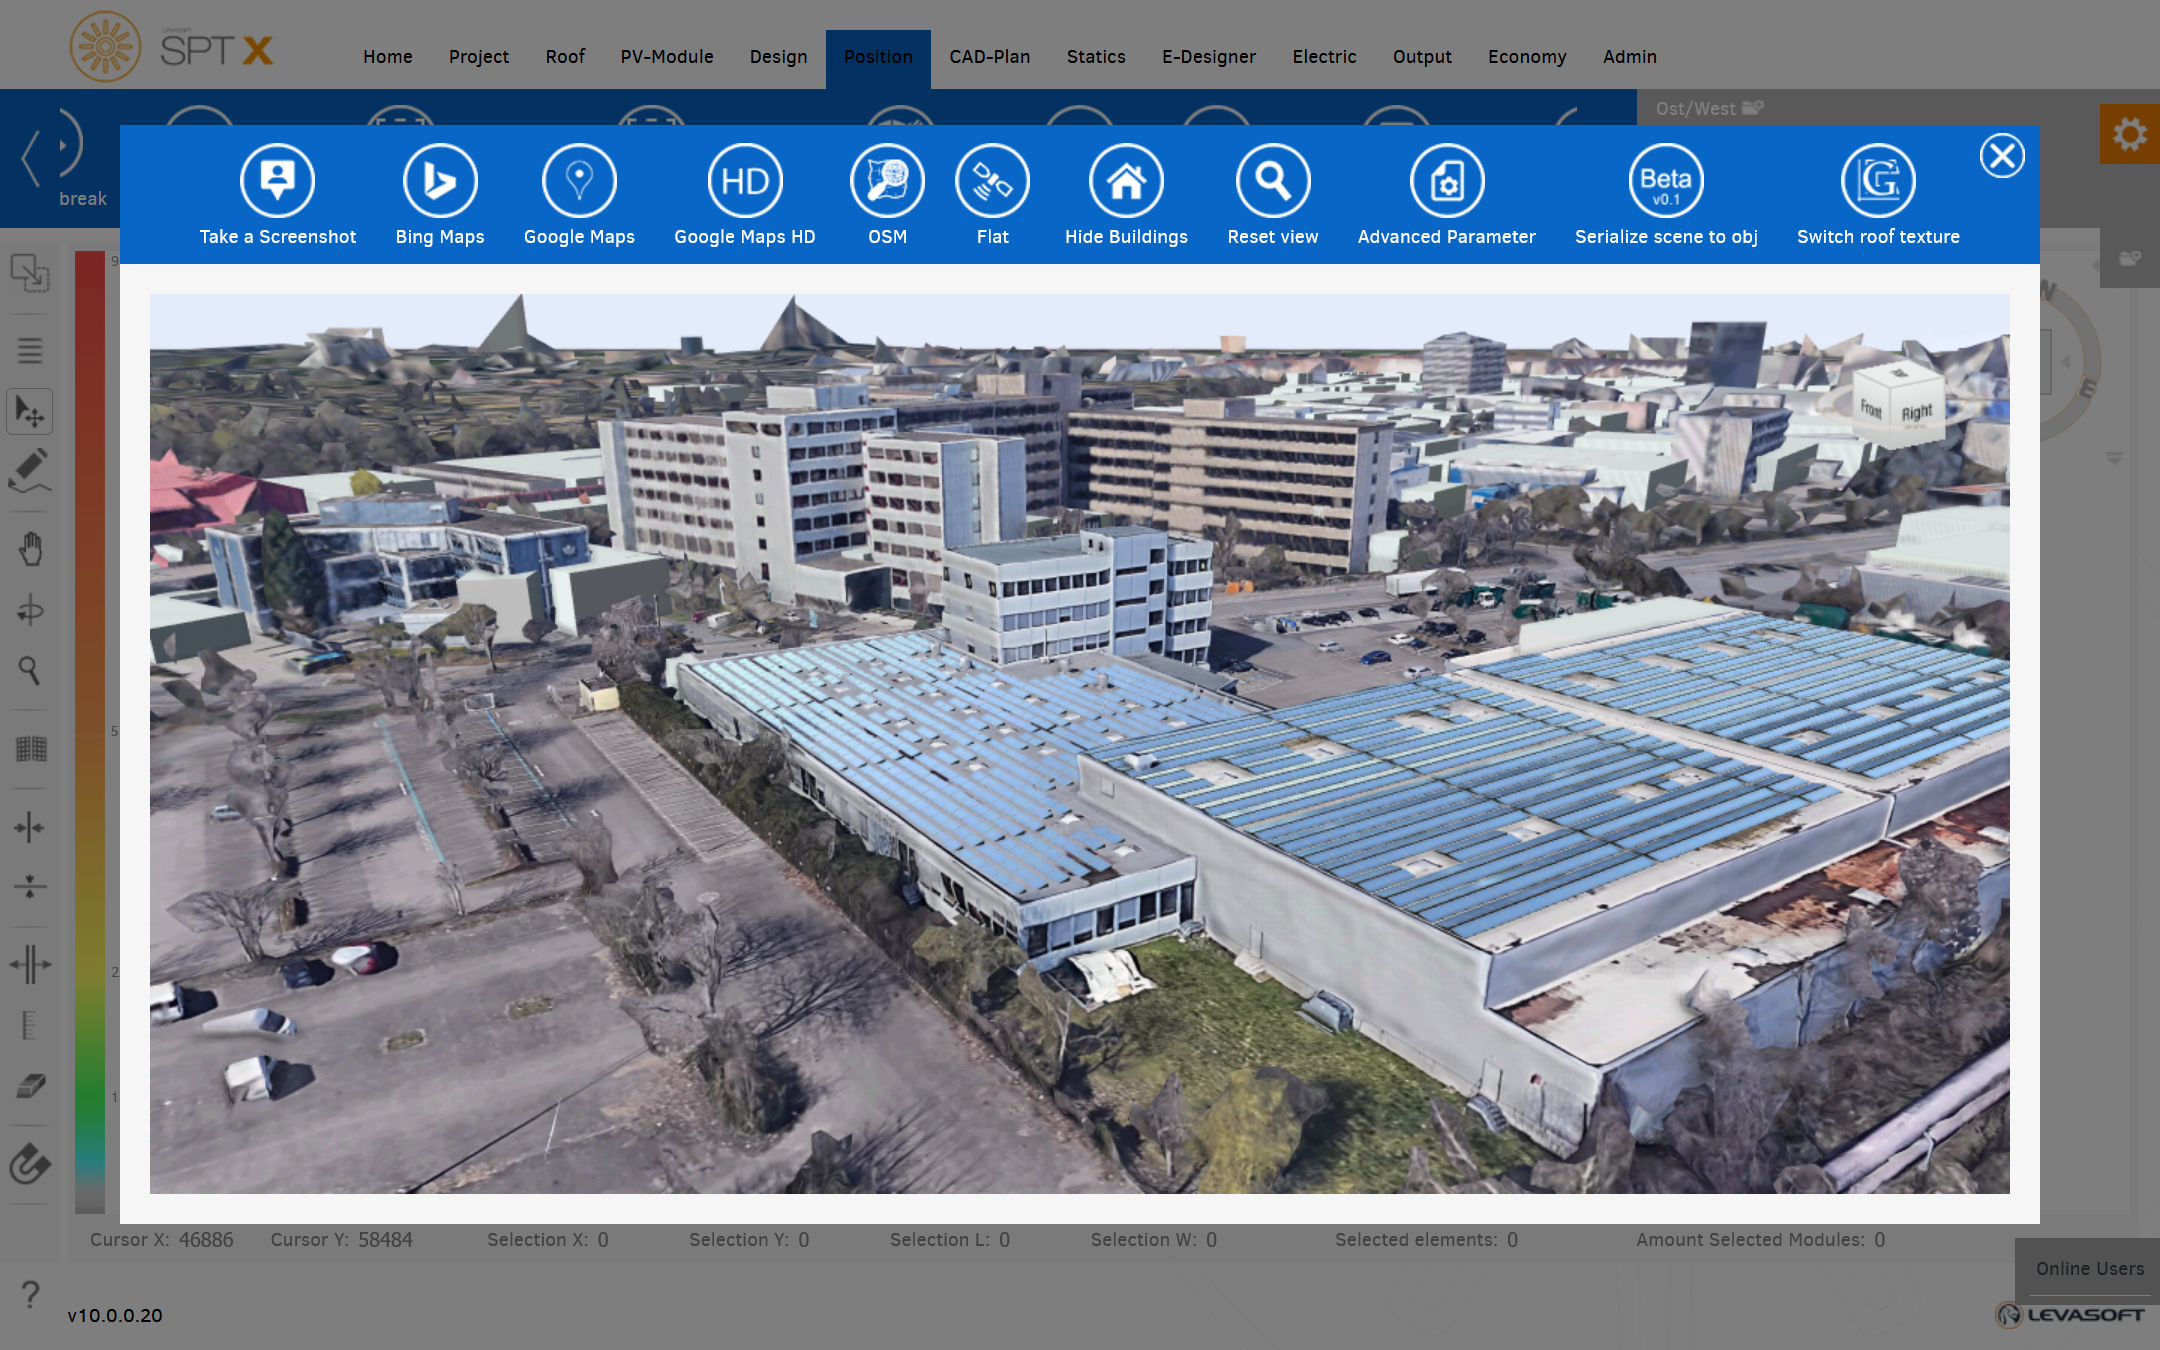
No problem, use MapDrawer.
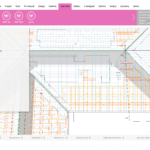
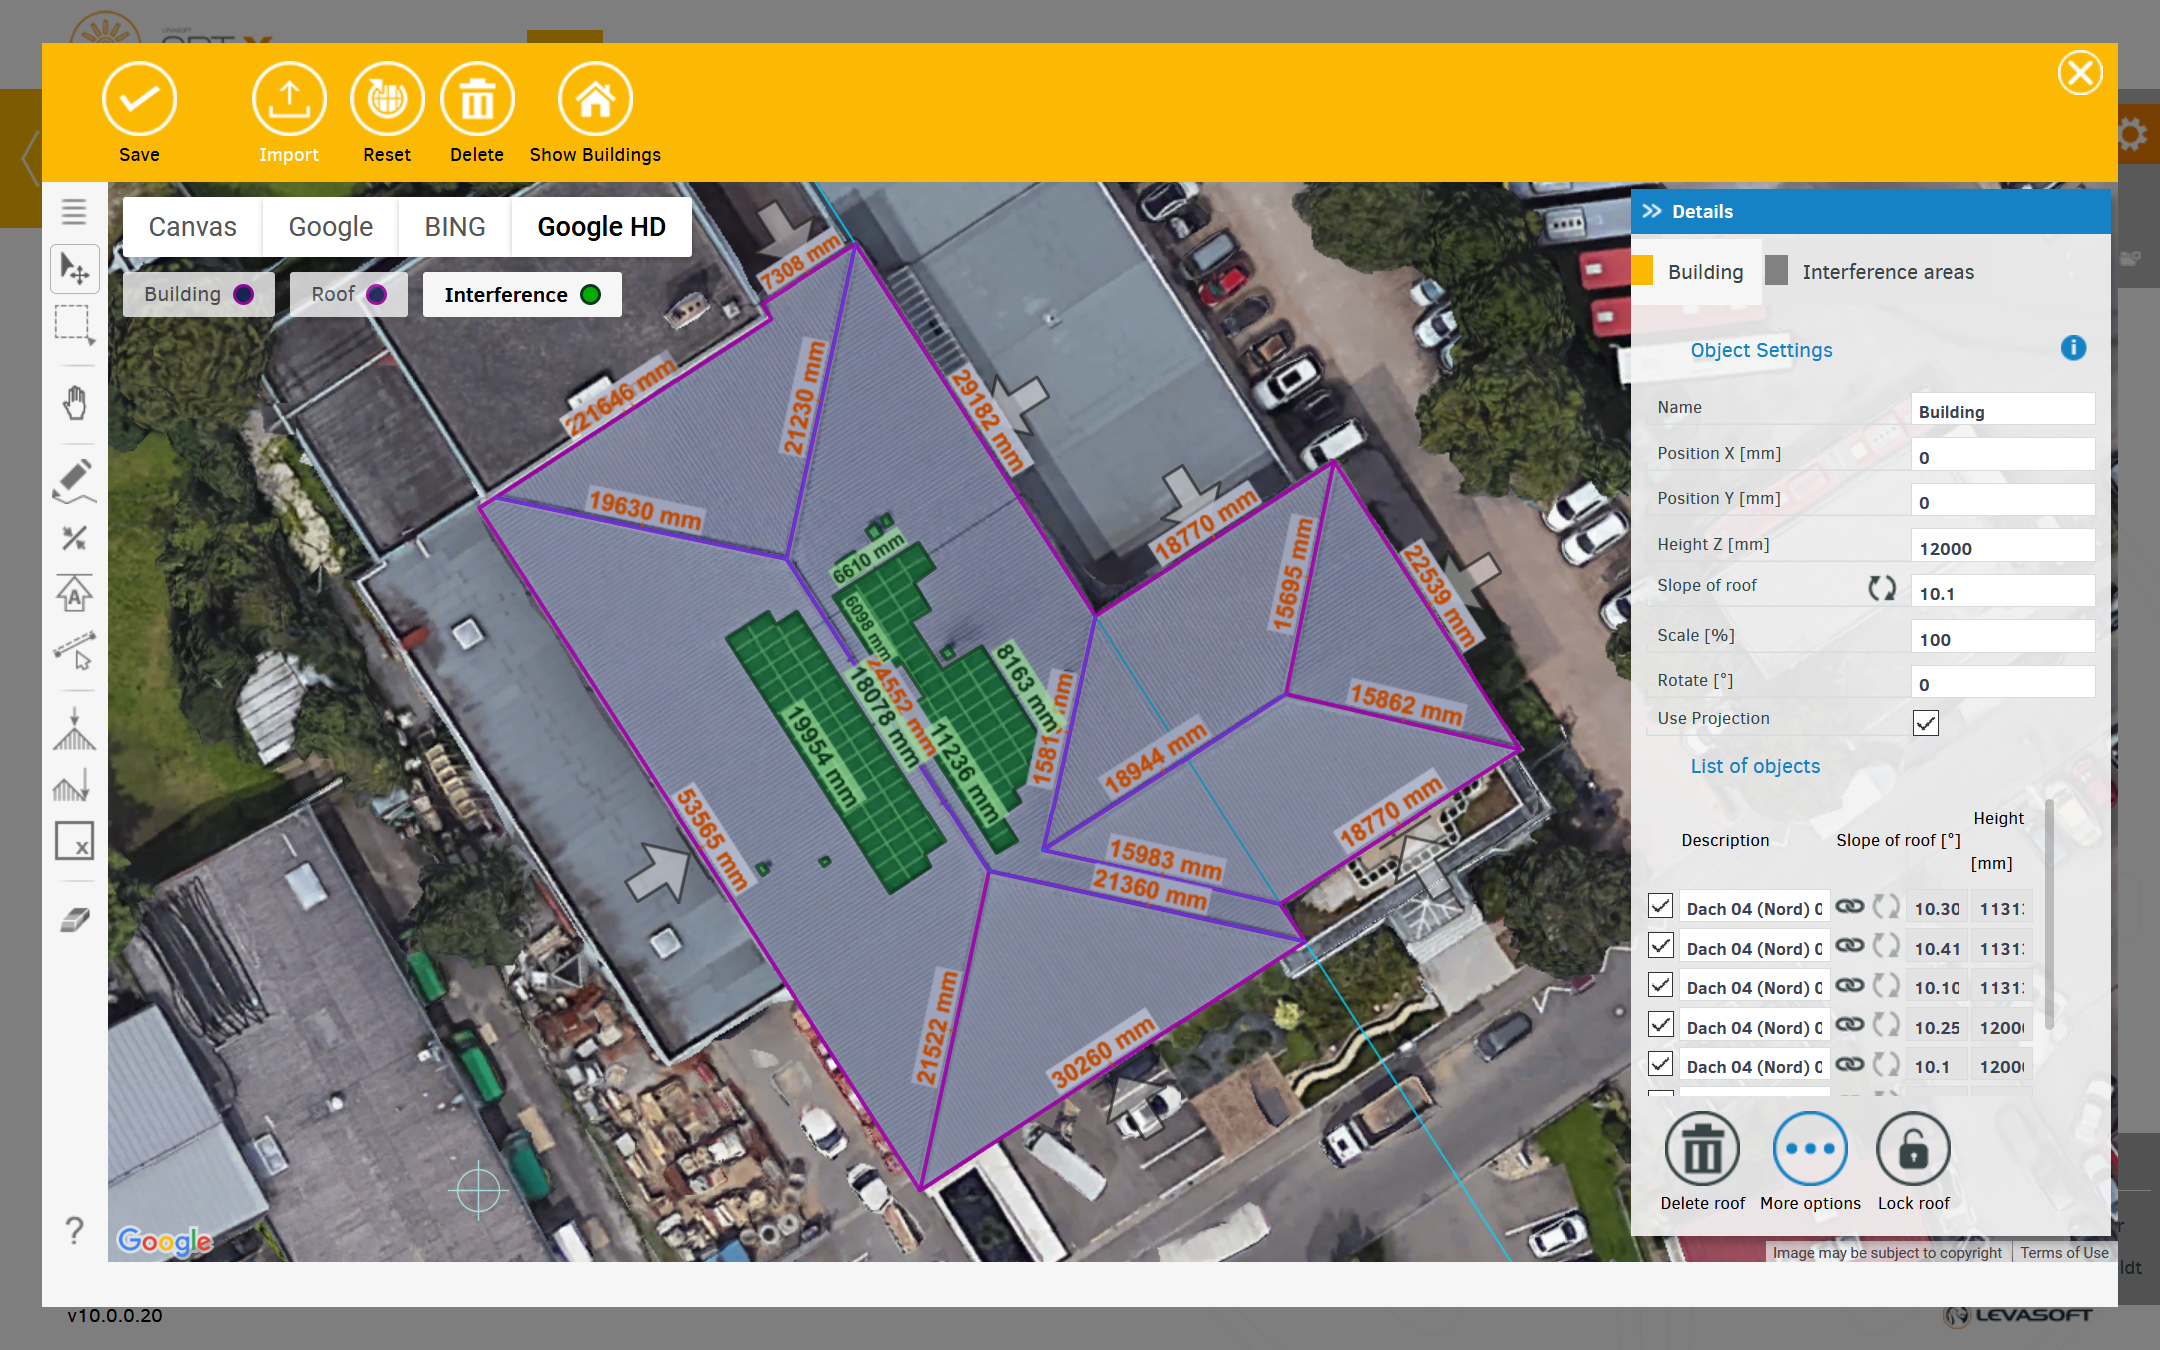
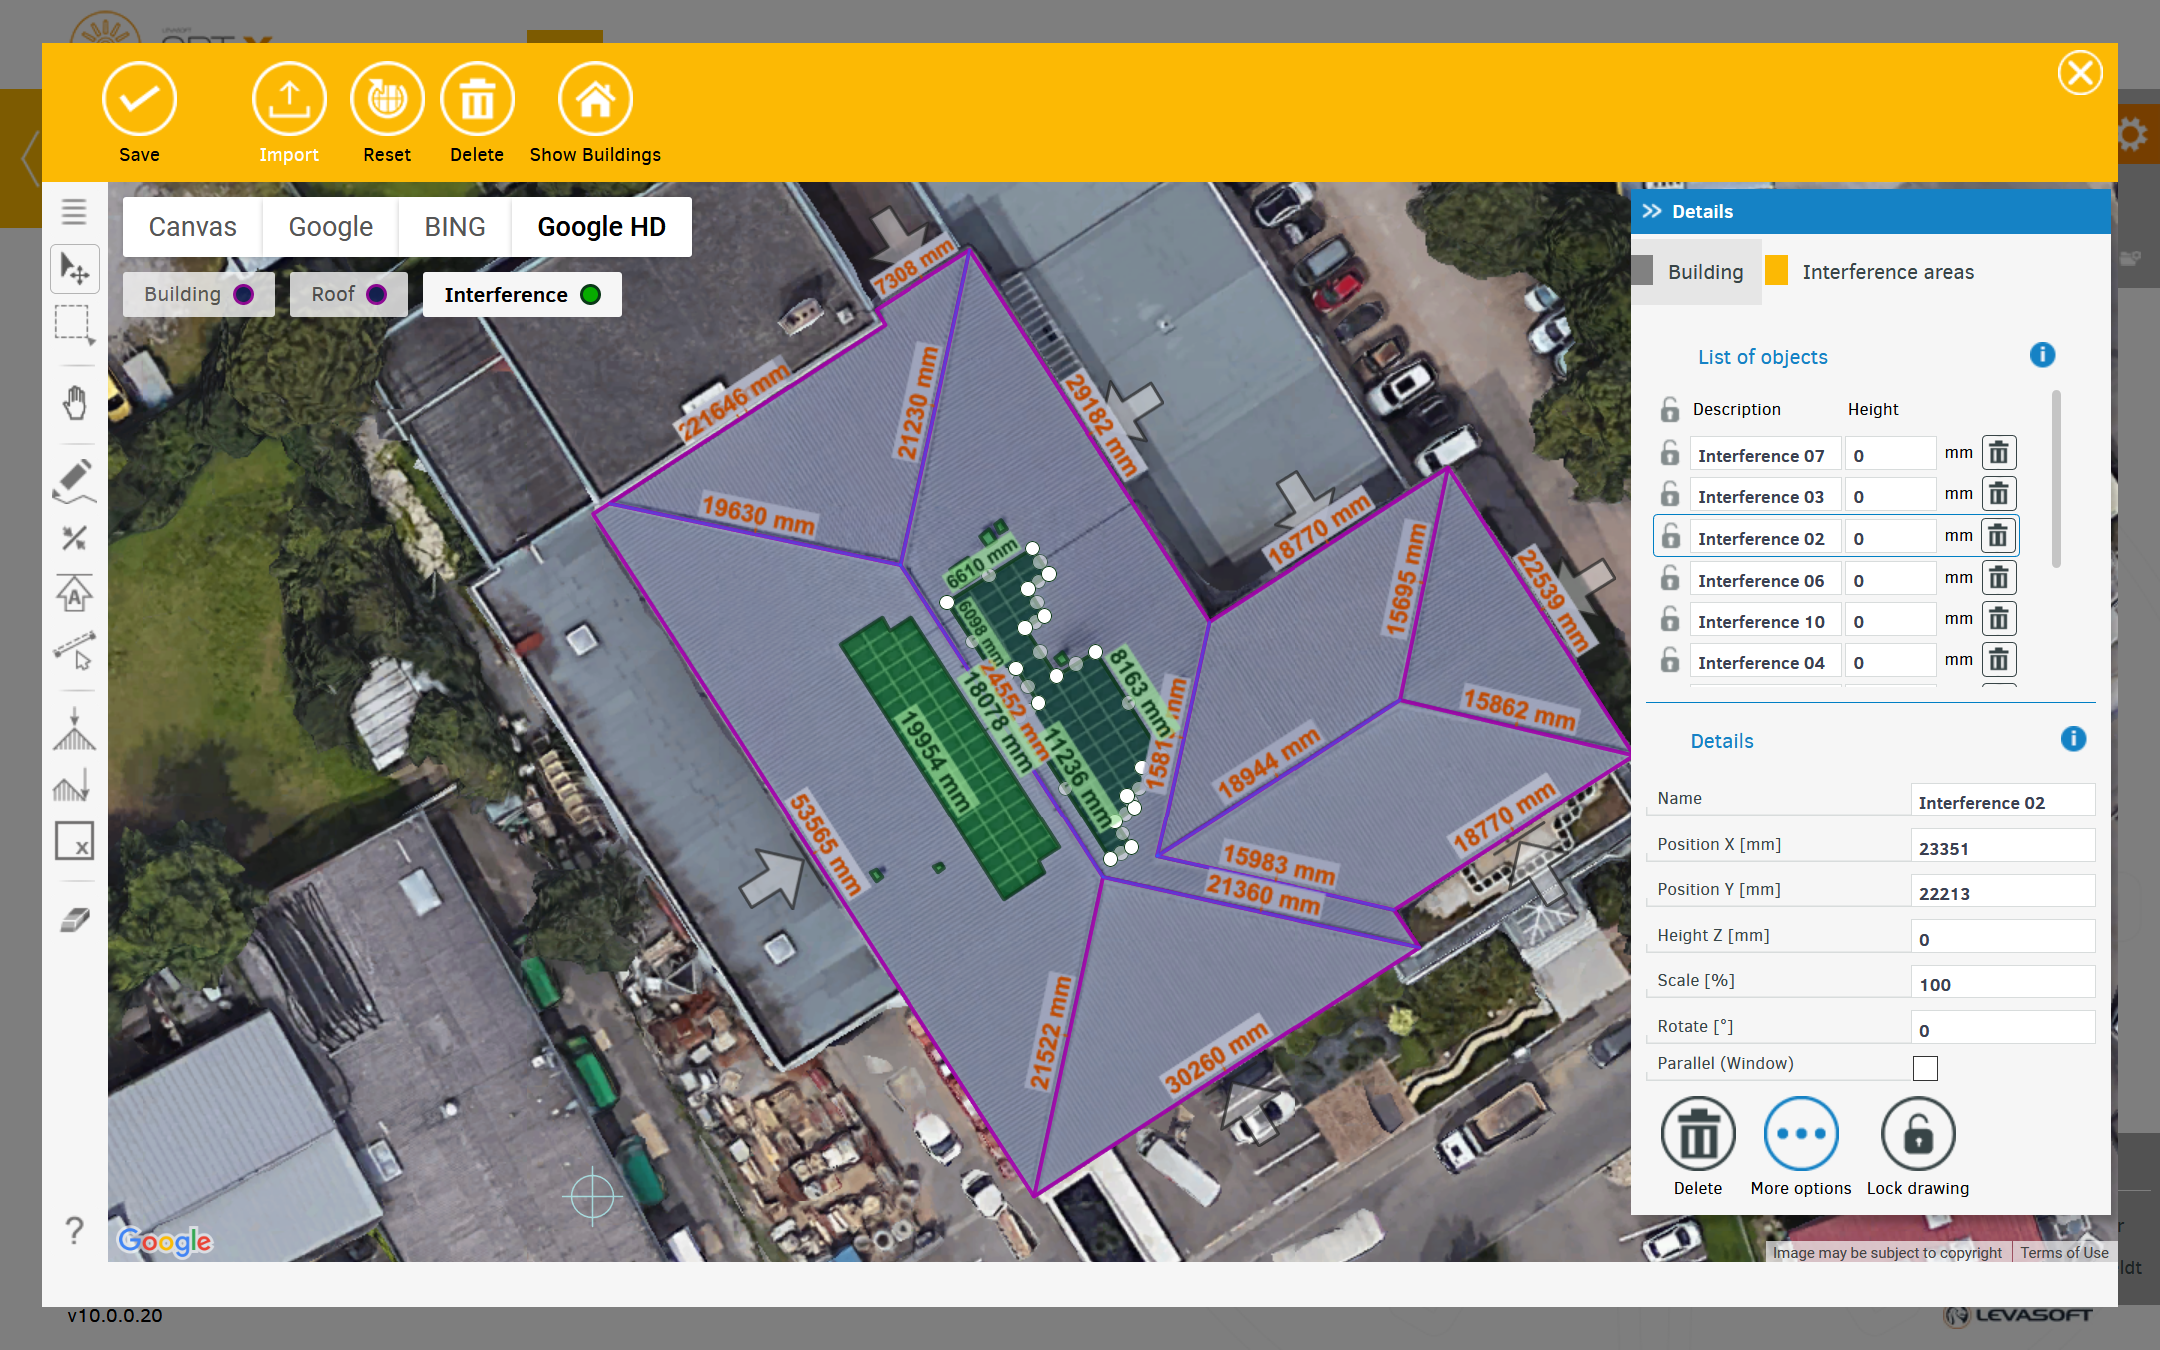
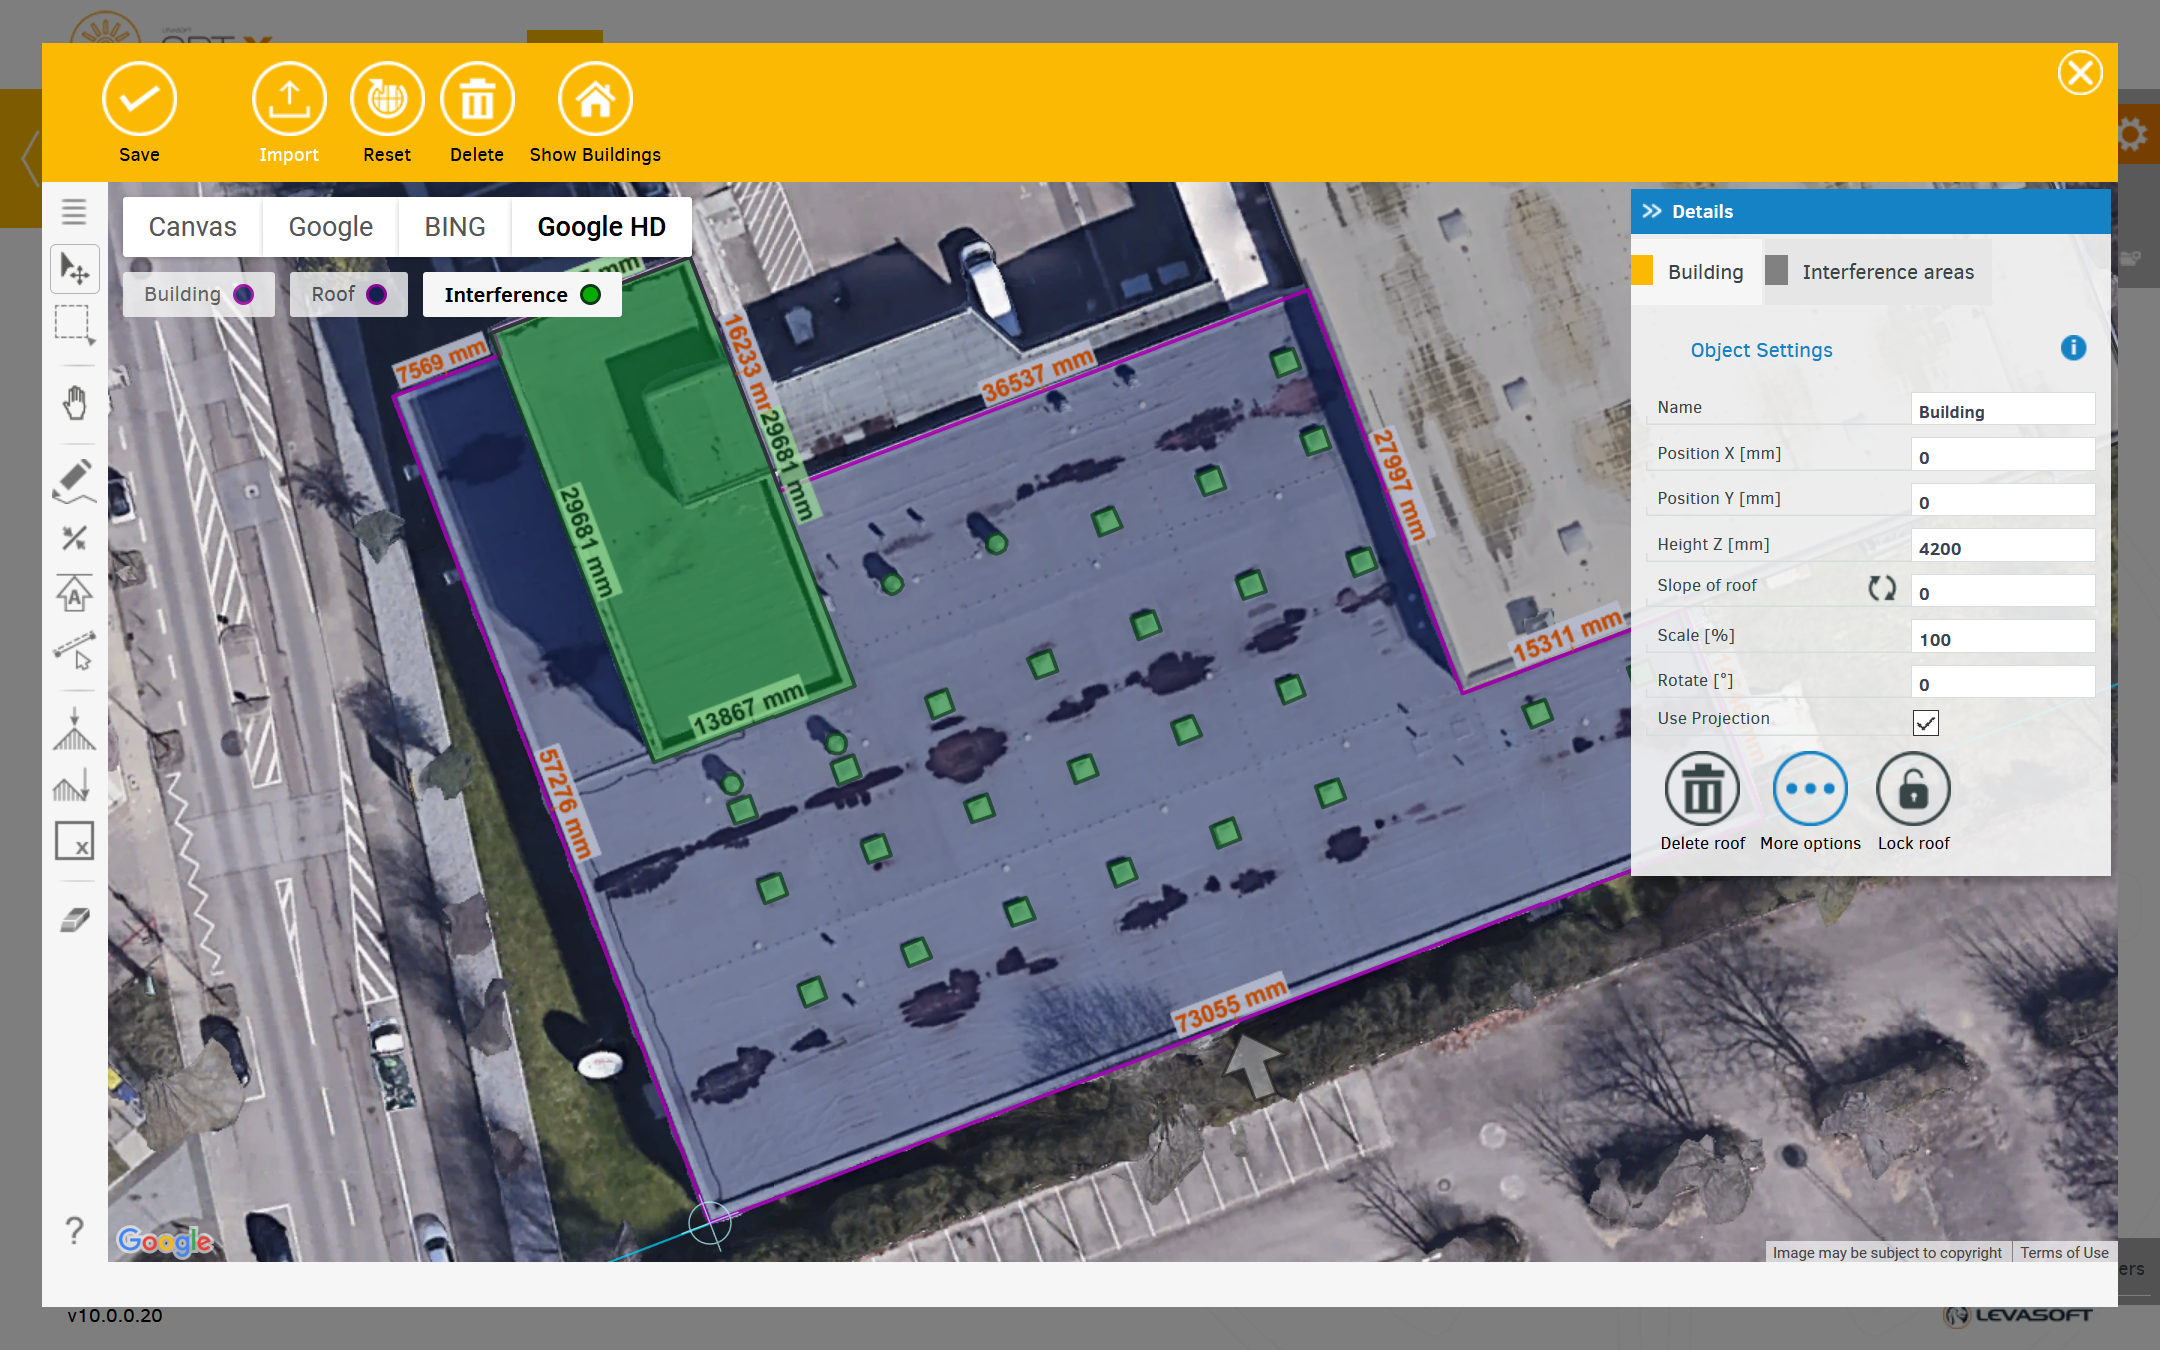
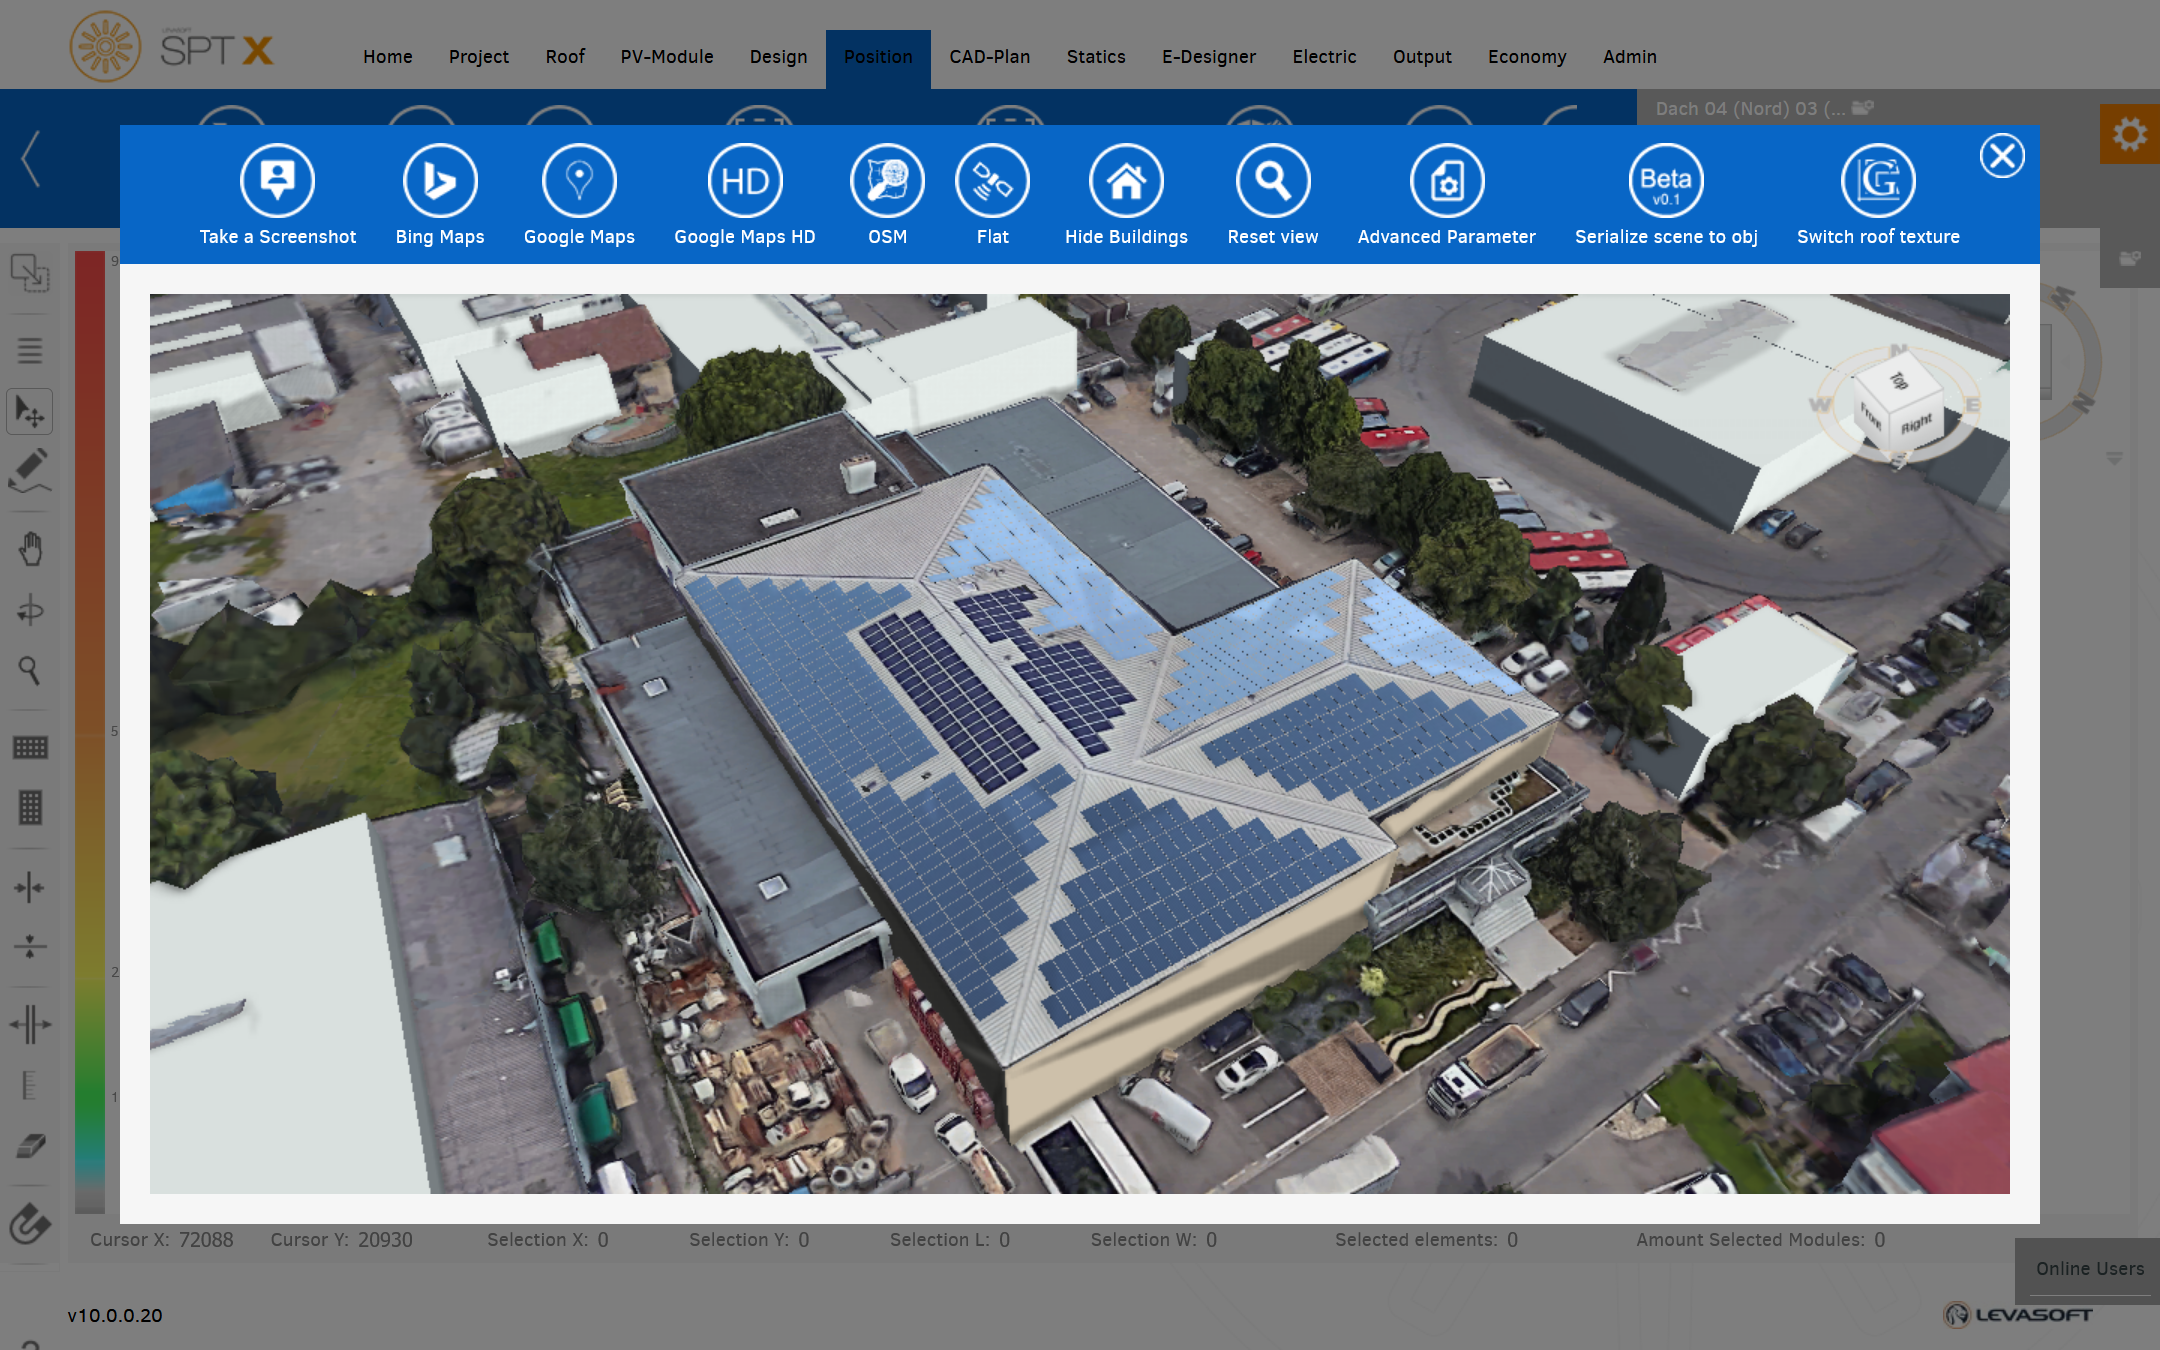
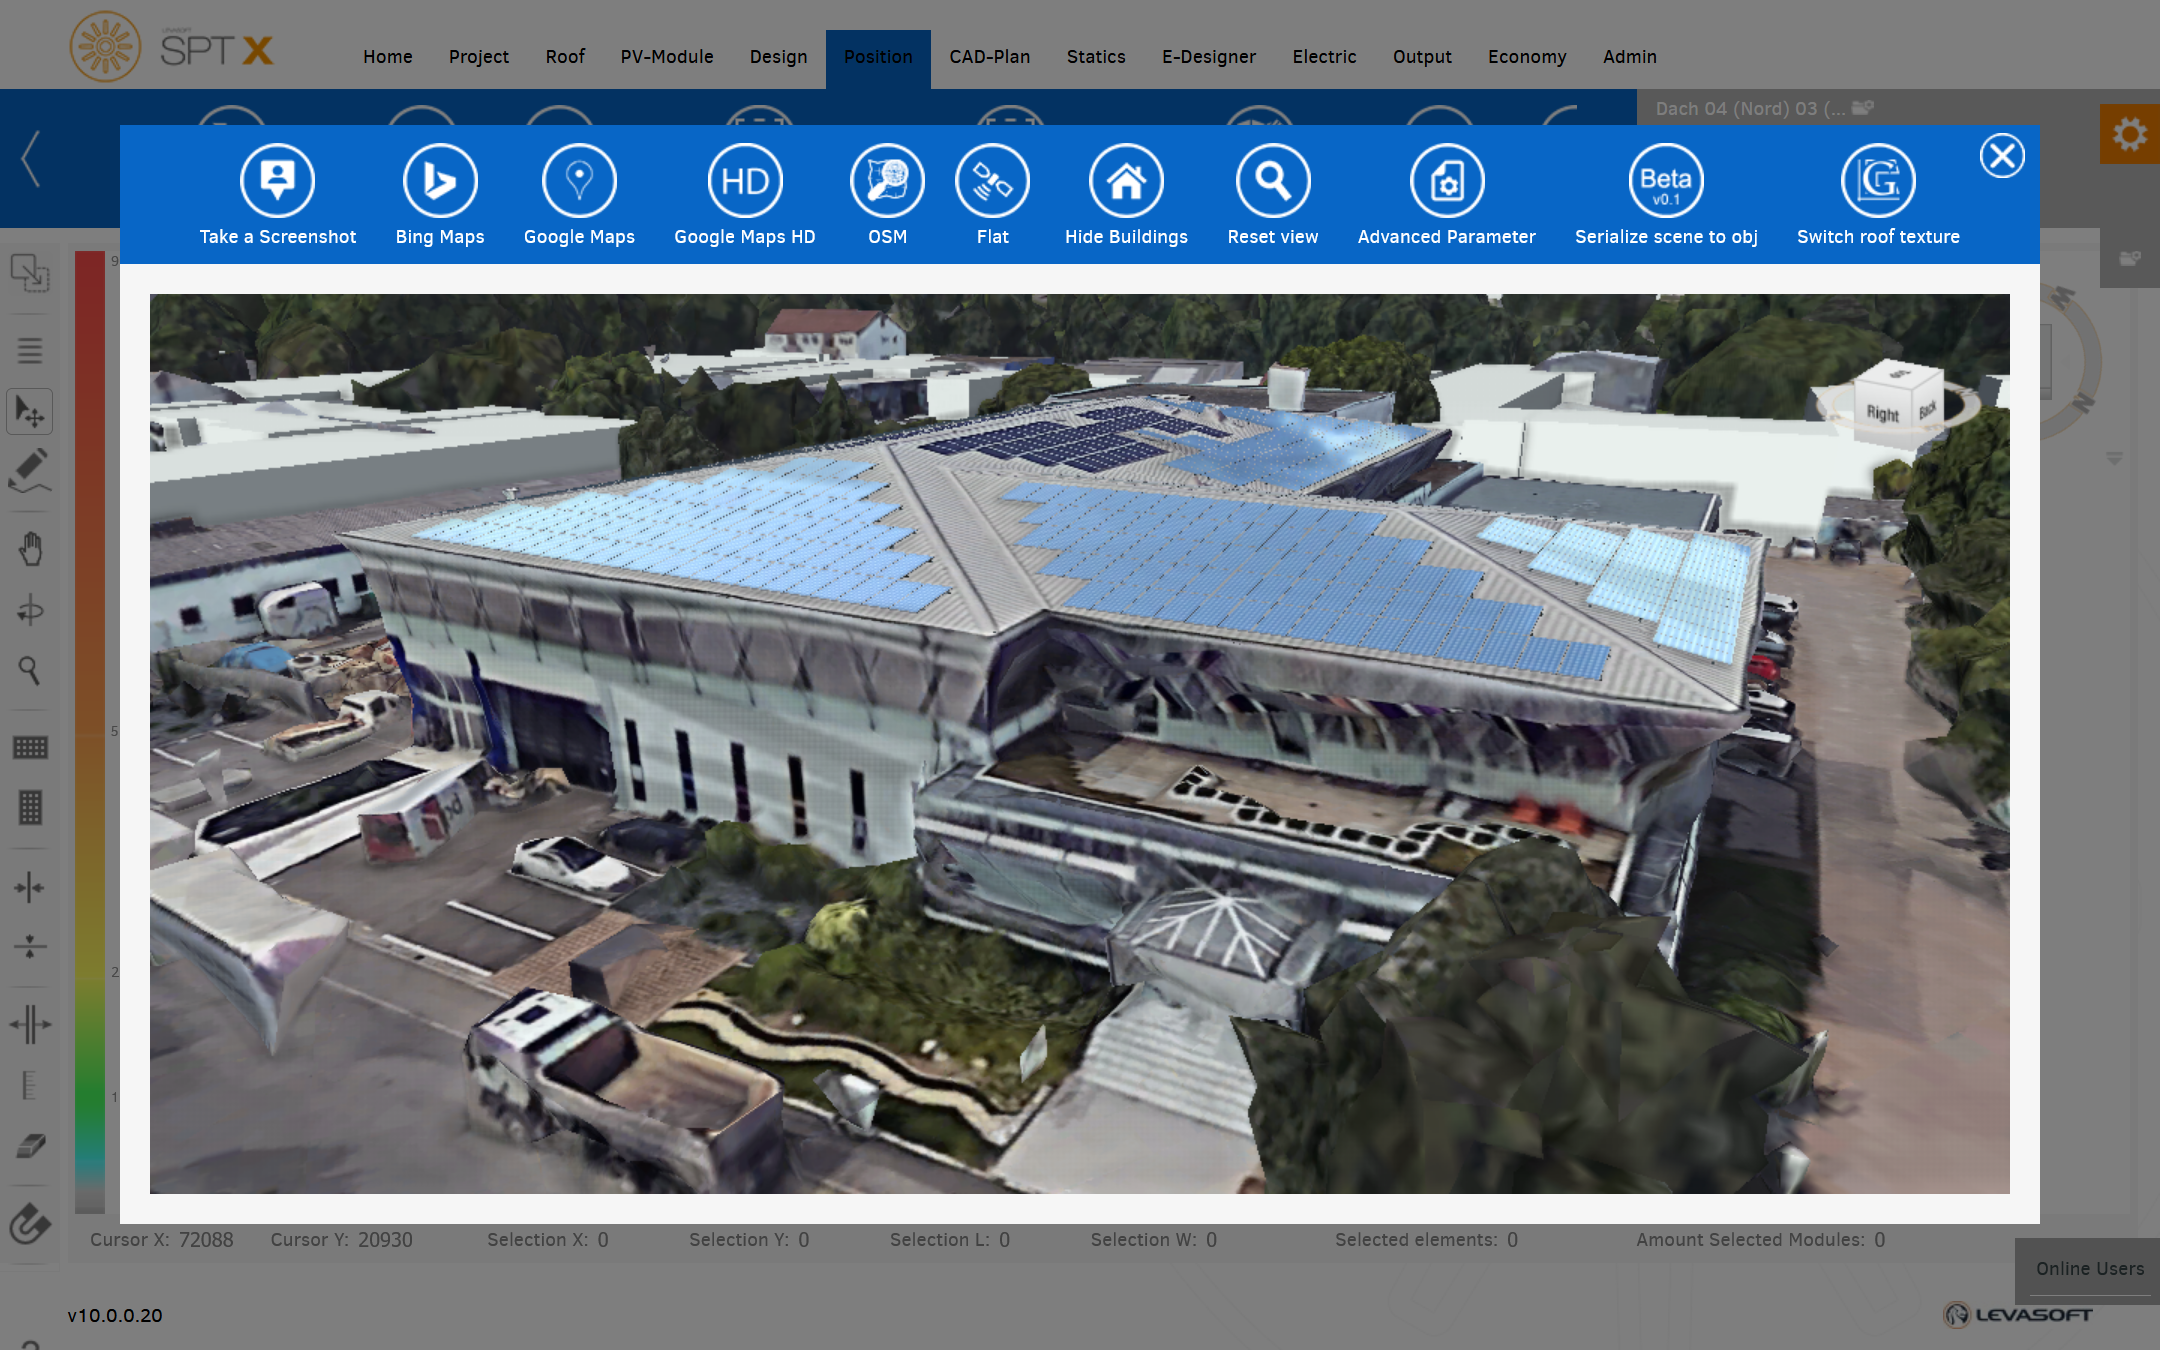
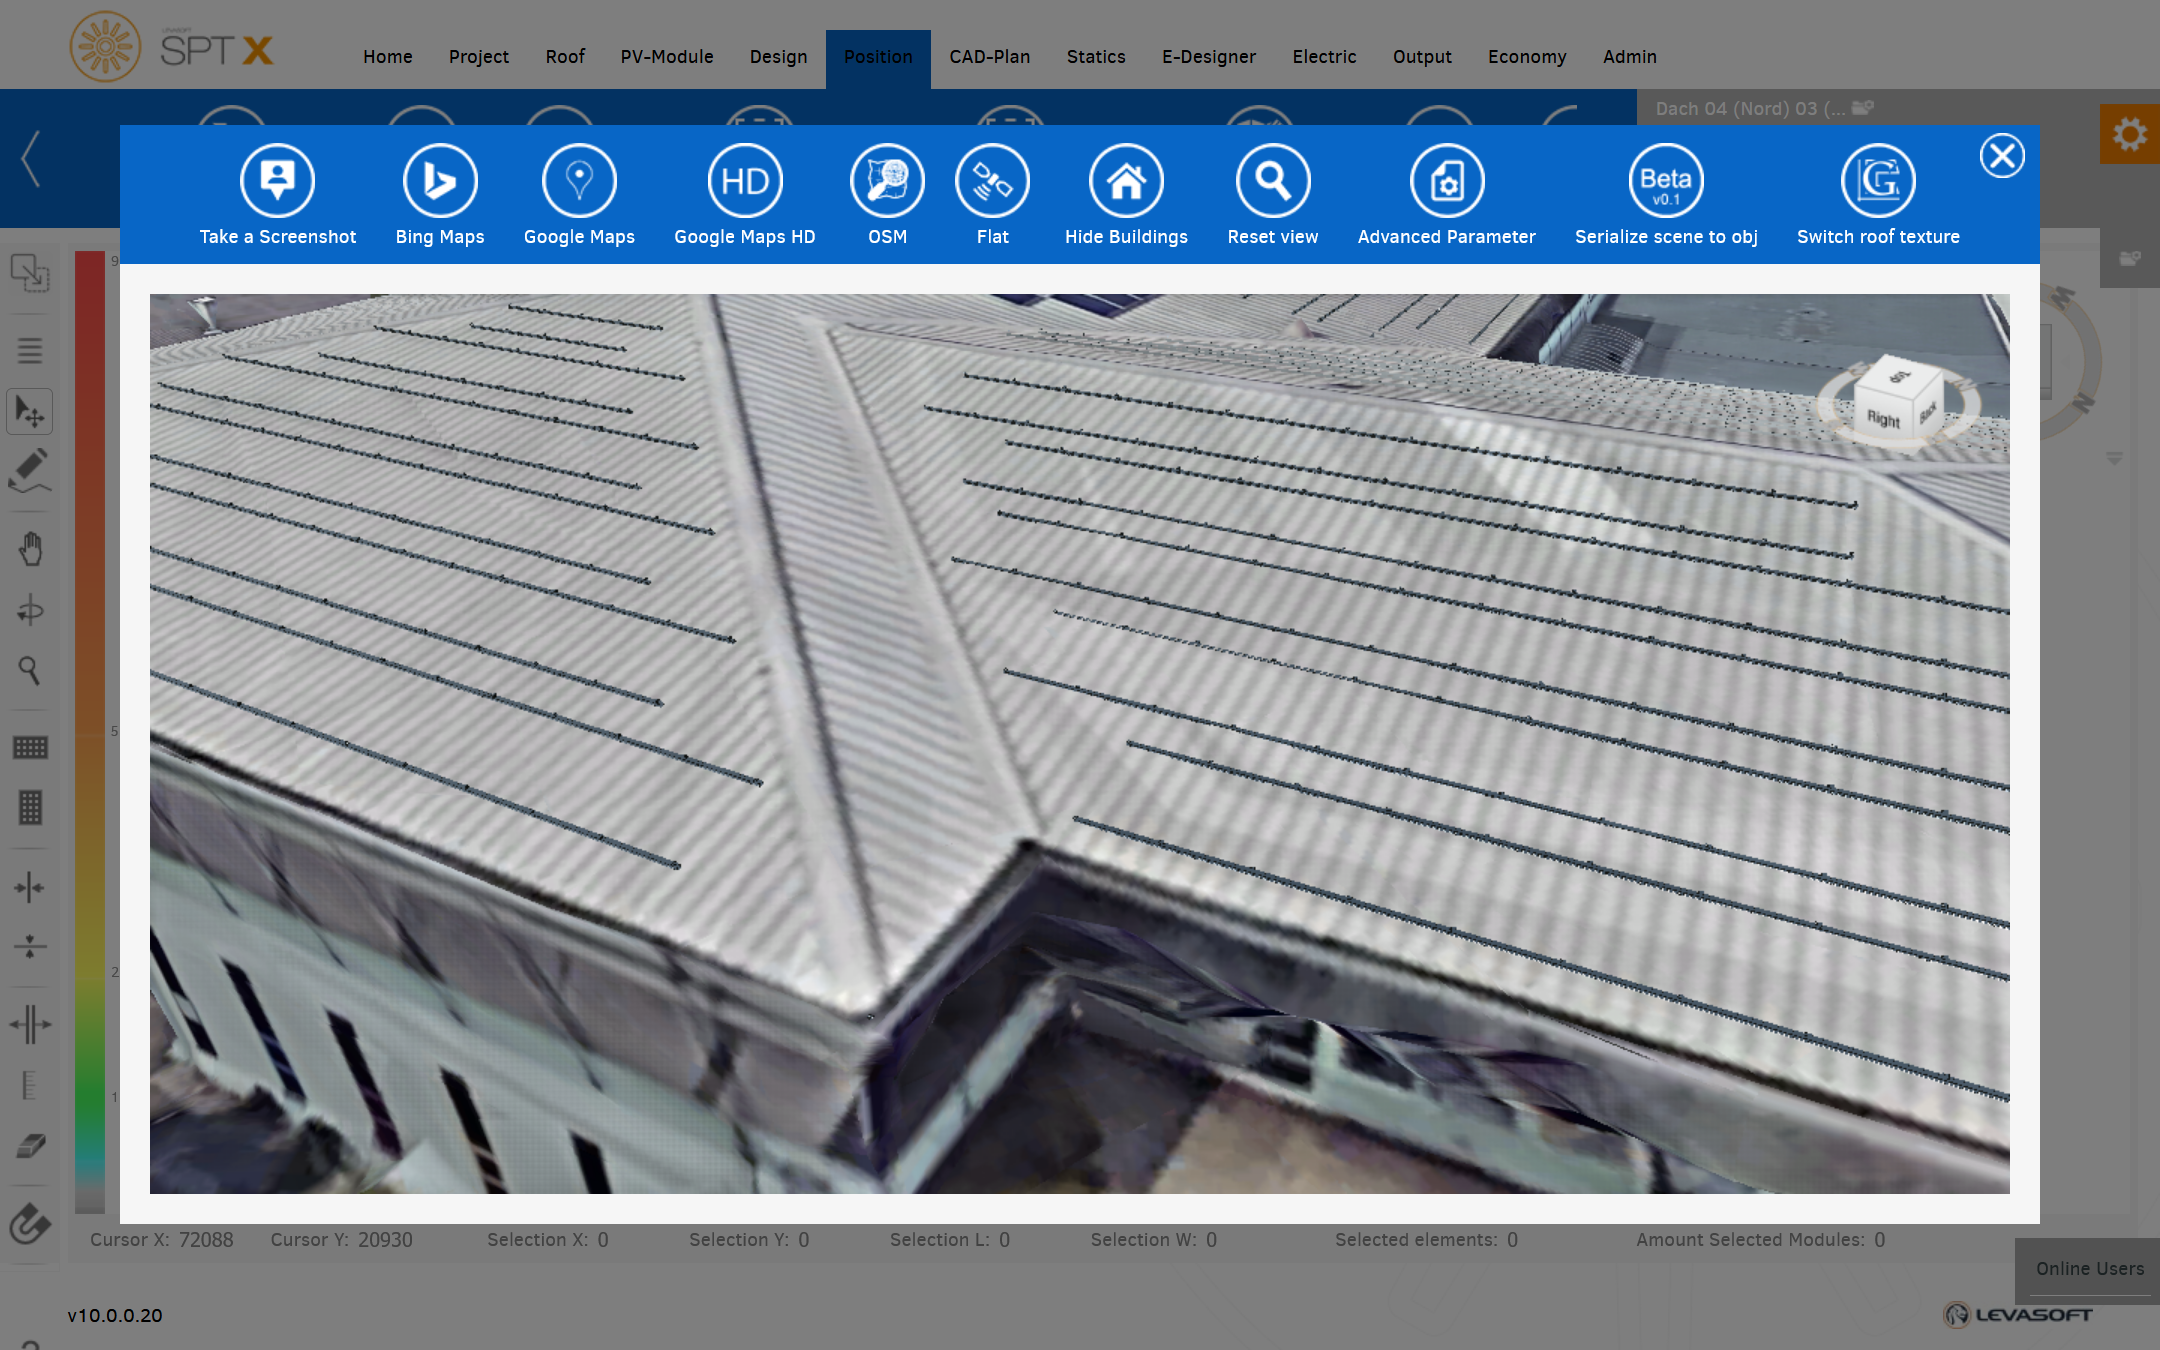
Here you can sign the building using satellite images or imported technical drawings.
If you are working with at least one hilsline (light blue), all objects are aligned with that guide when you draw.
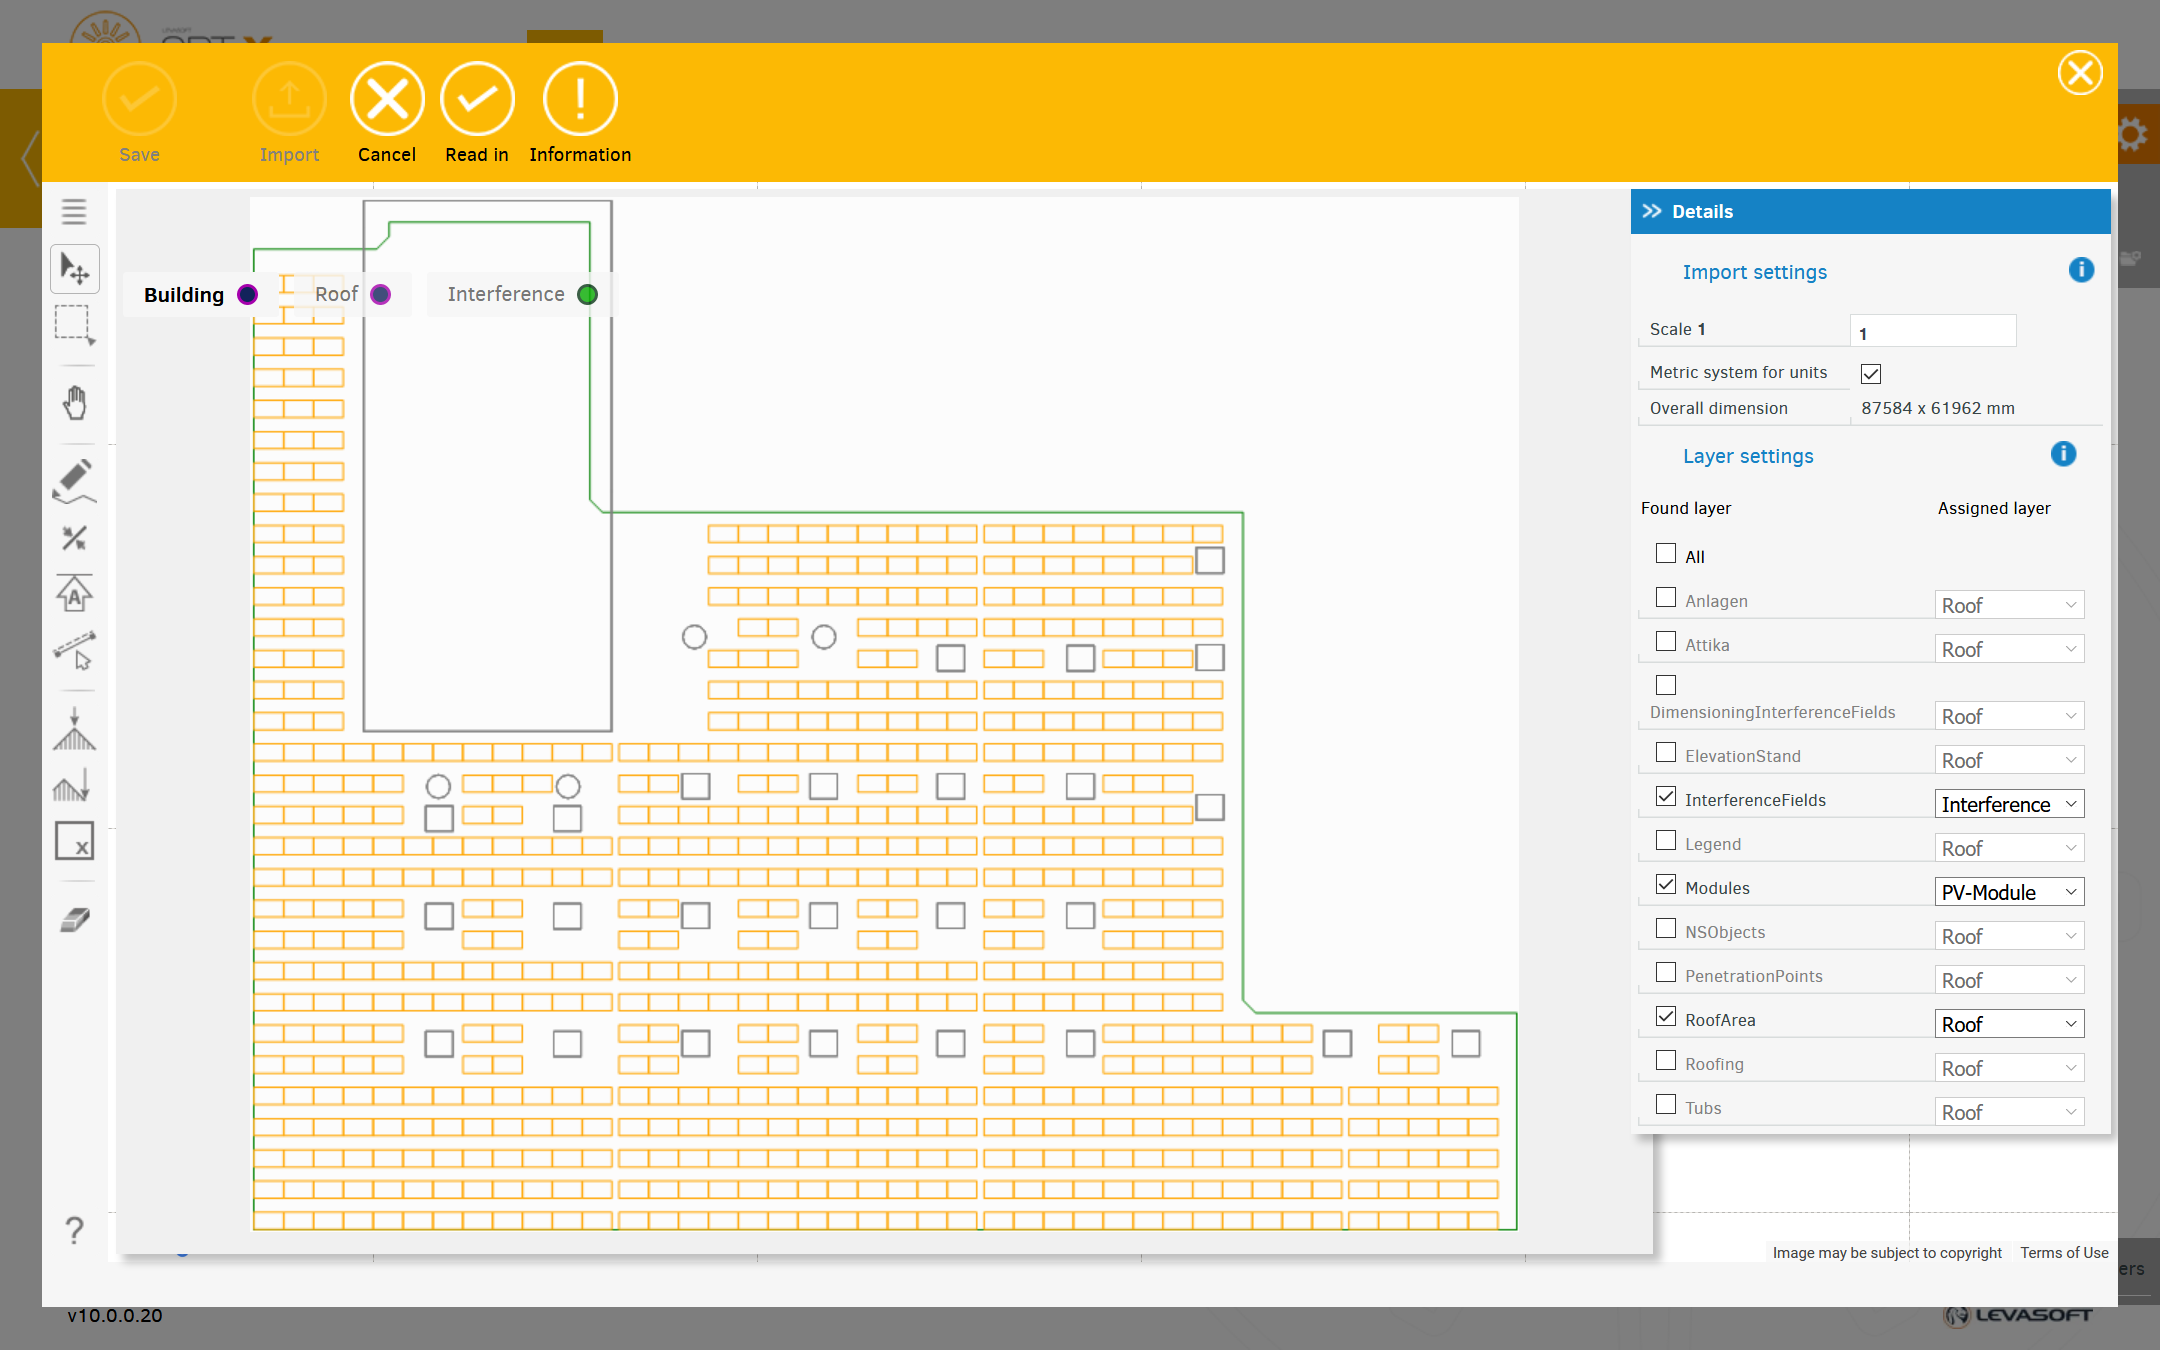
For flat roofs, it is possible to import existing CAD data (DWG or DXF).
We recognize the layers they contain, and you only need to map the identified layers to the character layers in the tool.
So what is roof outline, what are interference surfaces and what level are modules.
You will find some things already pre-filled.
The dialogs close automatically when all data is present.
You will find some things already pre-filled.
The dialogs close automatically when all data is present.
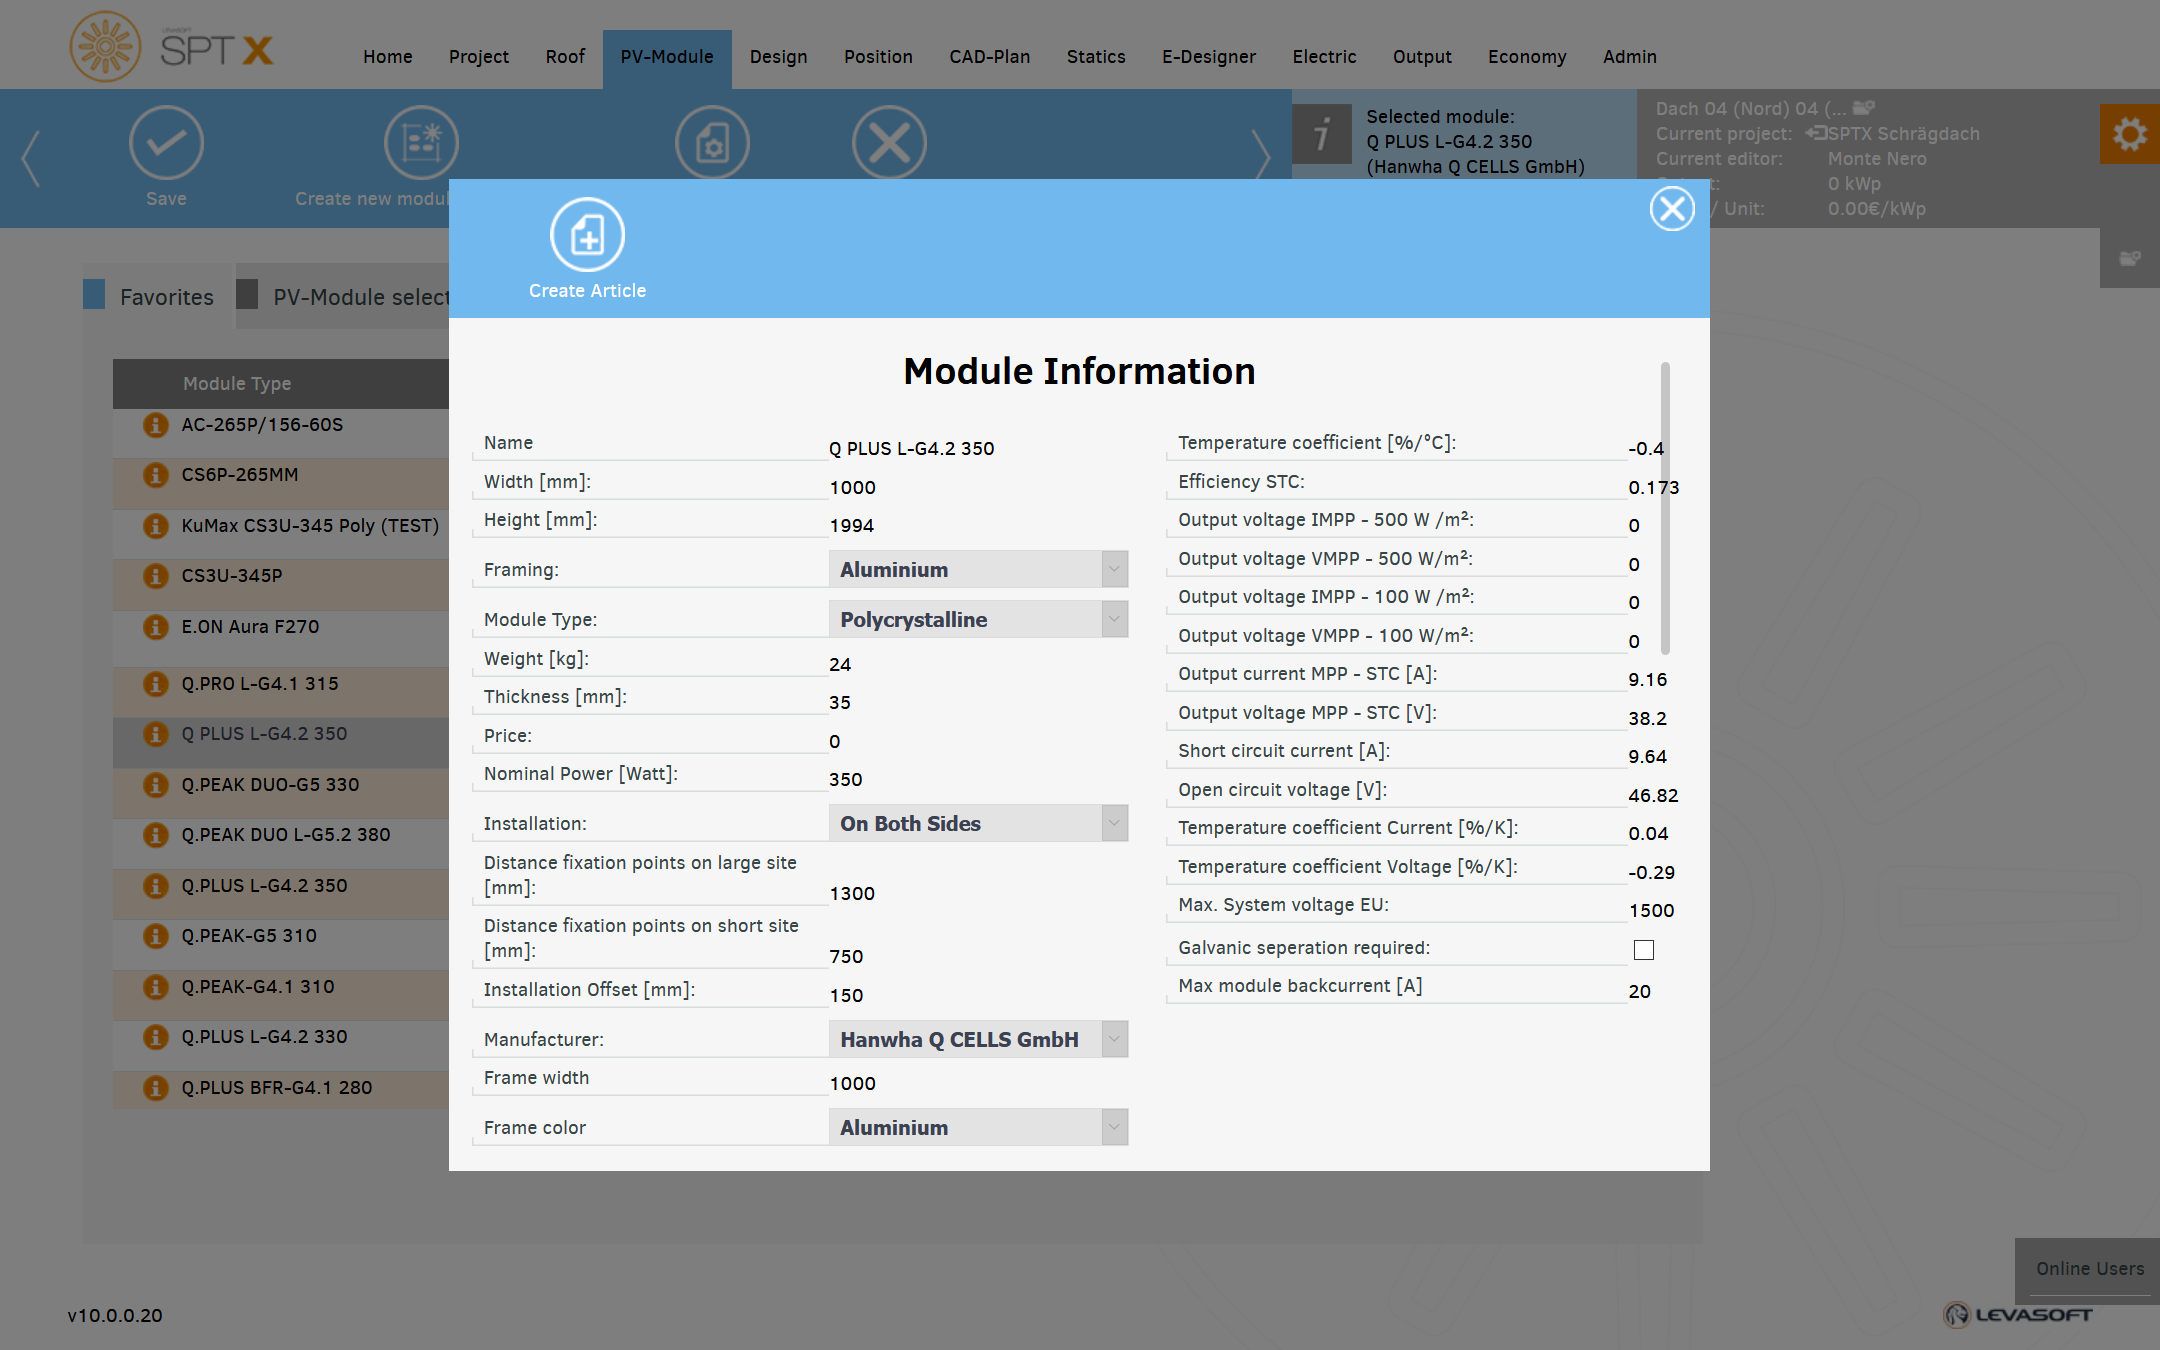
Your favorites will be updated automatically.
Every time you use a module that you didn't have previously used, we'll automatically add that module to your favorites.
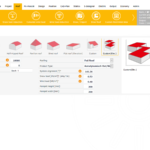
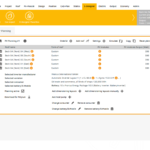
The list of modules can be sorted by their column headers.
In the "PV Module Selection" tab, you can view the listed modules per manufacturer.
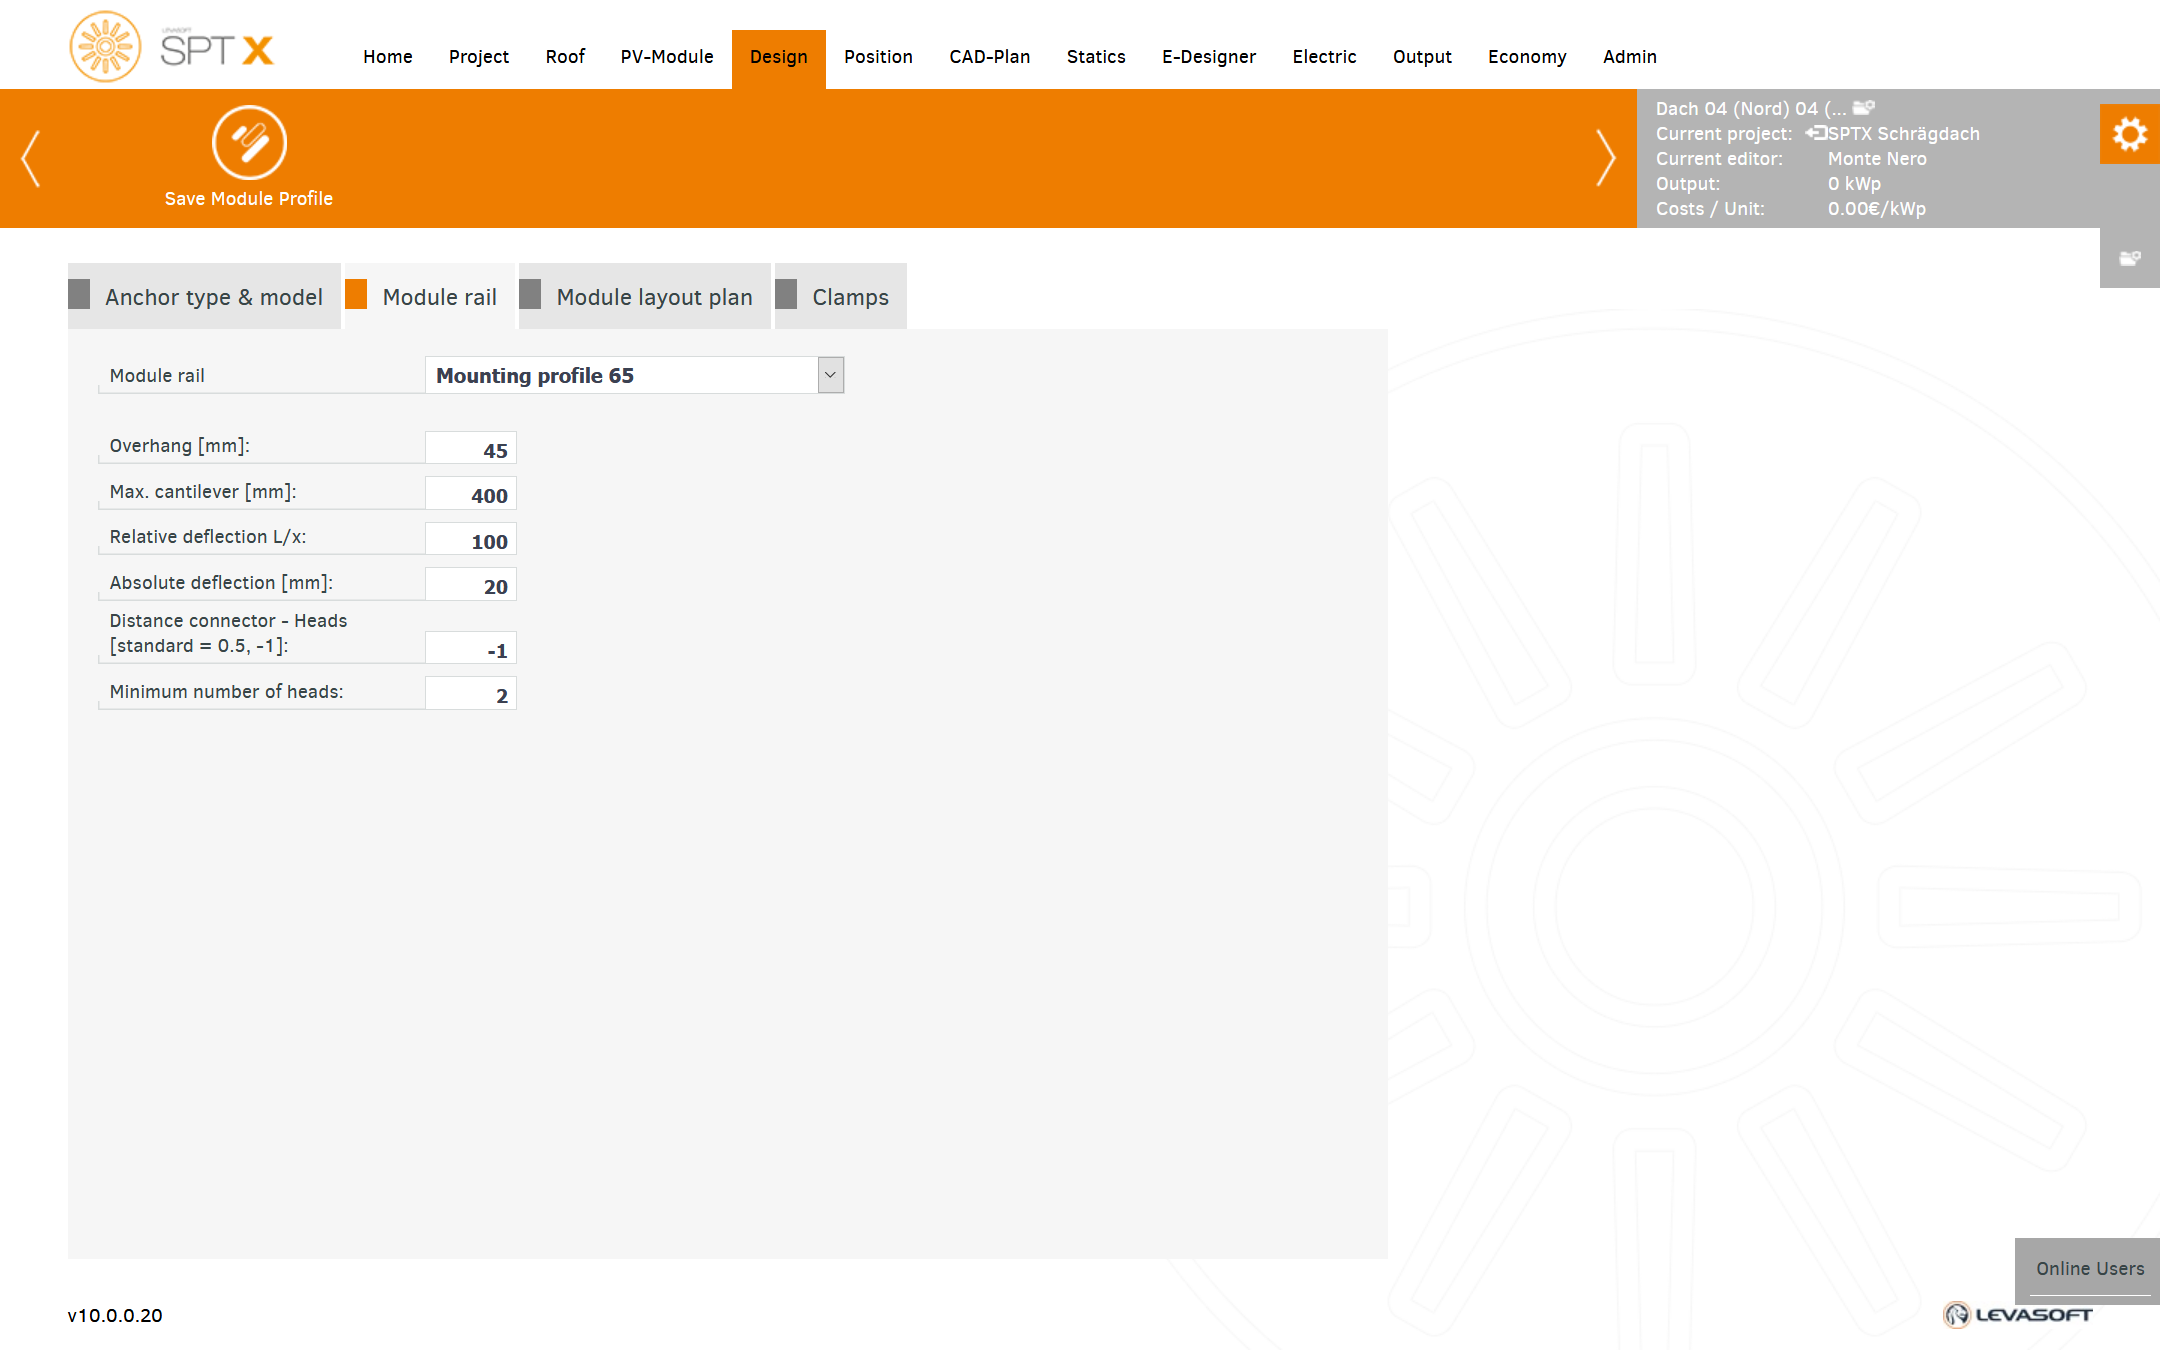
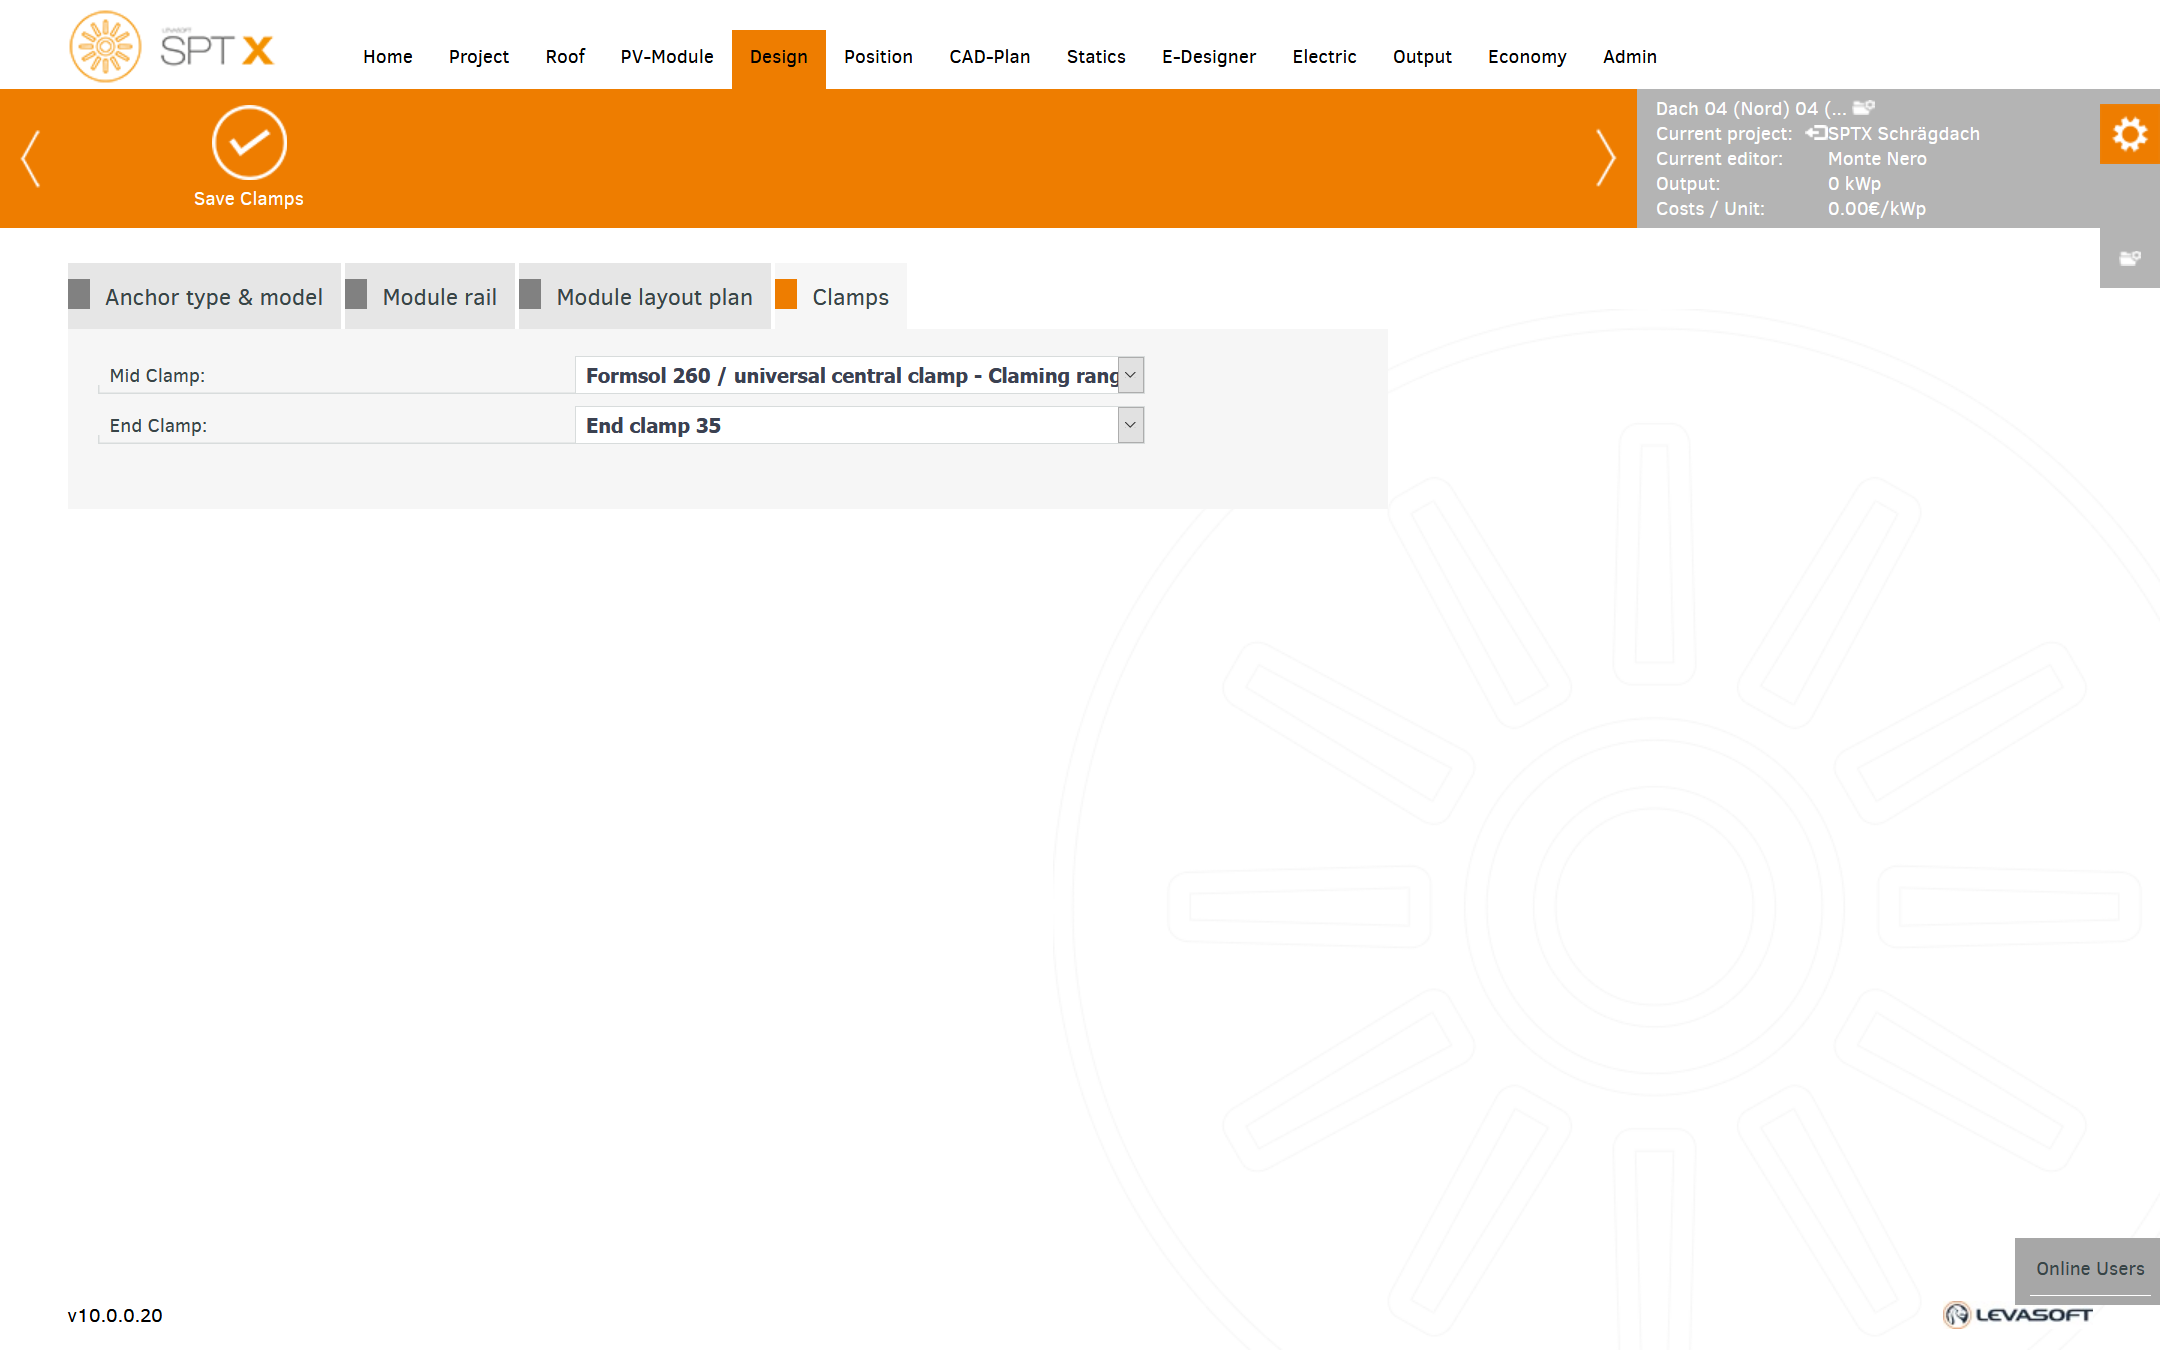
Depending on the pre-selected roofing, the appropriate components are listed.
If you define which components are offered by default, this speeds up the initial design enormously.
This applies to fixed and rails. Clamps are always selected automatically and appropriately to the module.
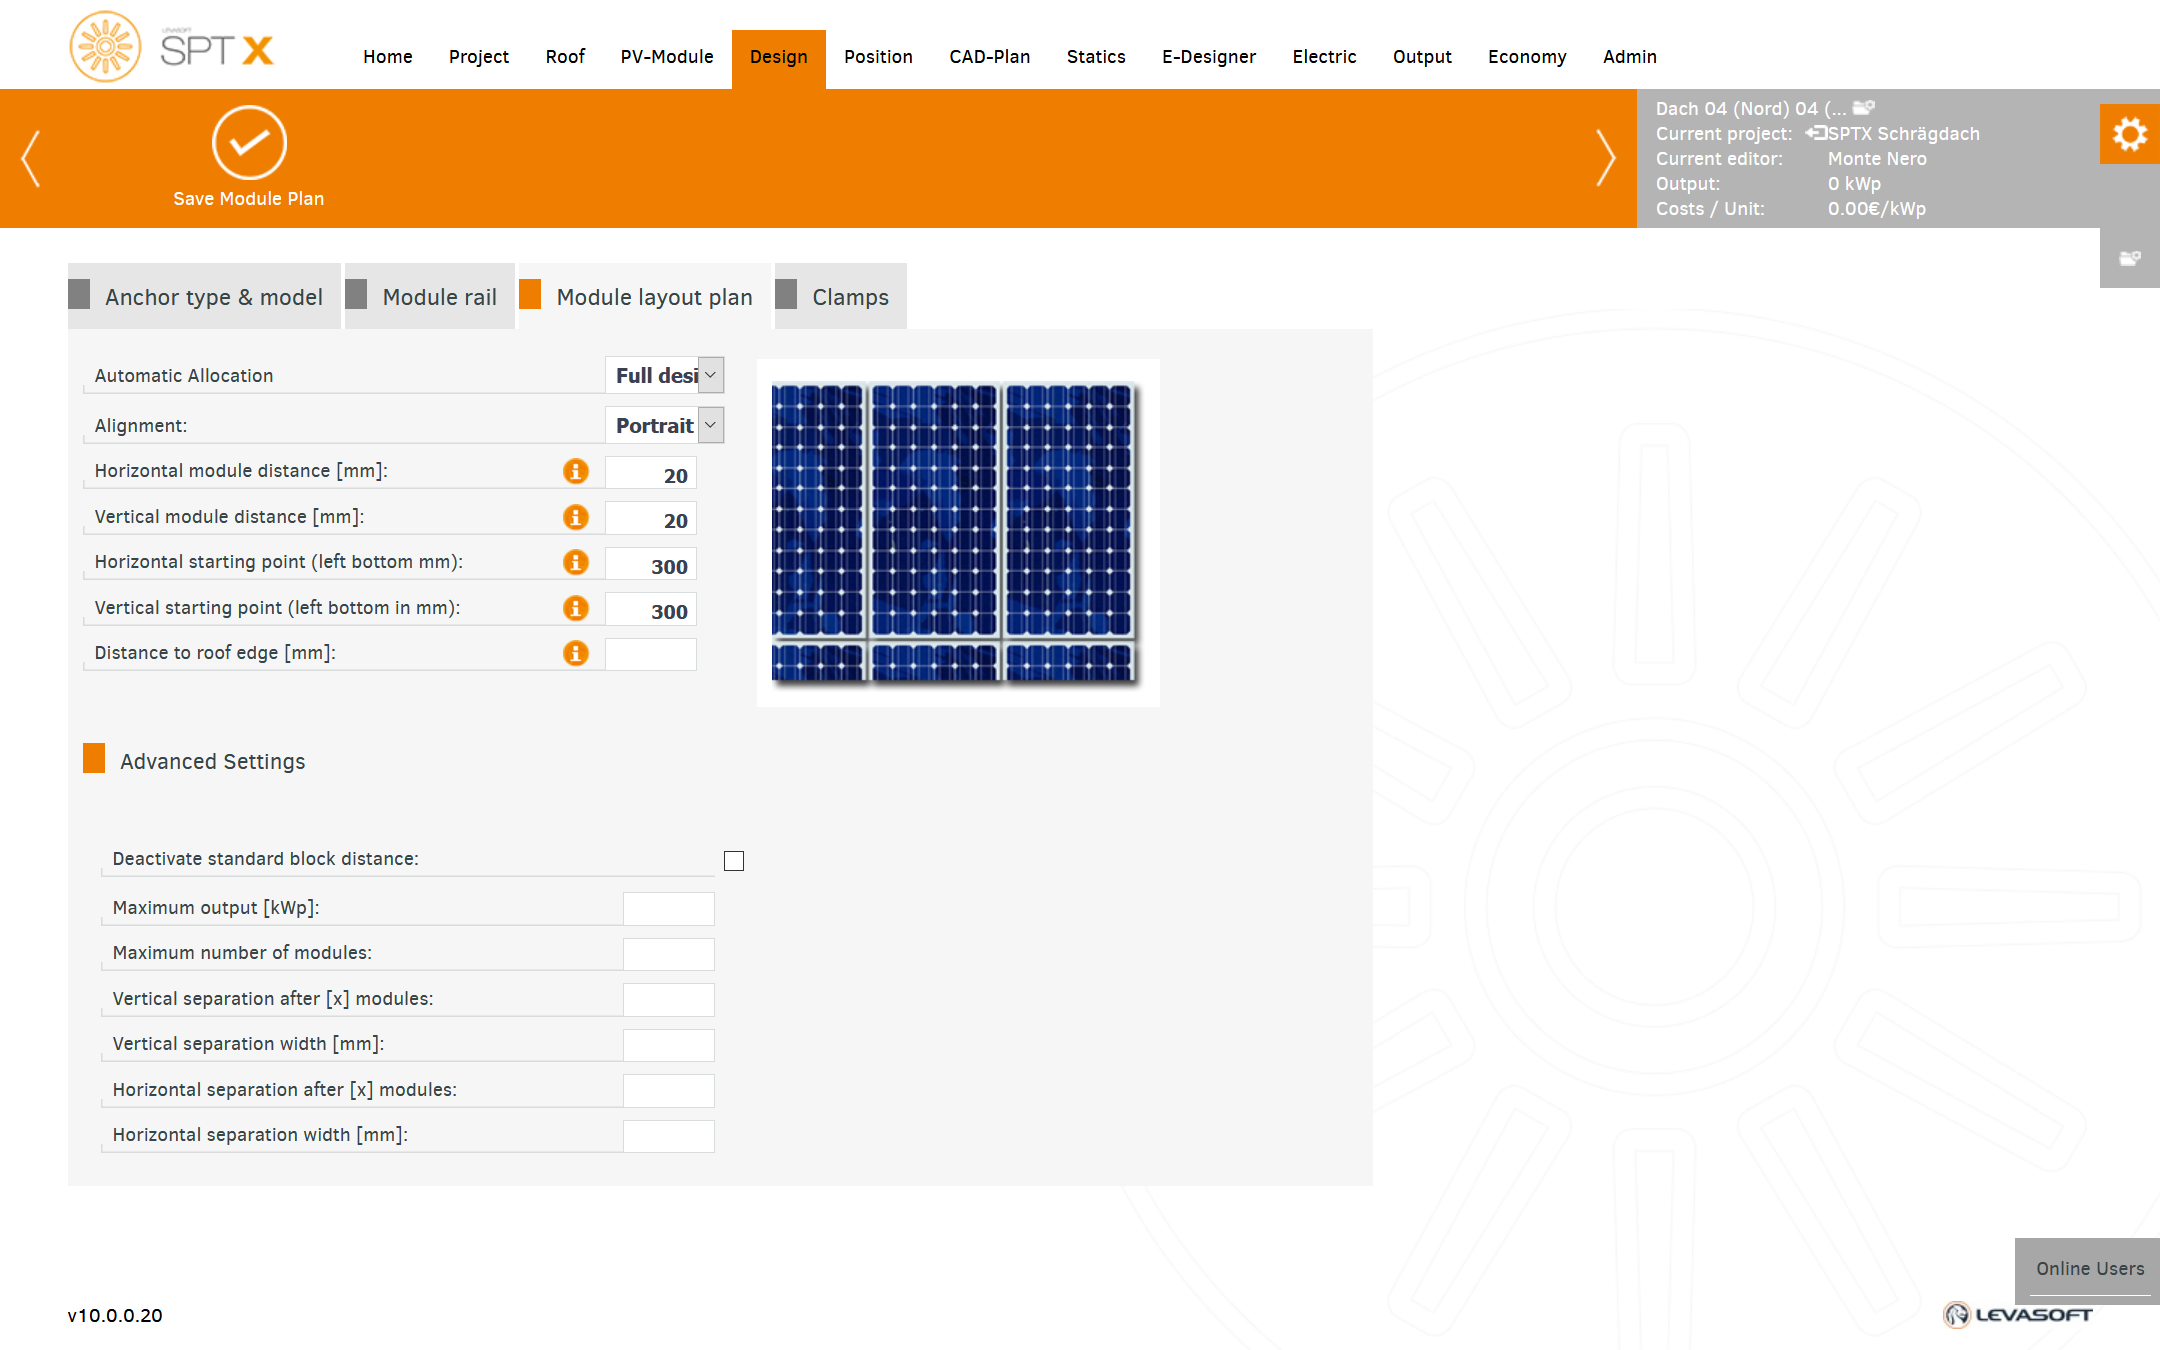
In "Module Layout Plan" you can adjust the framework conditions of the interpretation.
(distance to the edge of the roof, maximum power, separation after a certain number of modules or rows, etc.)
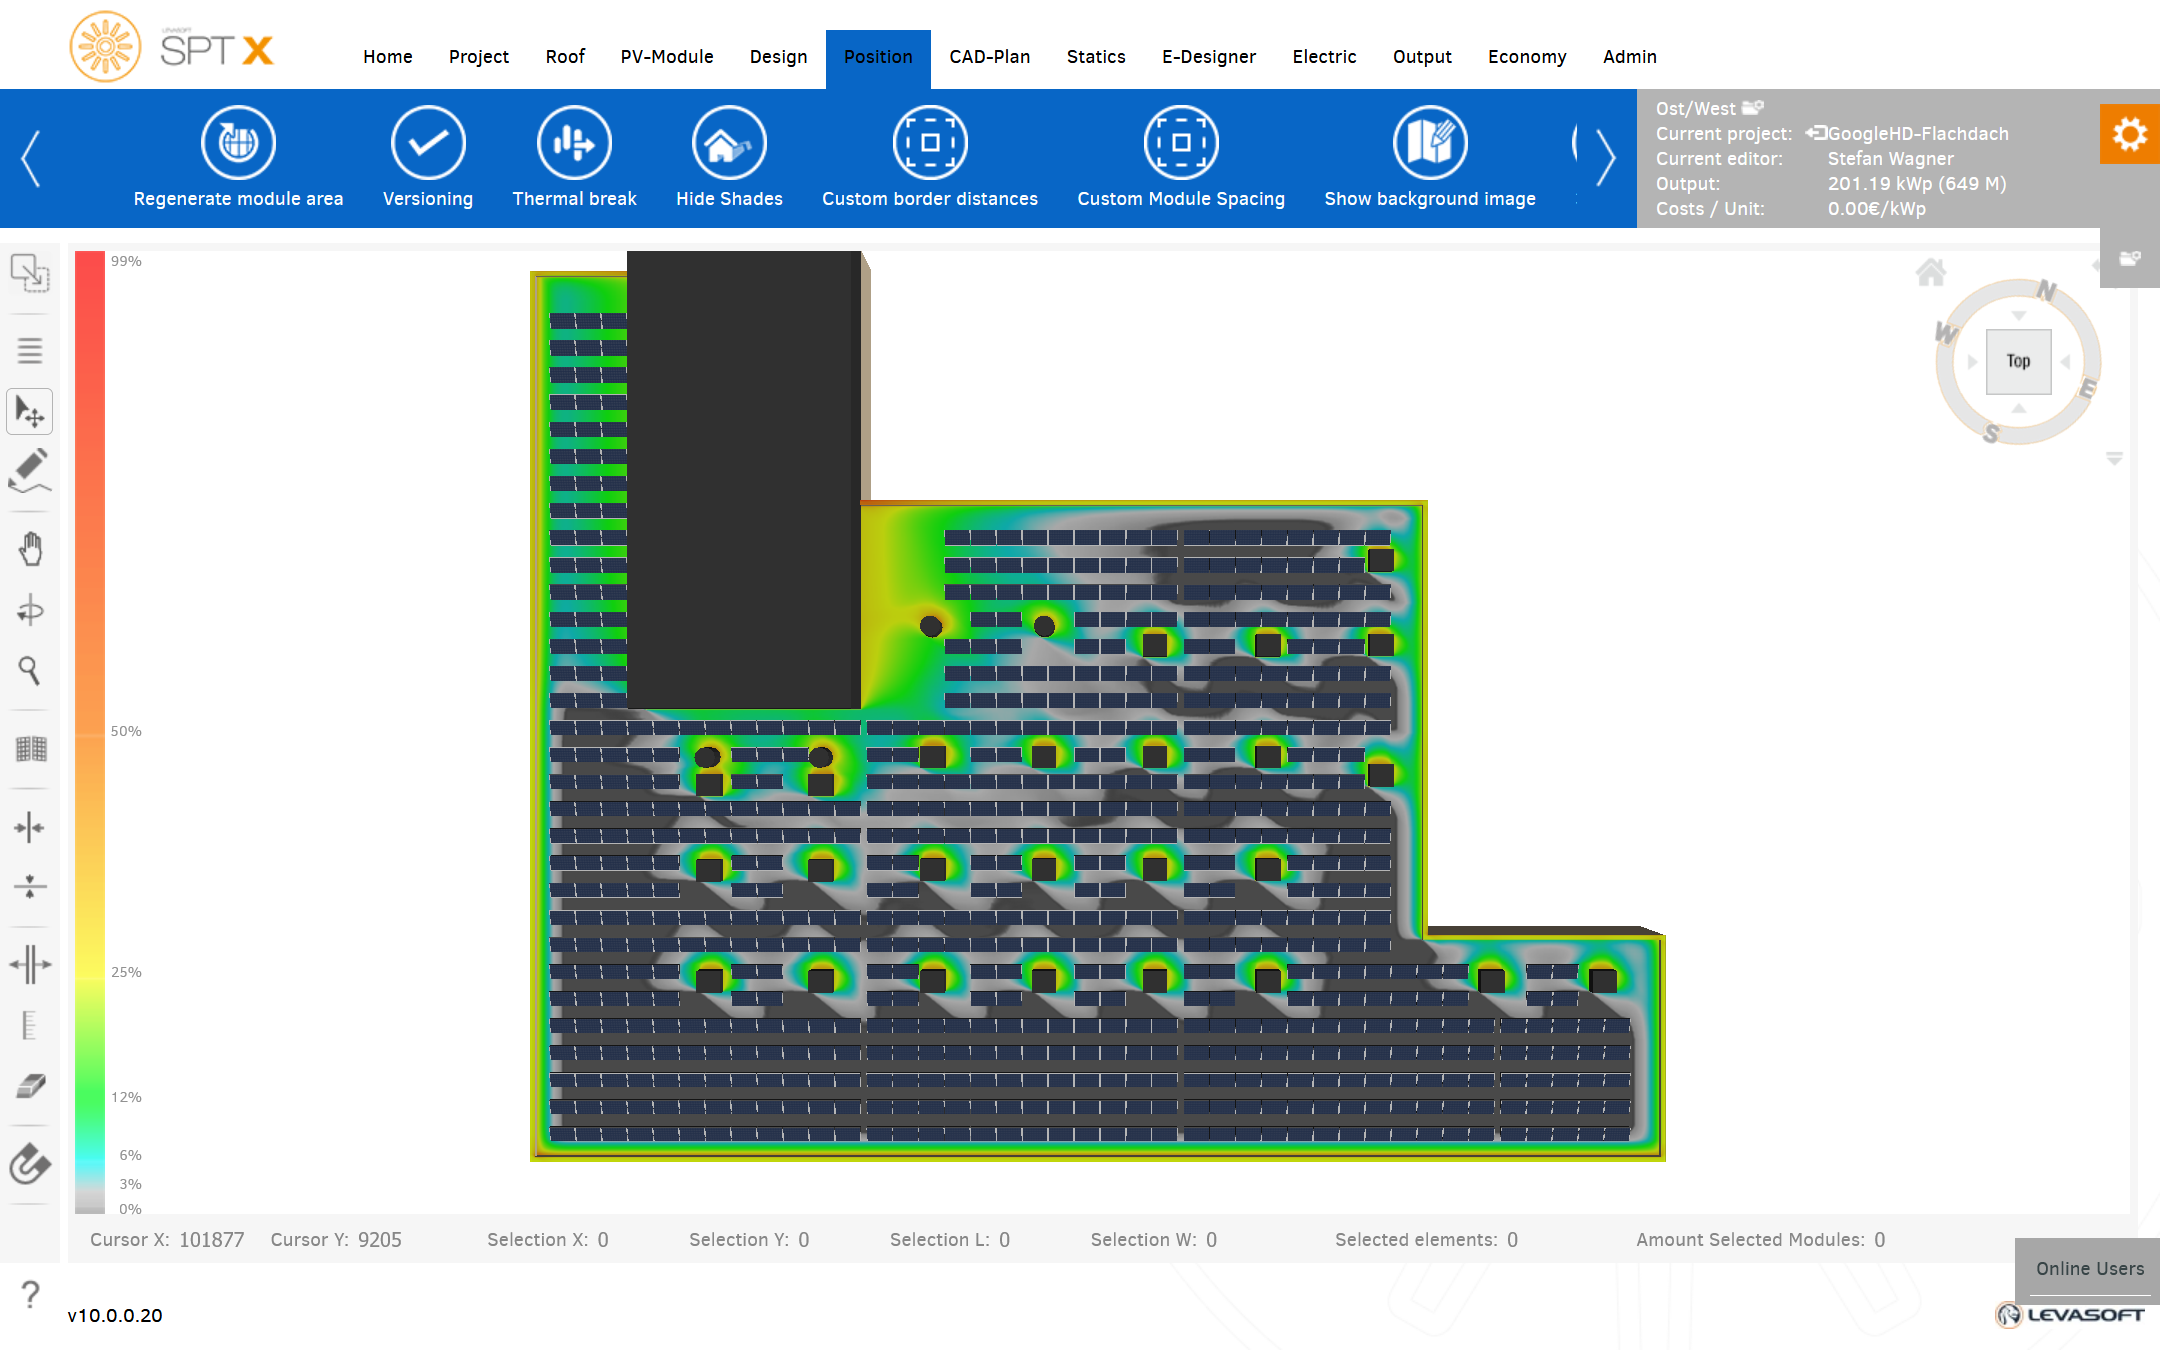
Modules are only placed there - or can only be placed by you where the characteristics of the selected mounting system can be detected.
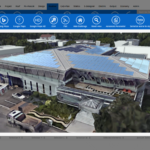
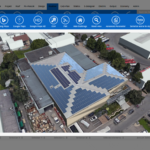
The toolbar provides you with comprehensive tools for editing the design.
This presentation is very helpful for your customers because your customers will see what the finished project will look like after installation.
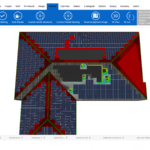
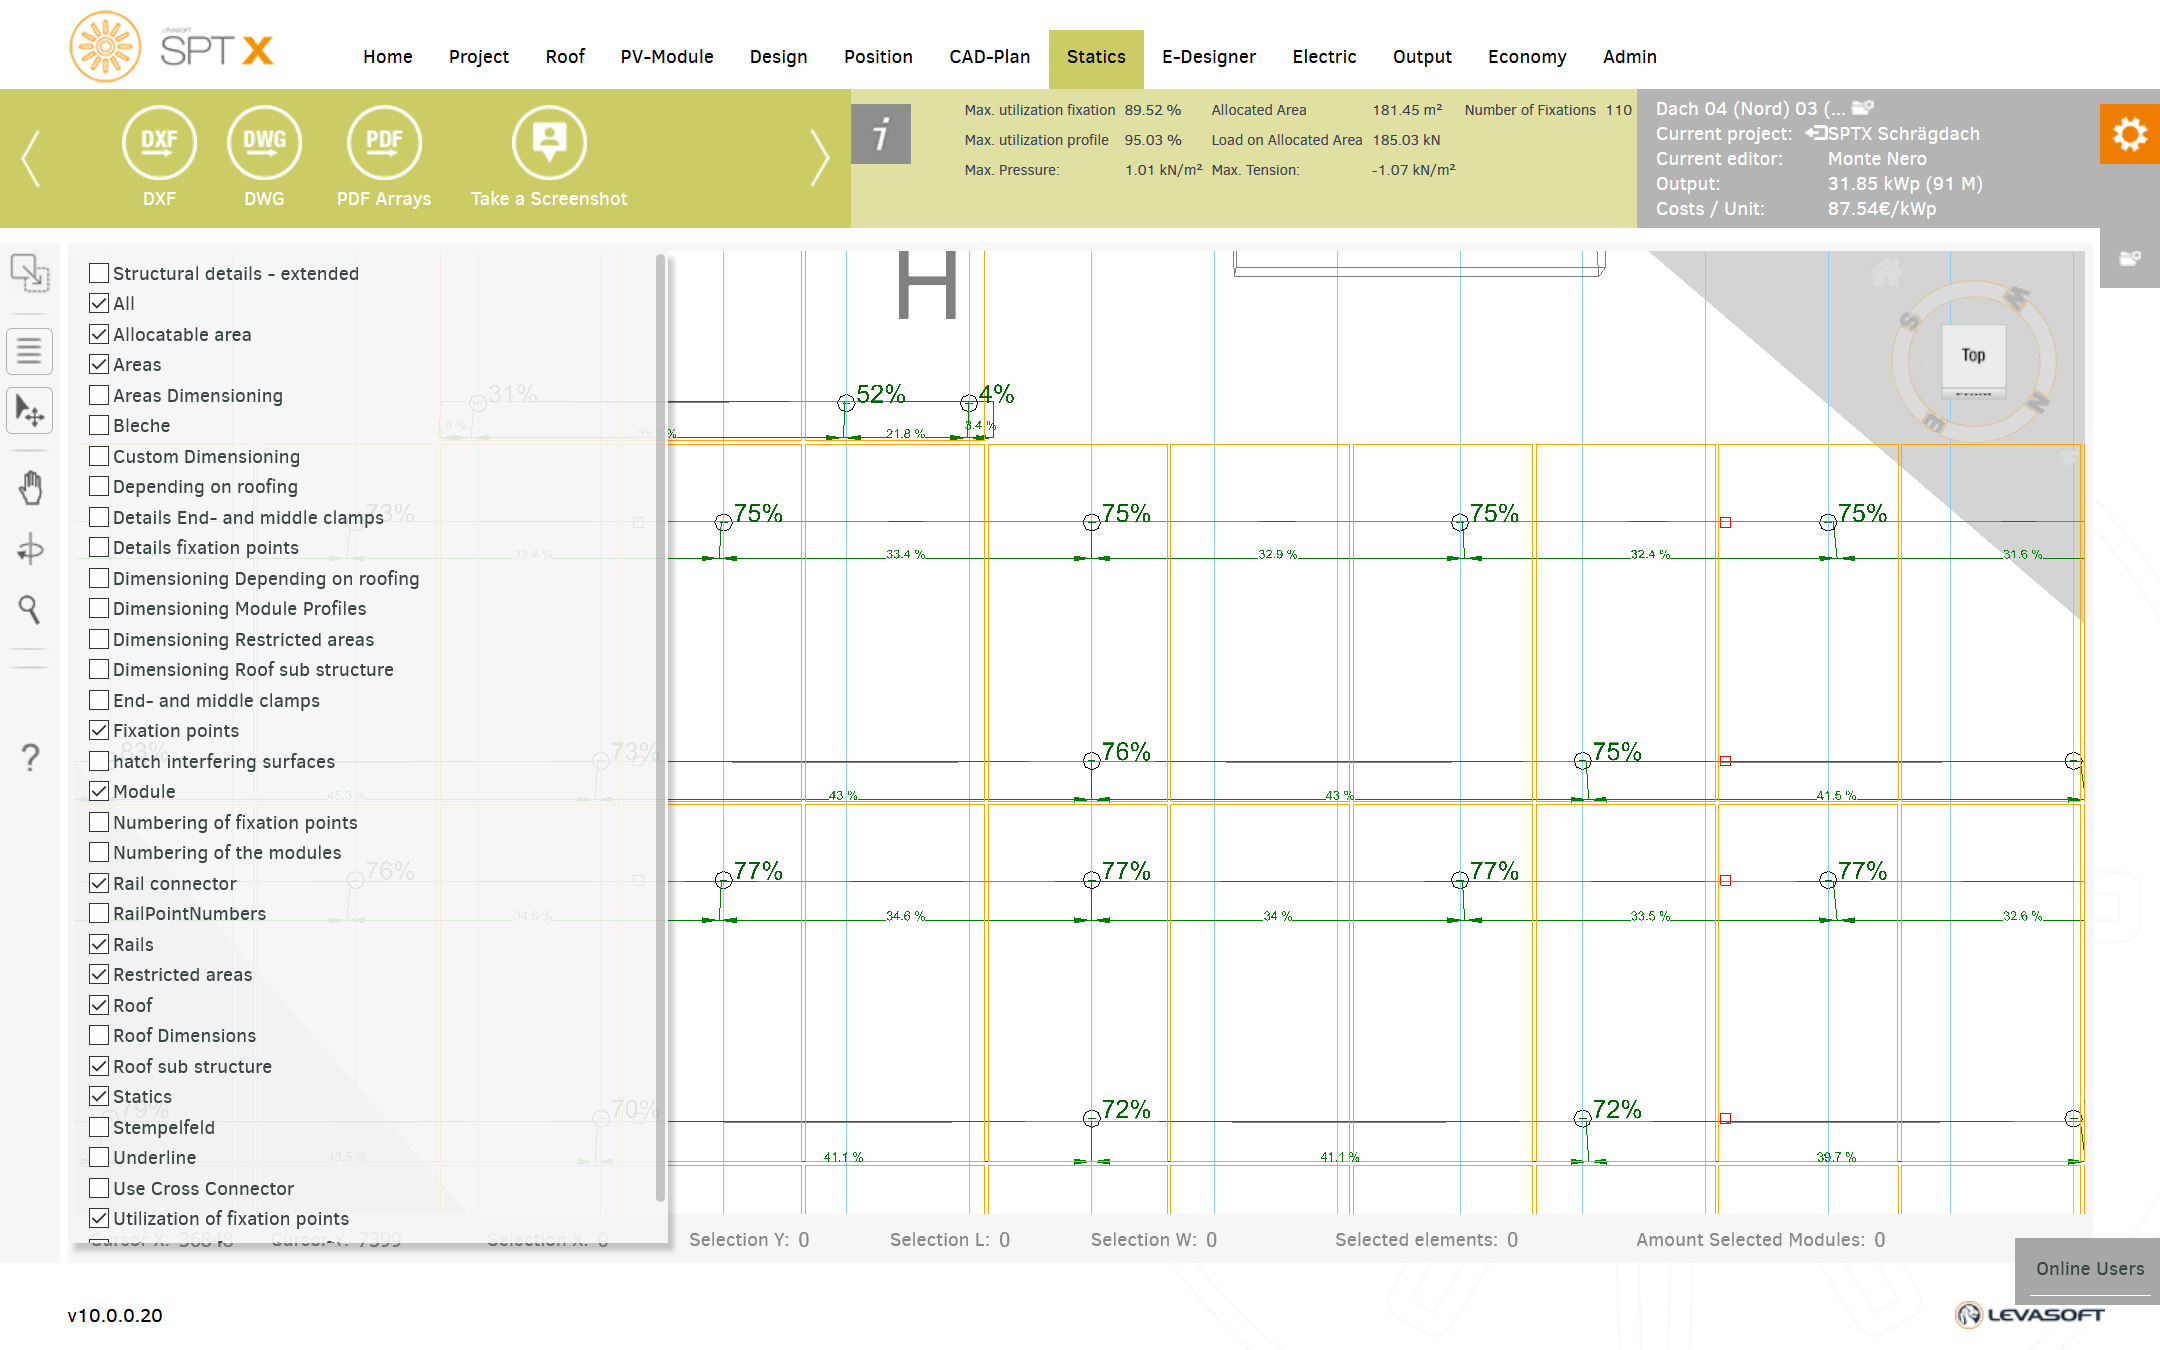
You can use the legend to show or hide character layers.
The layers are preserved in the export documents, even in PDFs
You can use the legend to show or hide layers, for example, to display the calculated X,Y, and Z values of the loads on individual components.
The layers are preserved in the export documents, even in PDFs
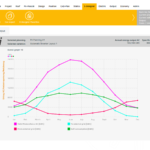
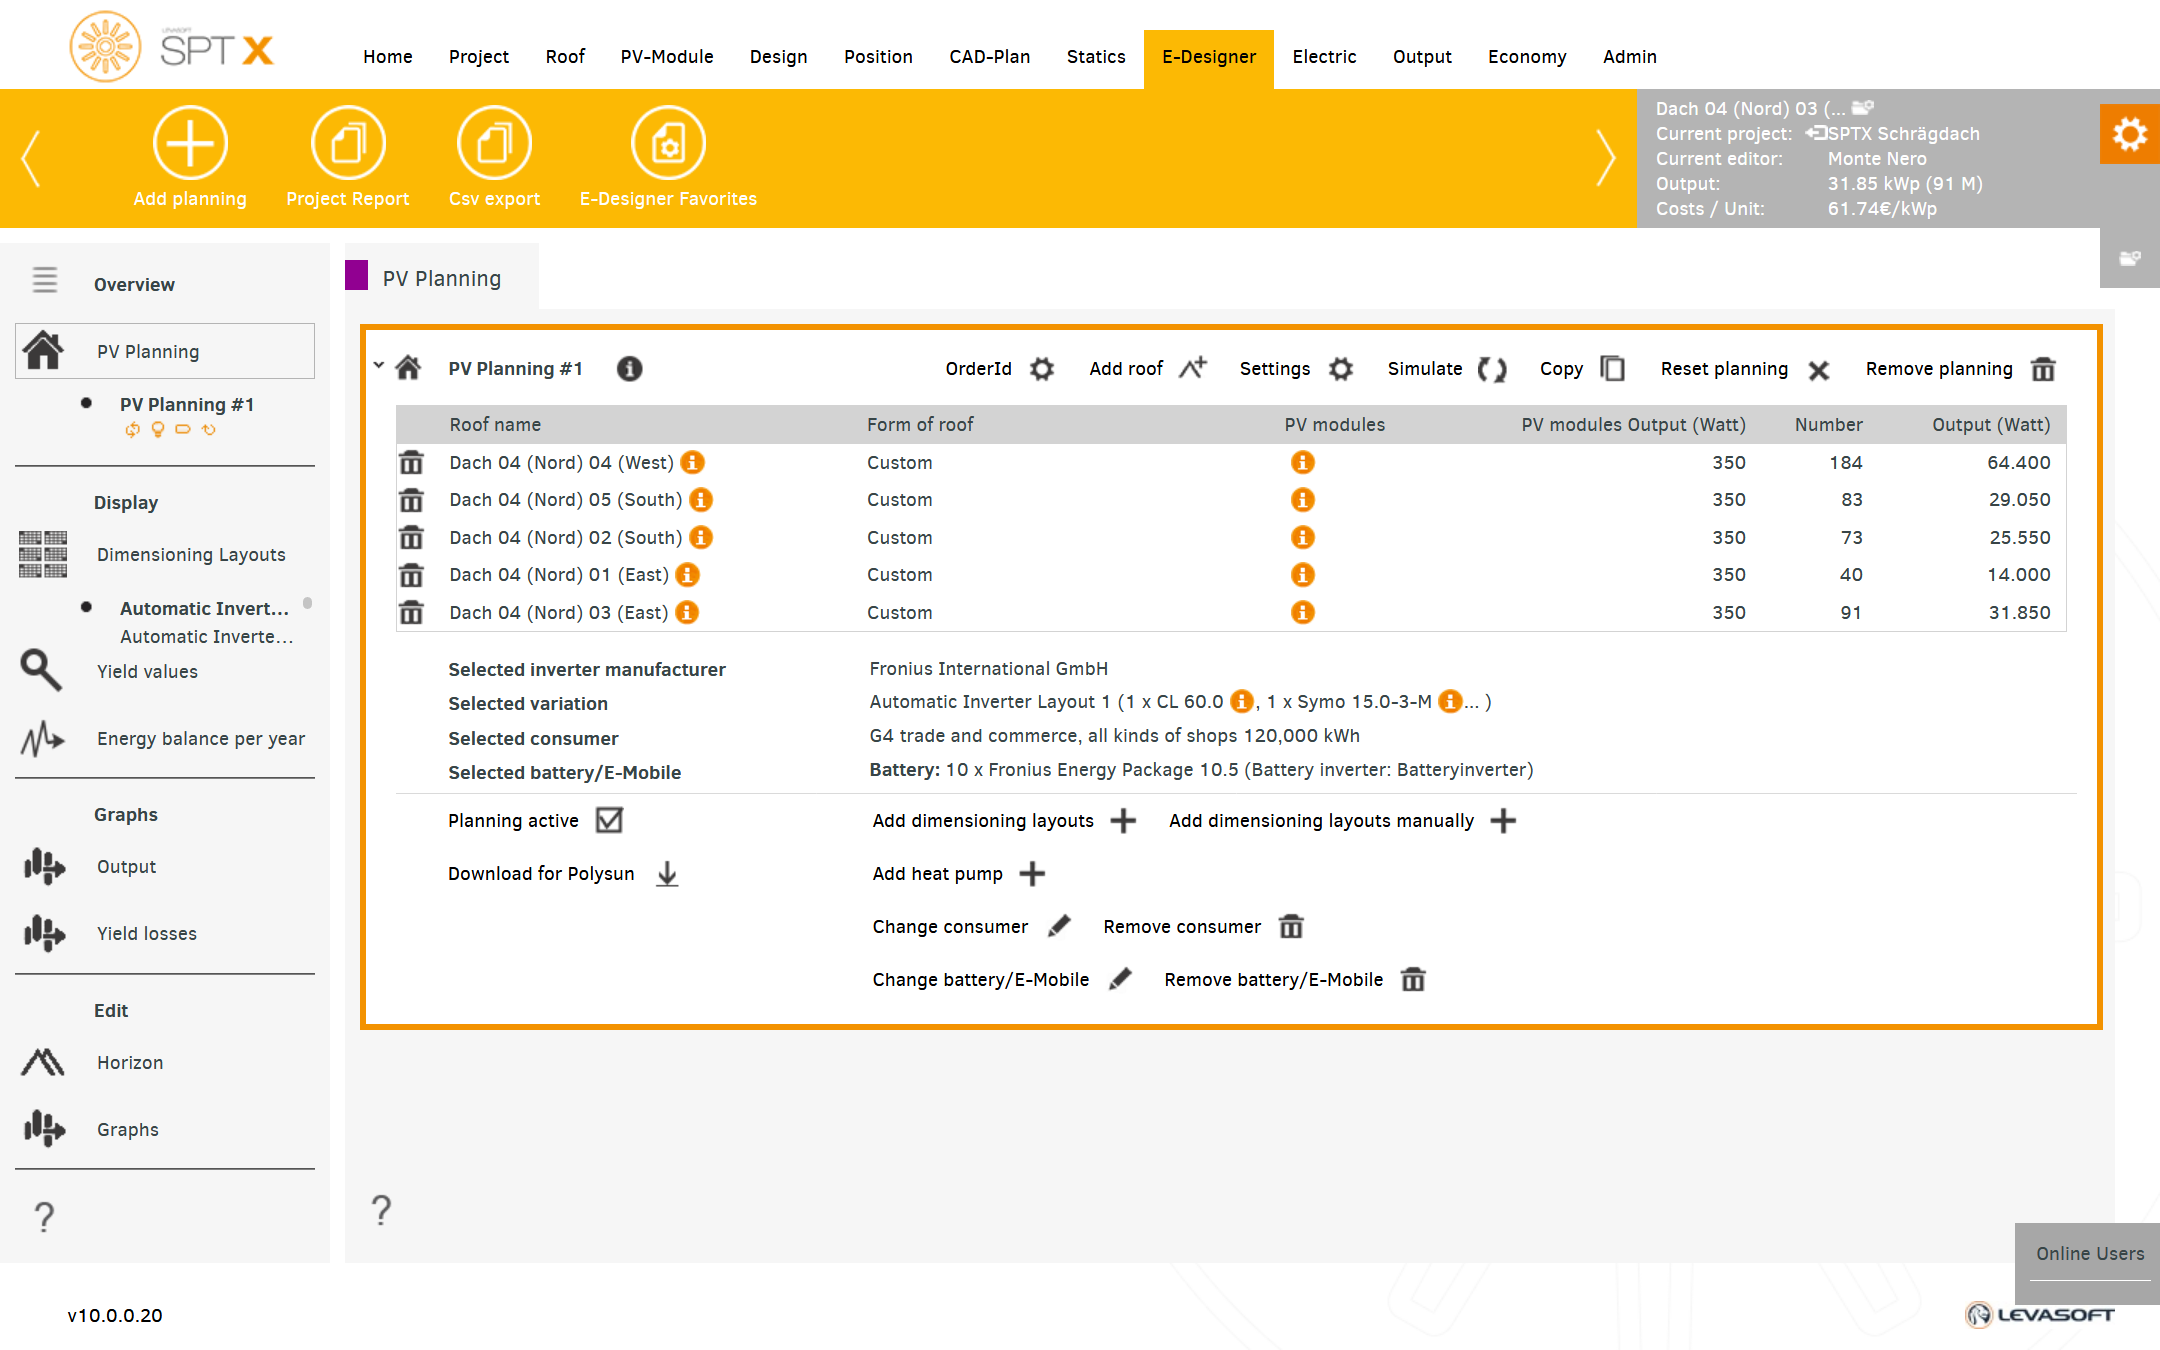
Here you can combine different consumption profiles, storage and e-mobility before the simulation.
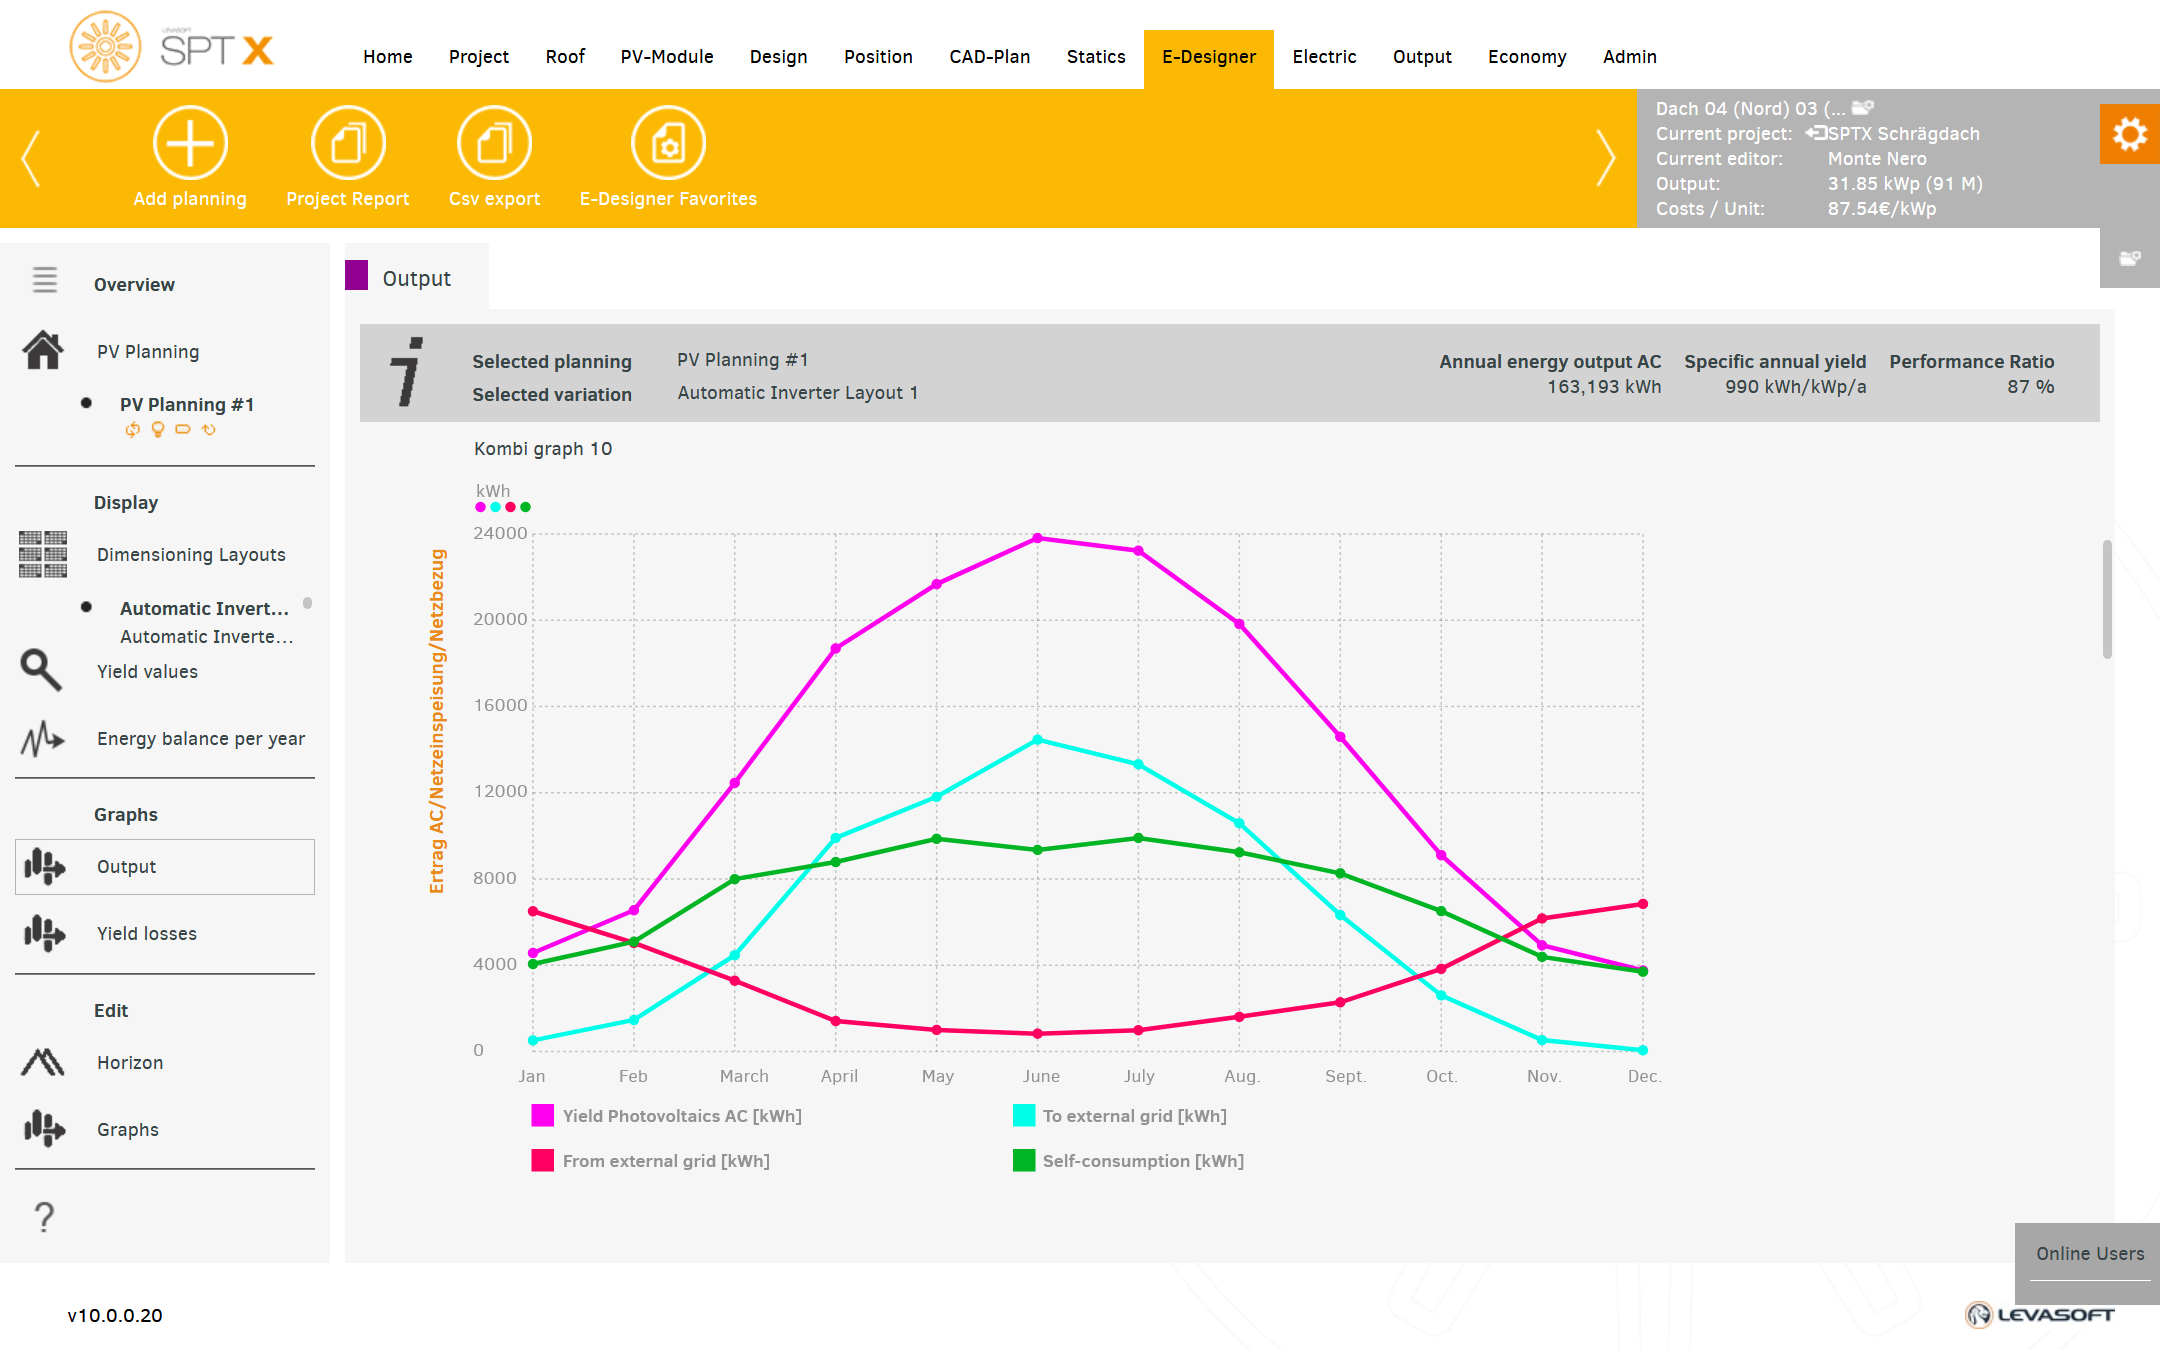
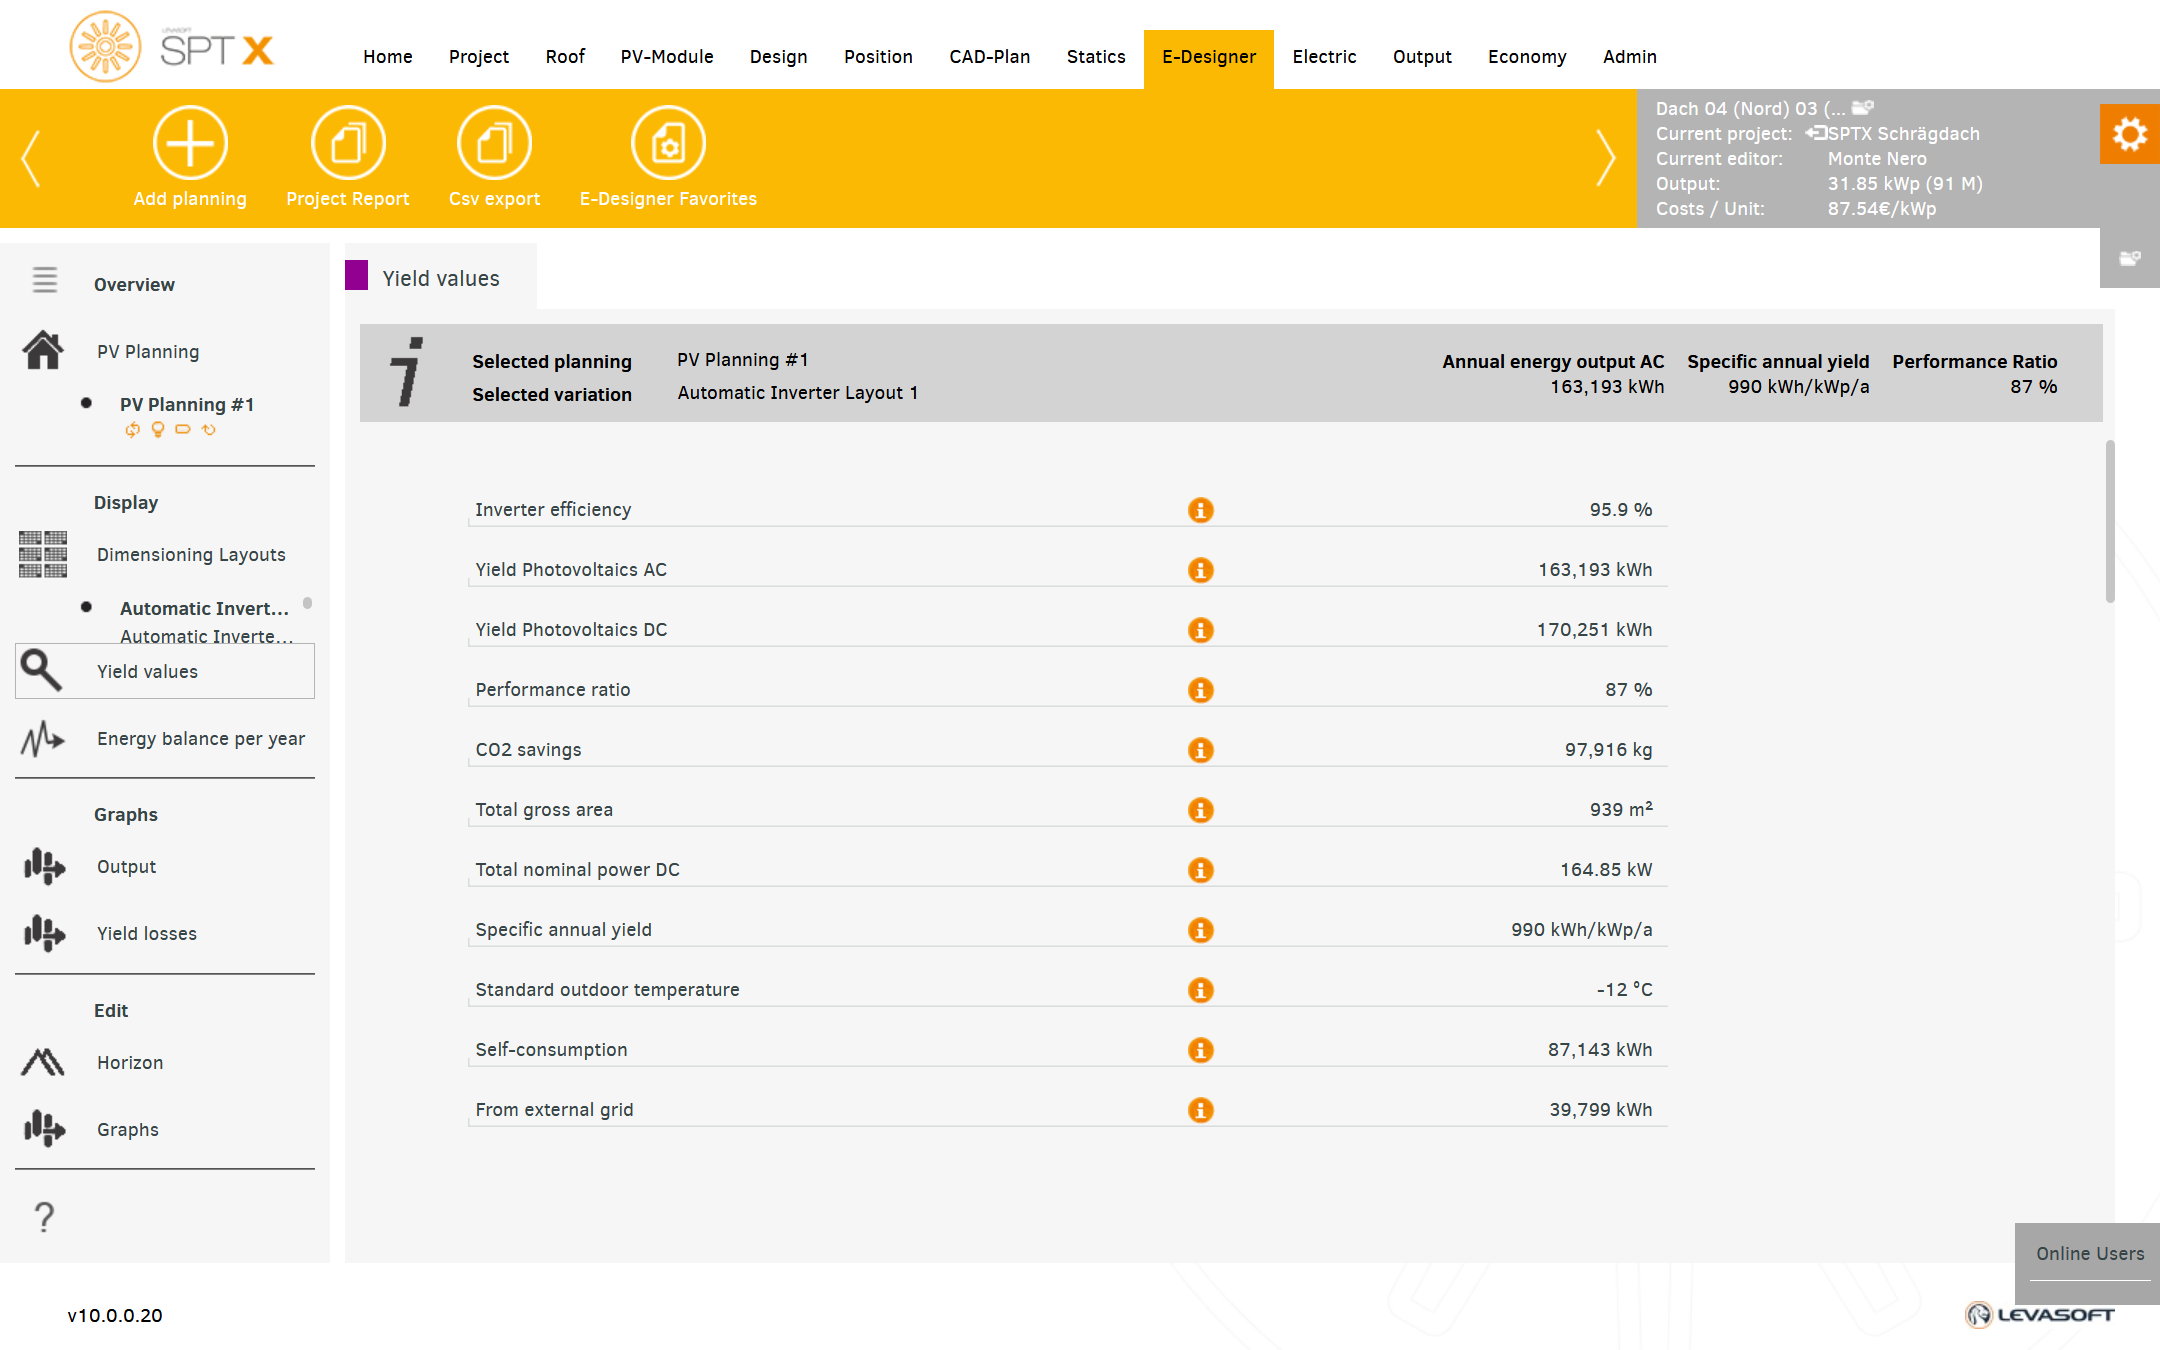
The simulation result provides detailed results, the content and appearance of which you can customize to your liking.
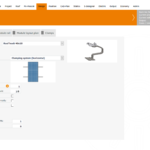
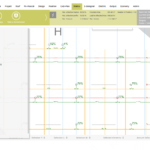
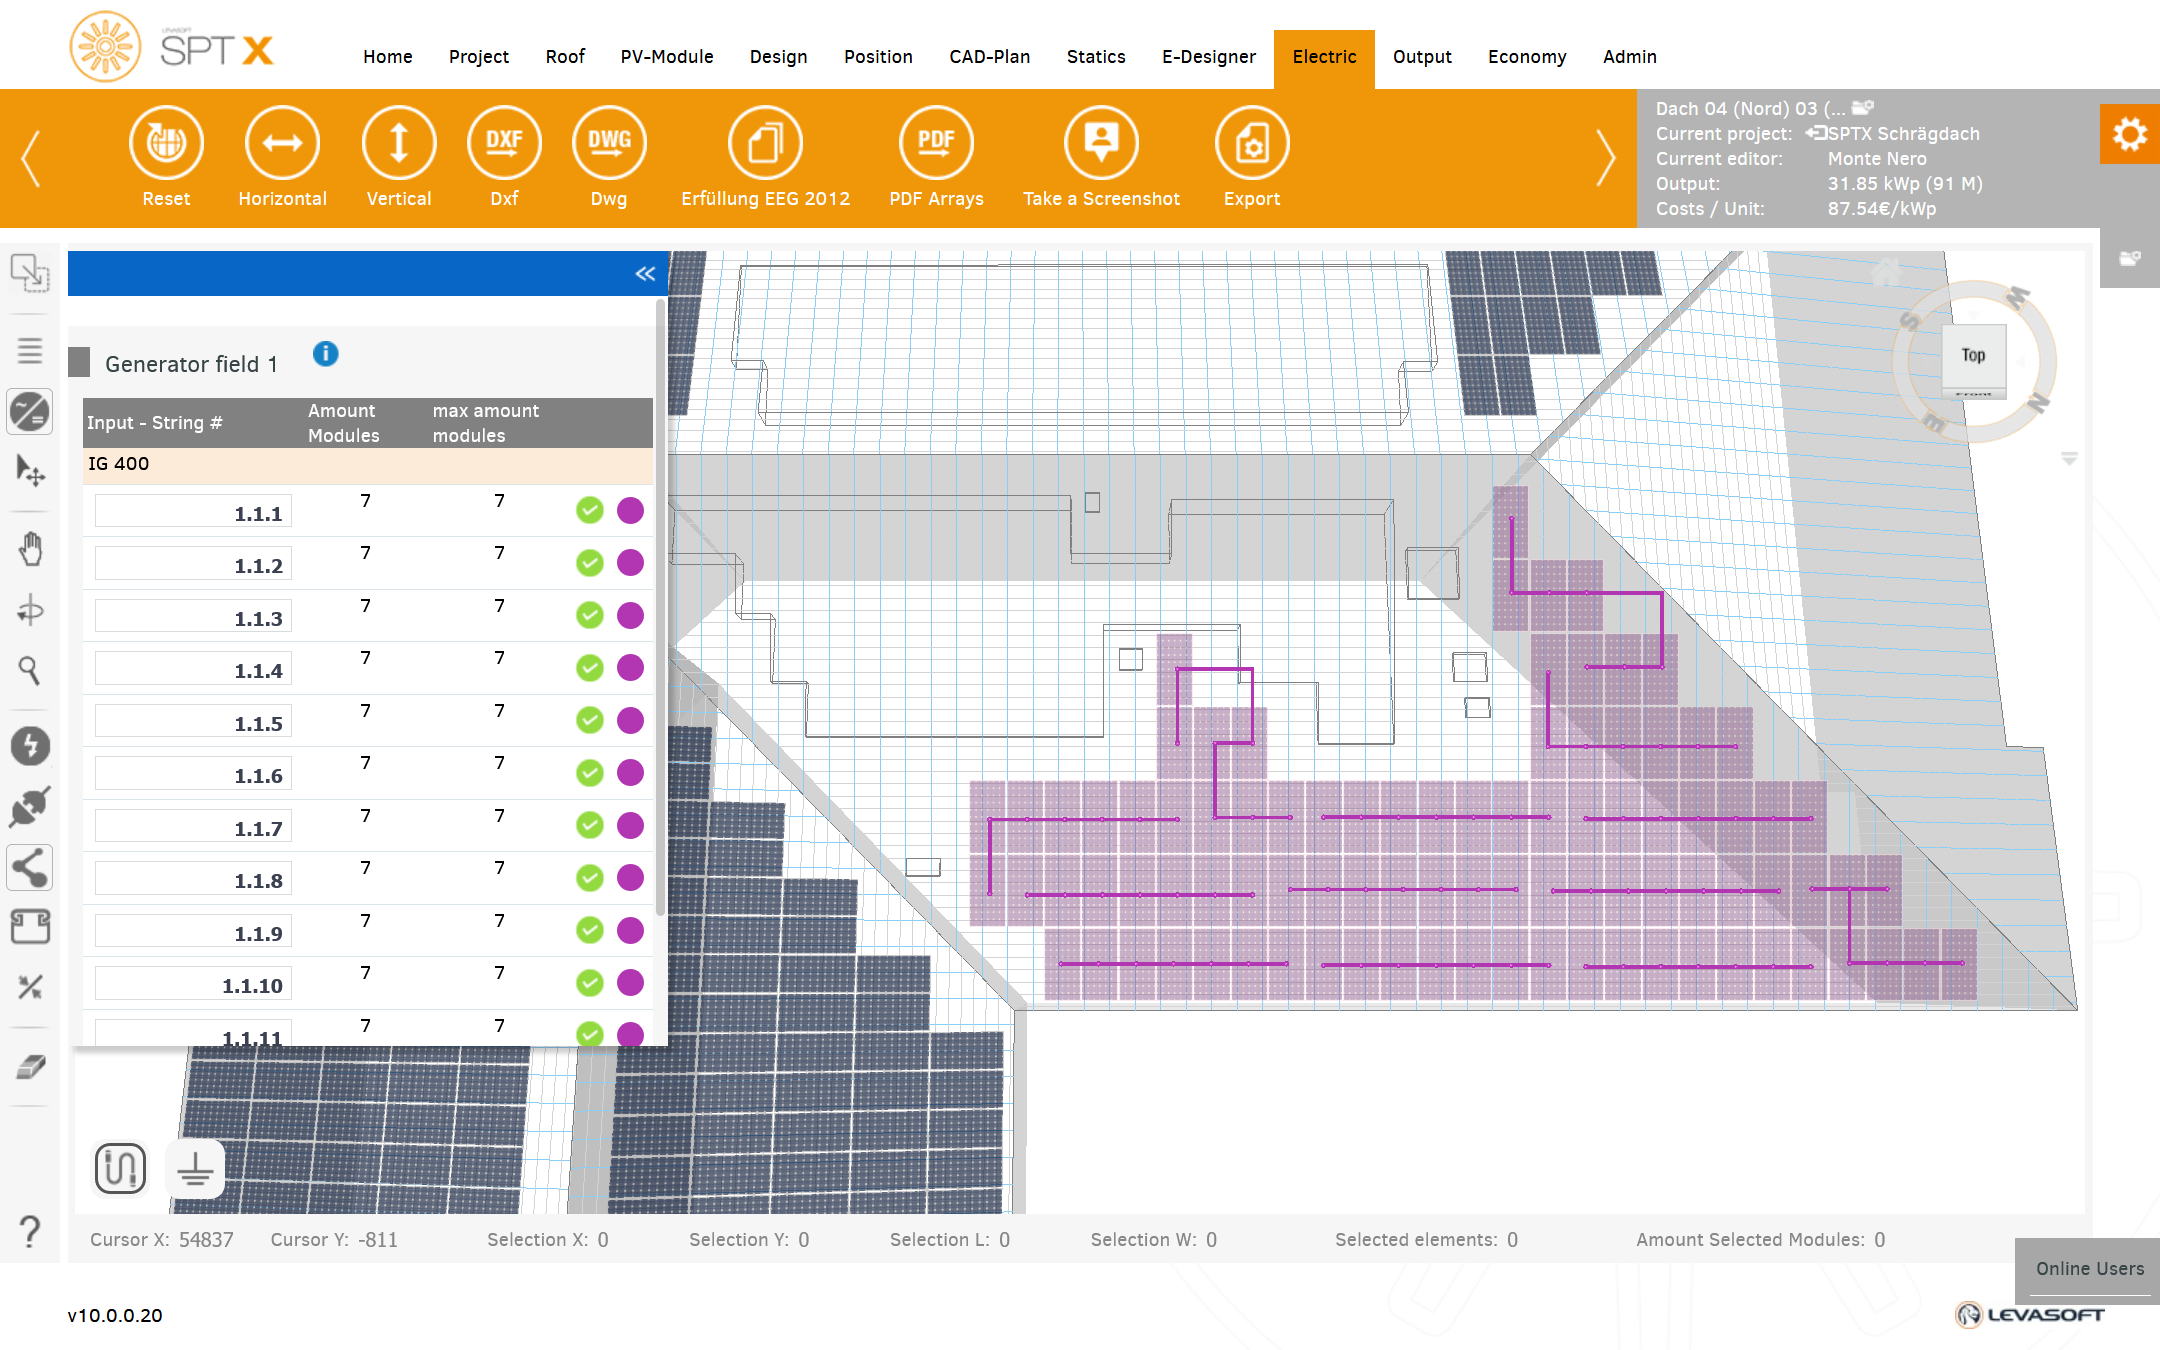
You can draw easily, the stringing is automatically terminated whenever enough modules are connected to a string.
Cable ducts, cable trays and collection points for inverters can also be drawn here.
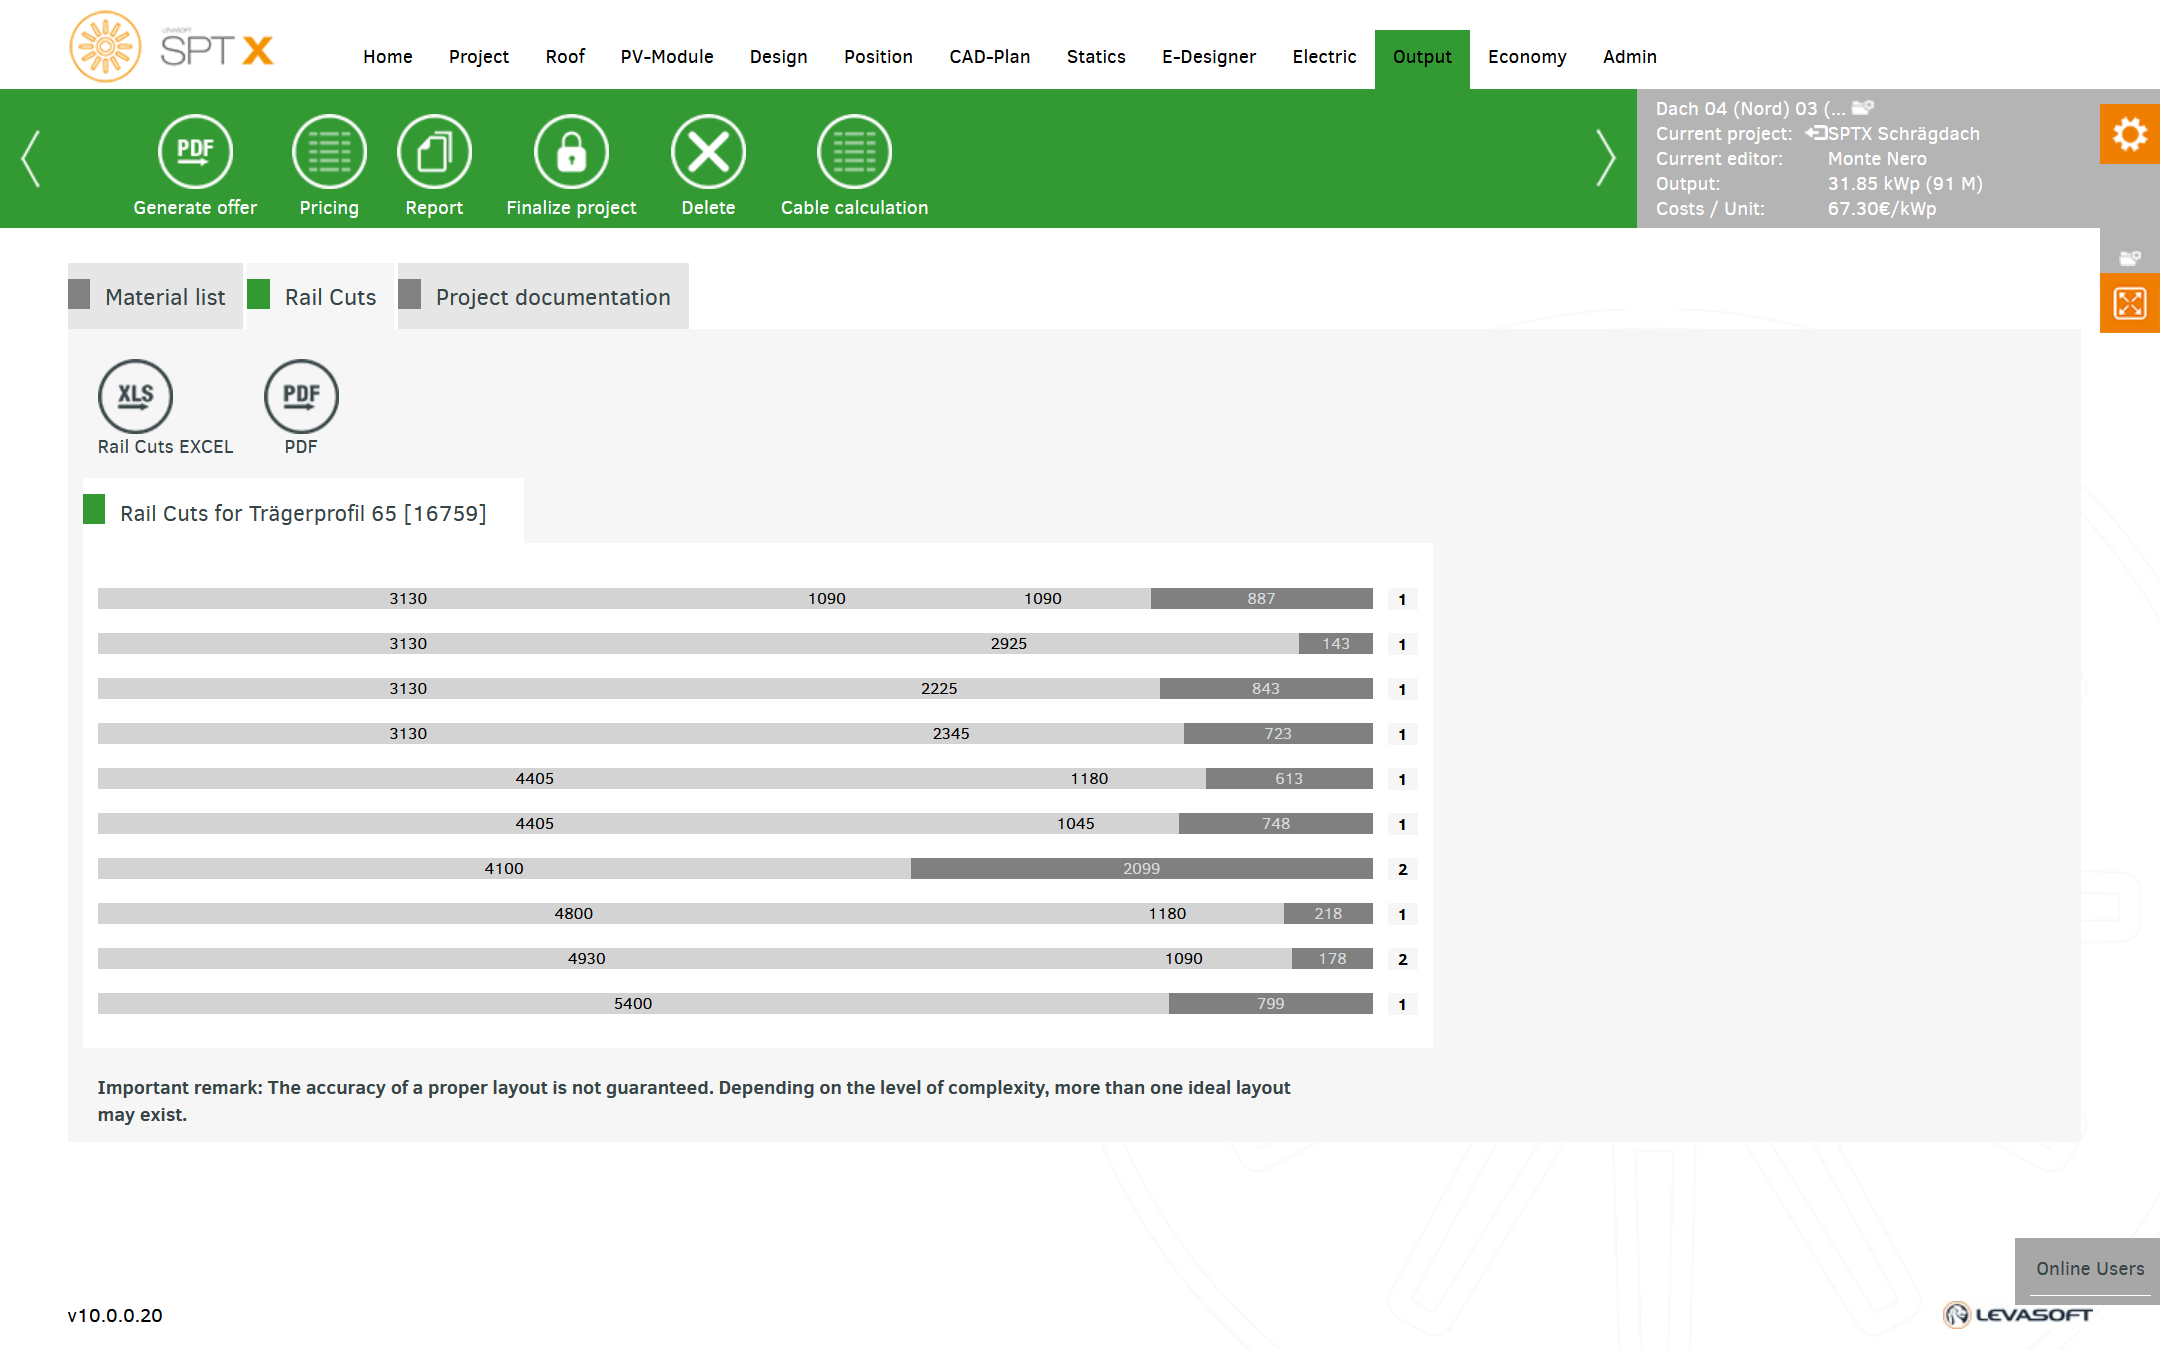
You will also find rail cuts and project documentation.
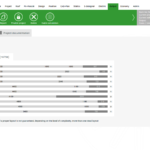
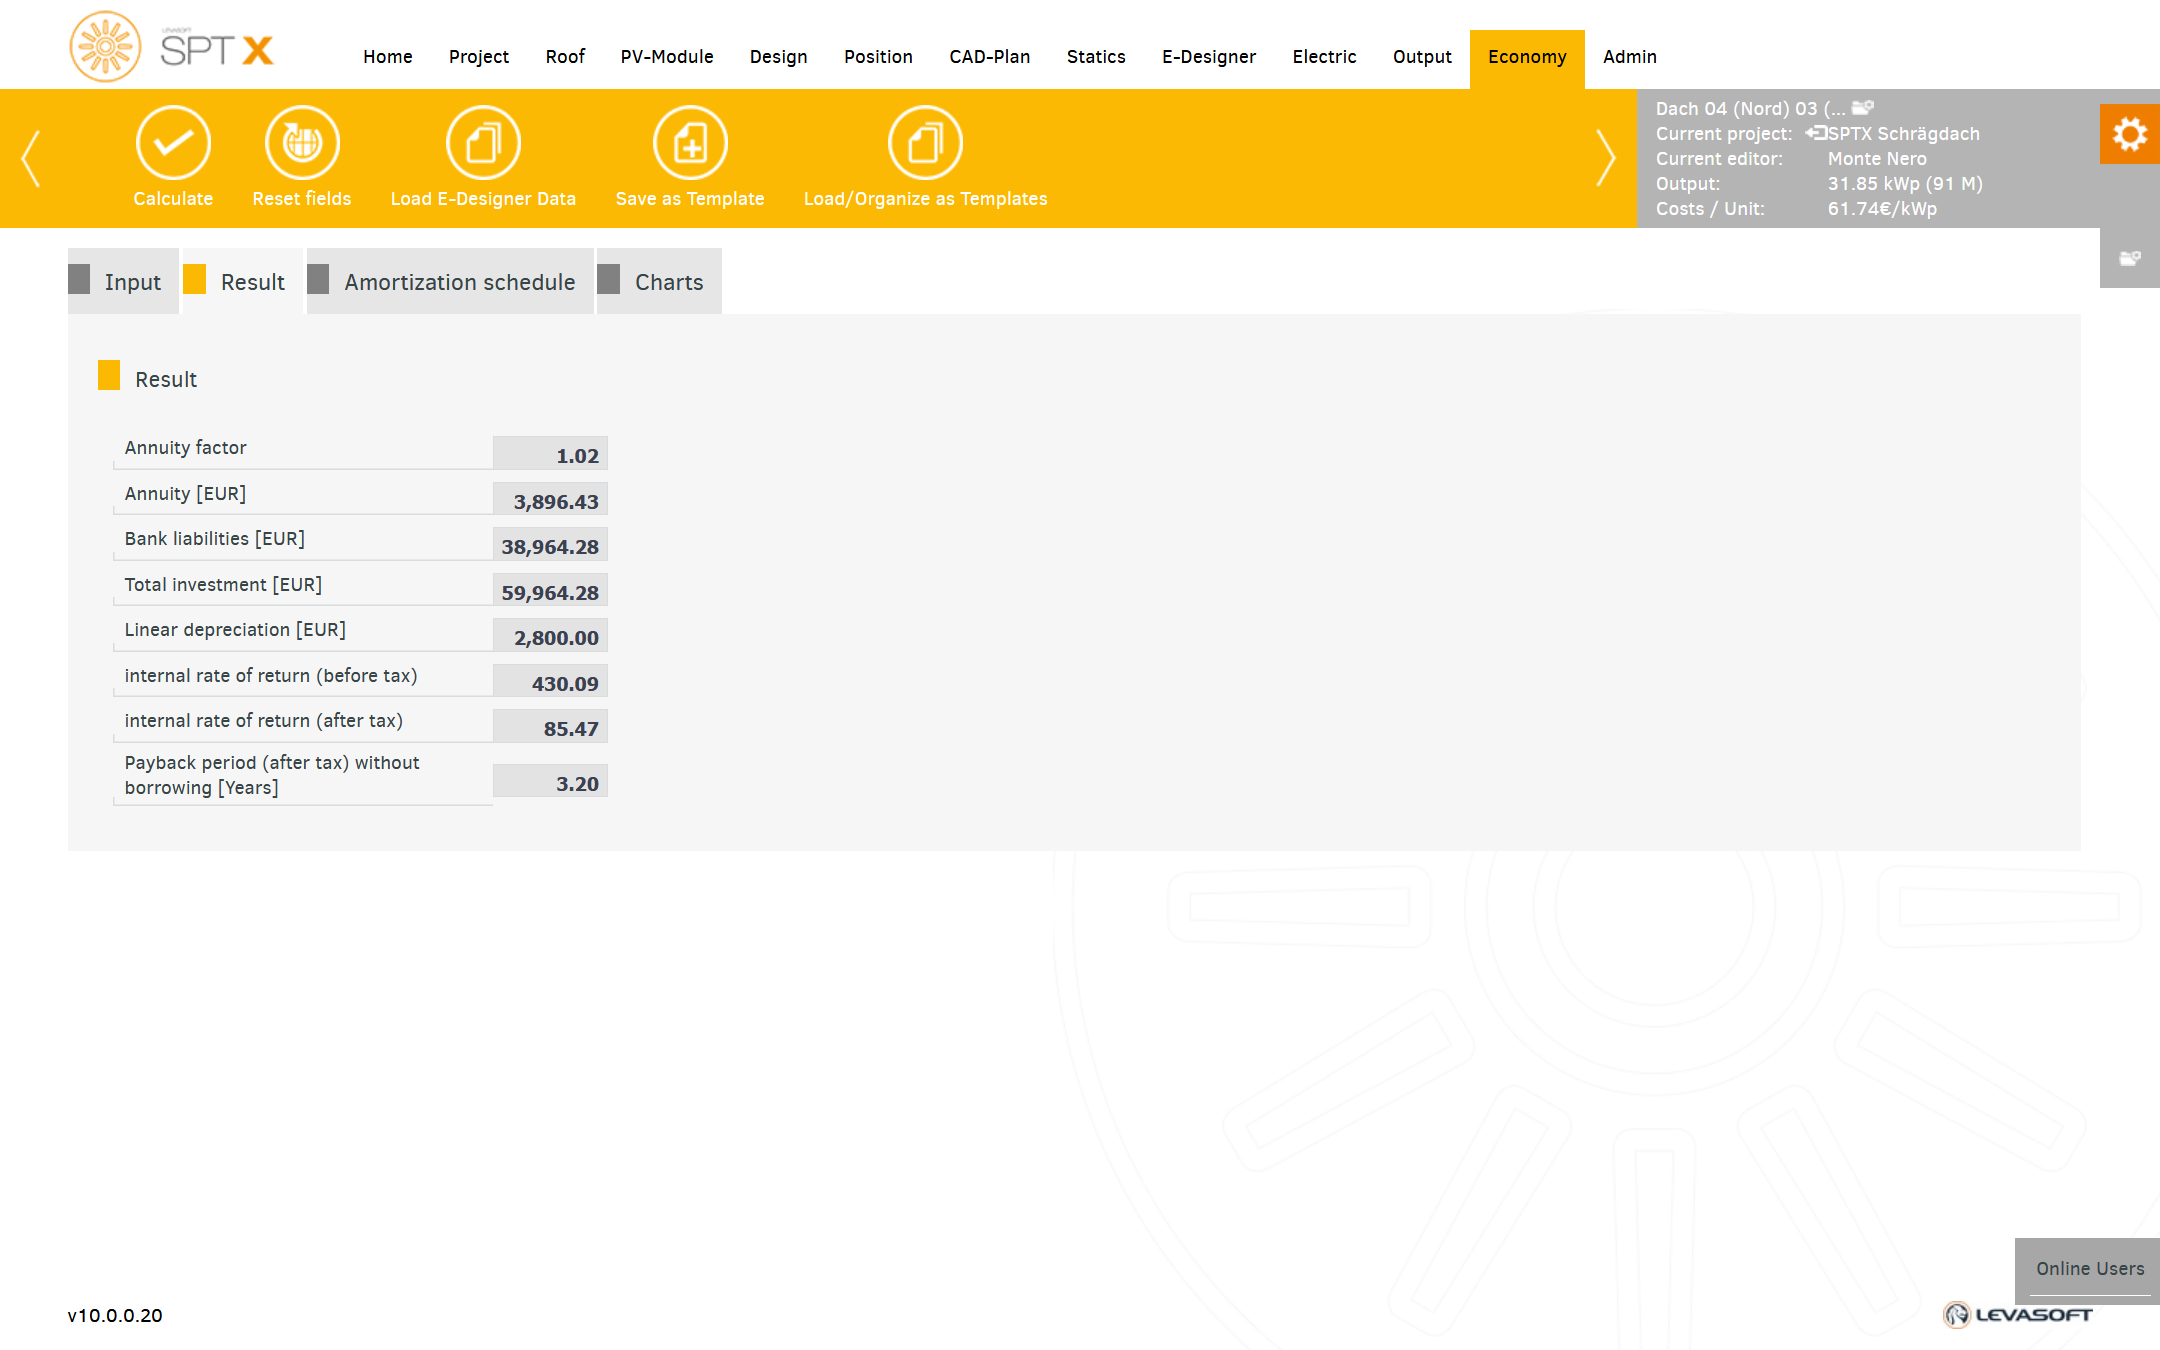
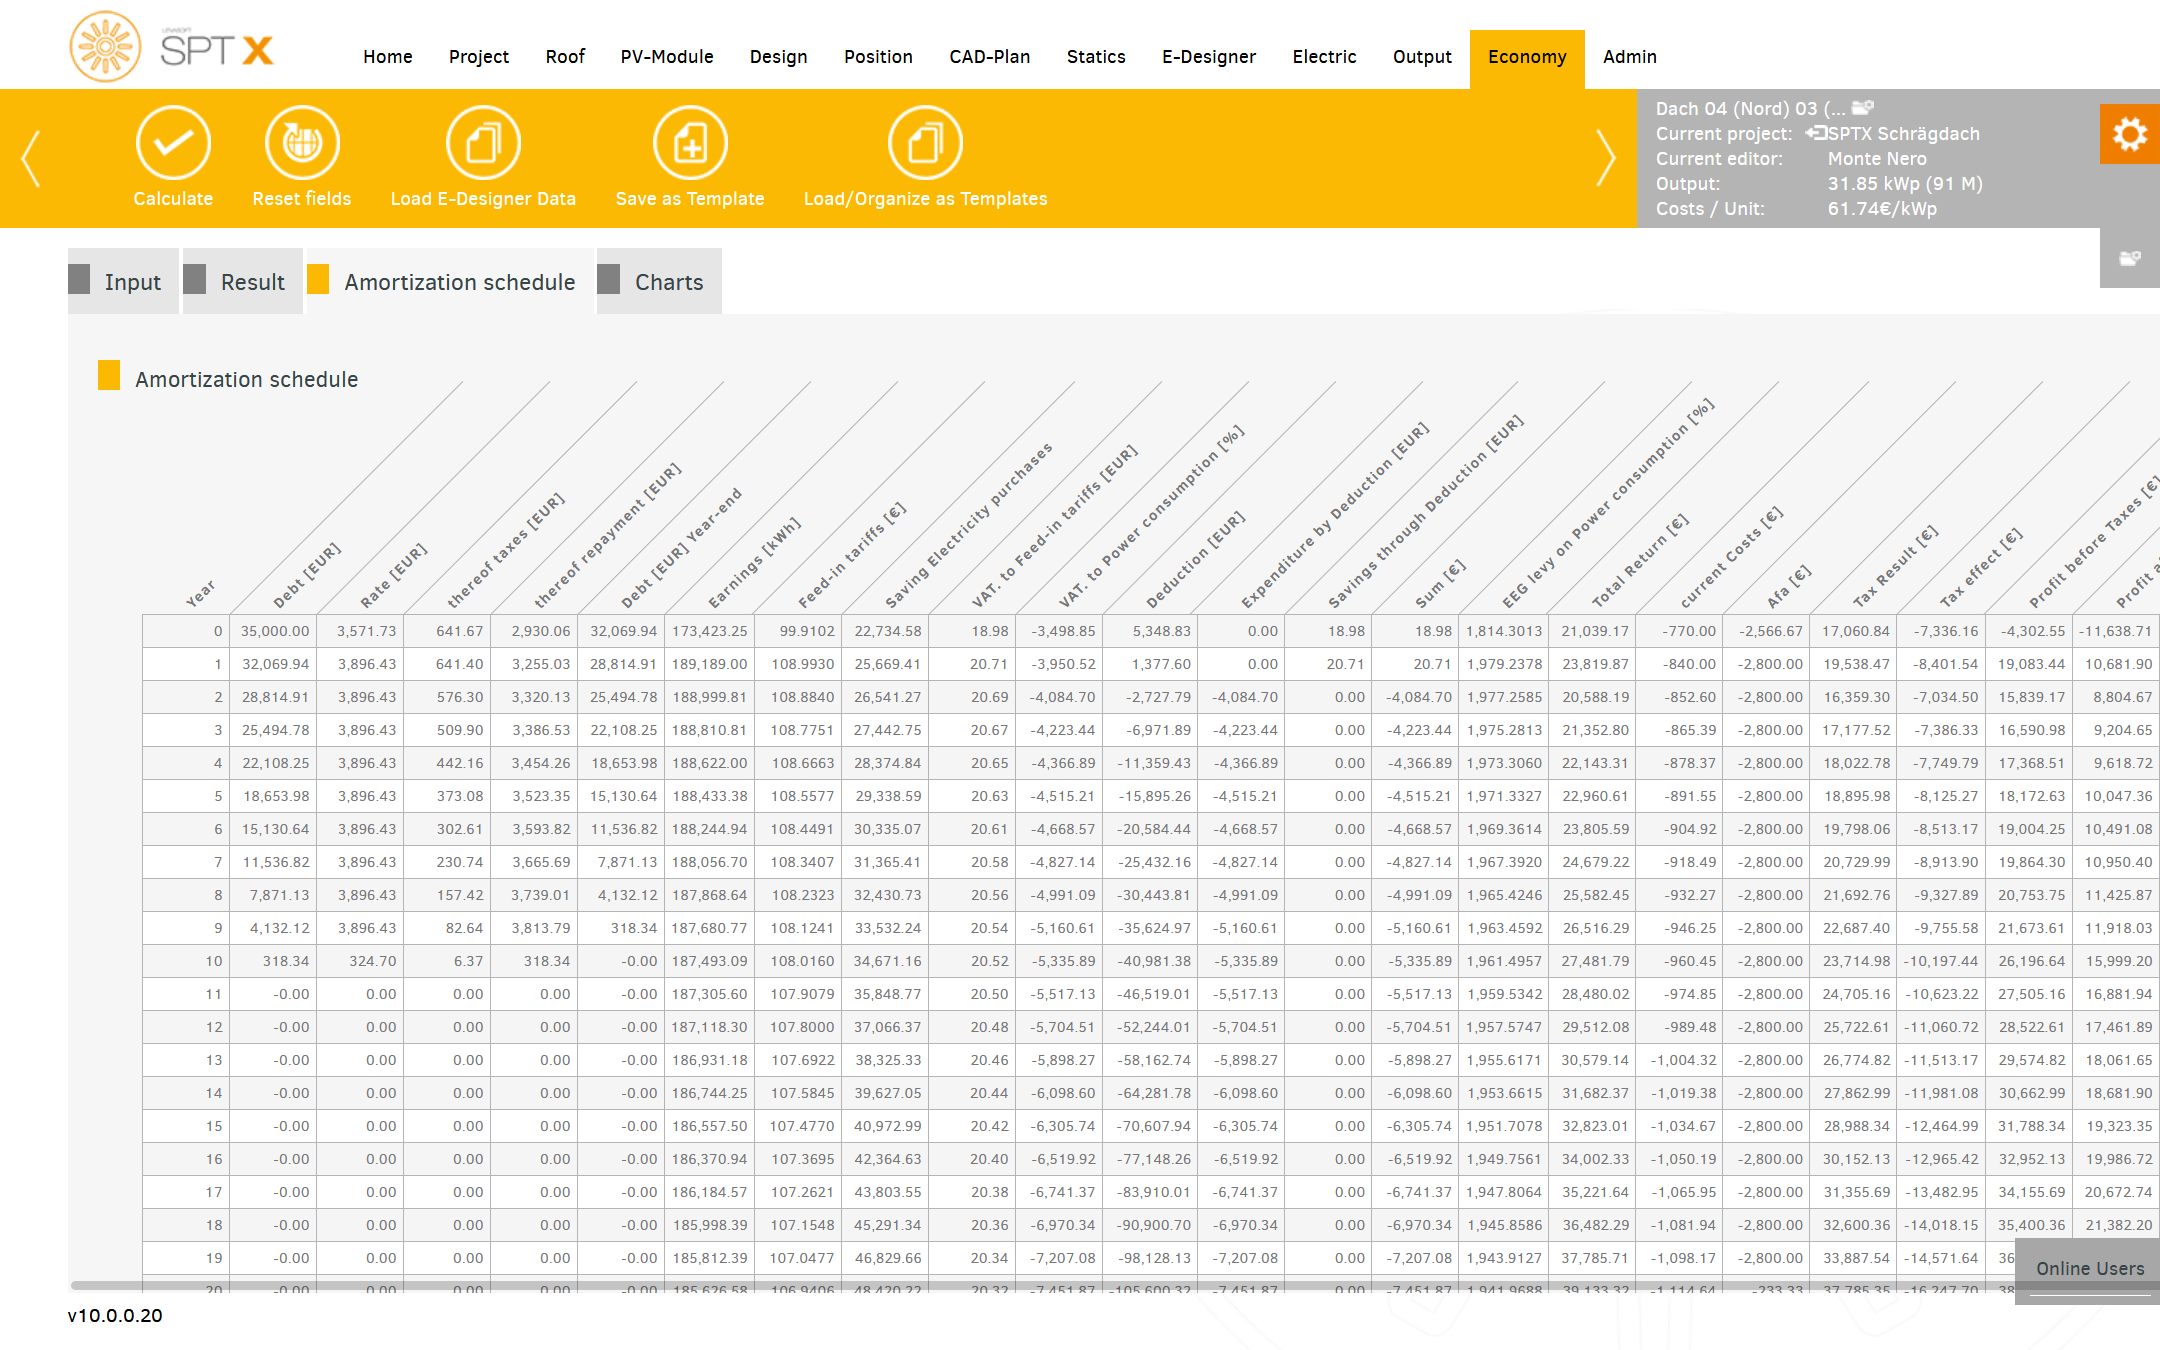
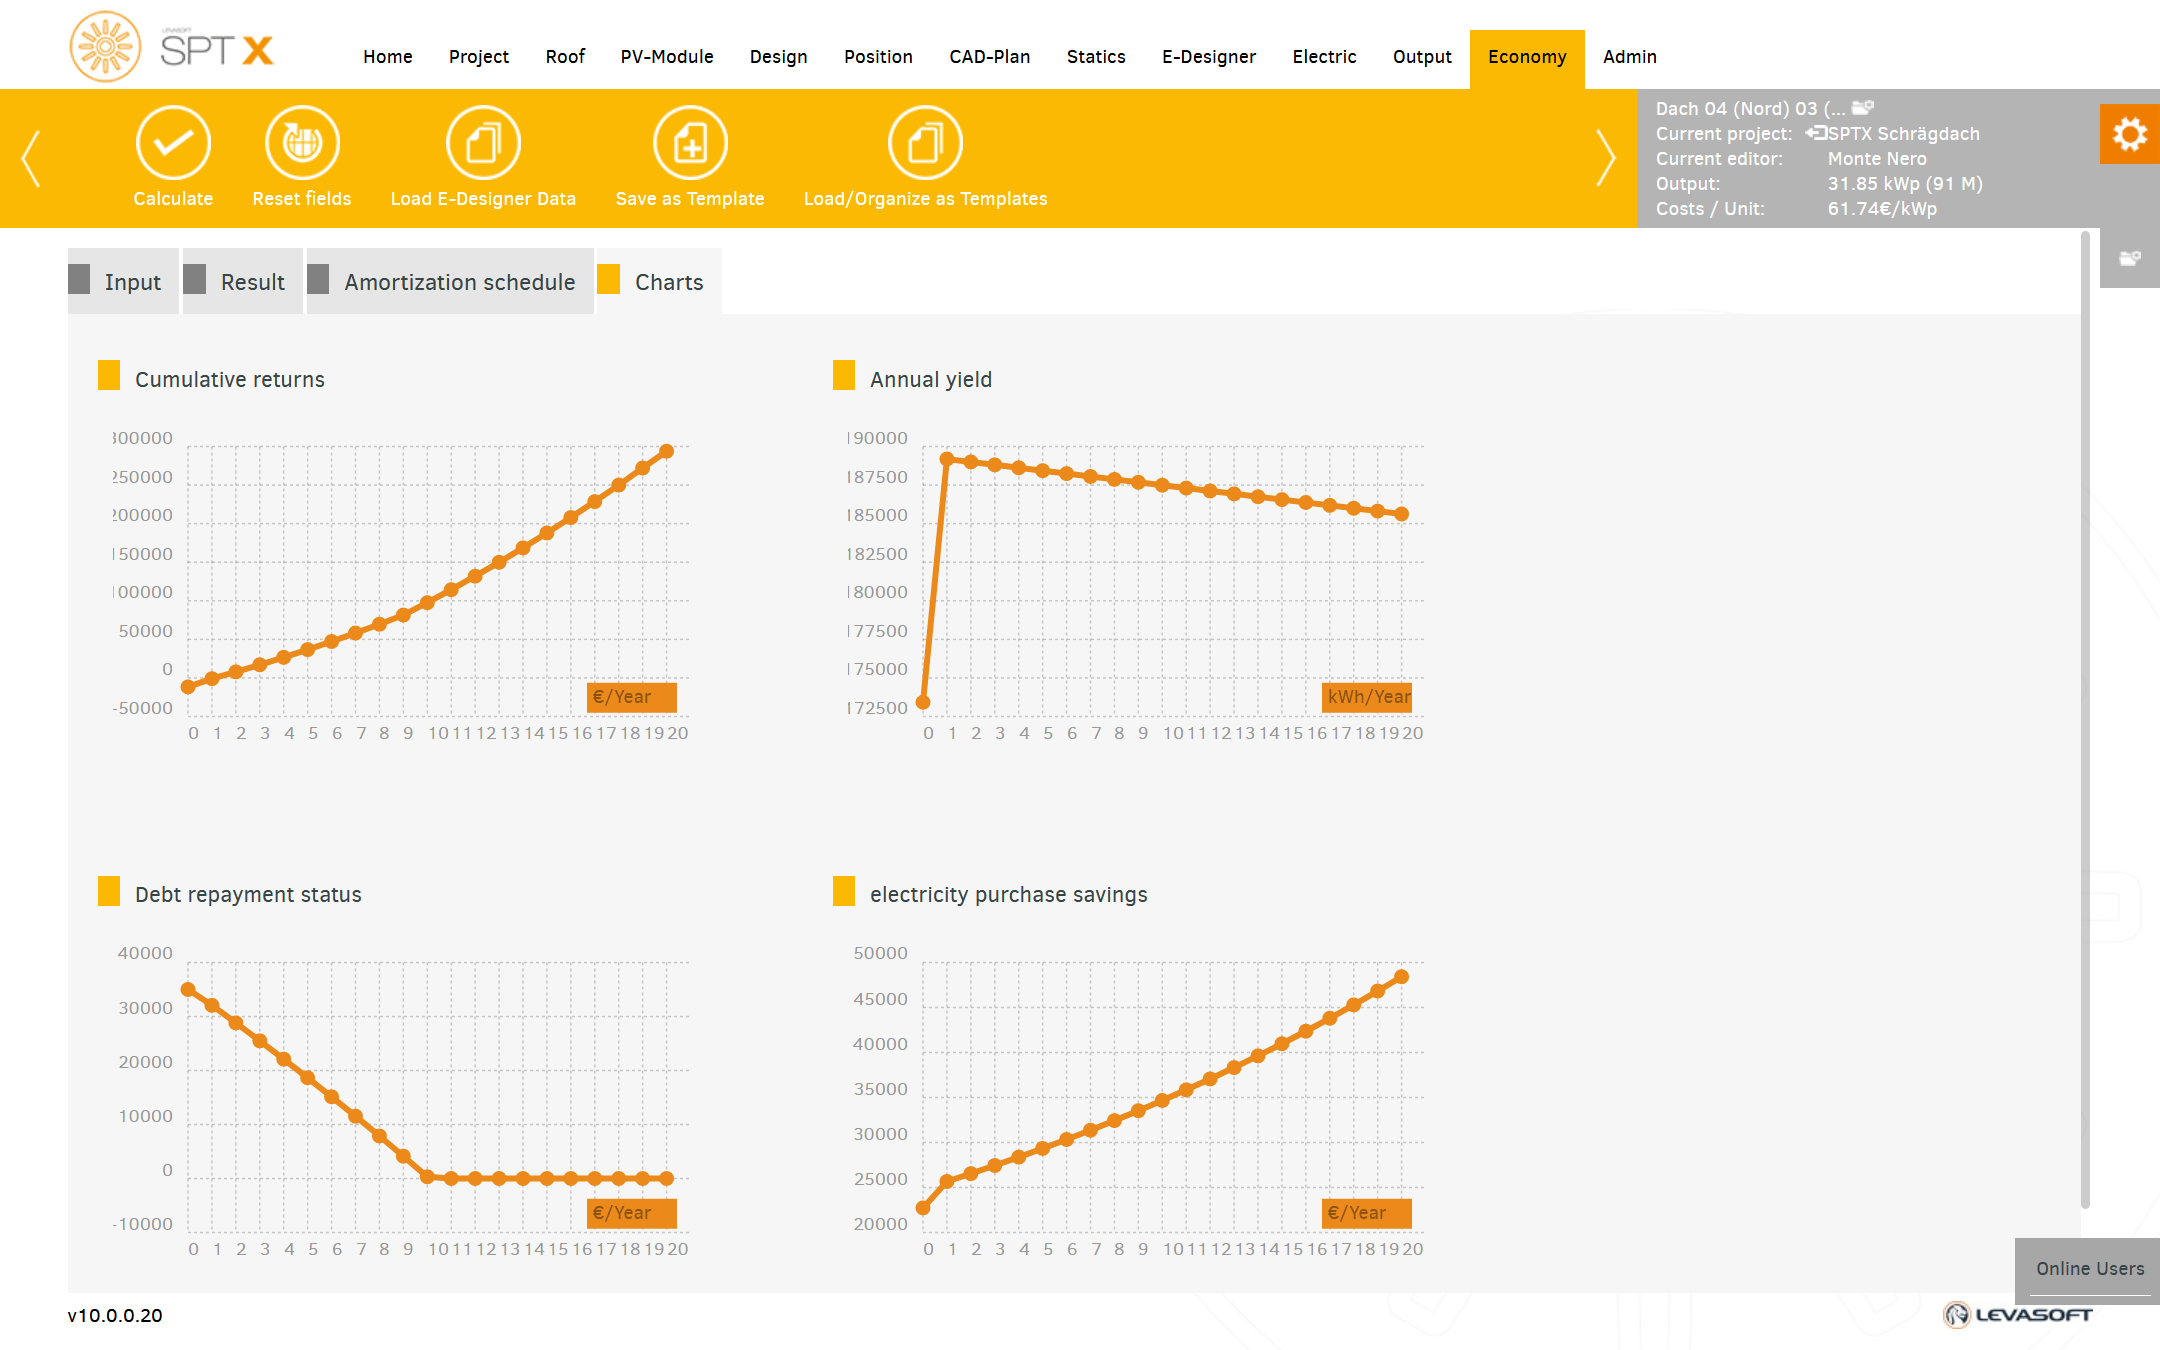
Project reports are also generated in the output. First, the report generator starts by specifying the scope of the project report.
Warning: Array to string conversion in /var/www/vhosts/chlrbuzf.host205.checkdomain.de/spt.solar/wp-includes/formatting.php on line 1096
Here you have all the functions to open, manage, or create a new project.
In addition, as an administrator, you have the option of populating three columns of content for your users.
Possible content could be images or links to technical documents, but also news about your products.
In Master Data, you store all the data that is useful for identifying the project.
The best way to determine the project address is to use Google. This ensures that we know the exact location later when determining snow and wind load and can thus automatically determine the altitude in the background, for example.
You can either use Google to determine the delivery address, take it from the project address, or simply leave it blank.
The snow and wind load are recorded in the decoded dialogs.
In the Subconstruction pane, either keep the default values or enter your values.
Depending on the coverage, the input fields in this area change.
The roof structure area is not relevant for the calculation of the roof, but serves, for example, to determine the appropriate screws with which roof hooks are mounted on the rafter.
No problem, use MapDrawer.
Here you can sign the building using satellite images or imported technical drawings.
If you are working with at least one hilsline (light blue), all objects are aligned with that guide when you draw.
For flat roofs, it is possible to import existing CAD data (DWG or DXF).
We recognize the layers they contain, and you only need to map the identified layers to the character layers in the tool.
So what is roof outline, what are interference surfaces and what level are modules.
You will find some things already pre-filled.
The dialogs close automatically when all data is present.
You will find some things already pre-filled.
The dialogs close automatically when all data is present.
Your favorites will be updated automatically.
Every time you use a module that you didn't have previously used, we'll automatically add that module to your favorites.
The list of modules can be sorted by their column headers.
In the "PV Module Selection" tab, you can view the listed modules per manufacturer.
You may be able to determine the size and weight of the stones to be used for ballasting. If the system can also be ballasted with tubs, this function is also available.
In any case, you can control the use of the ballast type based on econimic values.
Modules are only placed there - or can only be placed by you where the characteristics of the selected mounting system can be detected.
The toolbar provides you with comprehensive tools for editing the design.
This presentation is very helpful for your customers because your customers will see what the finished project will look like after installation.
You can use the legend to show or hide character layers.
The layers are preserved in the export documents, even in PDFs
You can use the legend to show or hide layers, for example, to display the calculated X,Y, and Z values of the loads on individual components.
The layers are preserved in the export documents, even in PDFs
Here you can combine different consumption profiles, storage and e-mobility before the simulation.
The simulation result provides detailed results, the content and appearance of which you can customize to your liking.
You can draw easily, the stringing is automatically terminated whenever enough modules are connected to a string.
Cable ducts, cable trays and collection points for inverters can also be drawn here.
You will also find rail cuts and project documentation.
Project reports are also generated in the output. First, the report generator starts by specifying the scope of the project report.


